iCNC PERFORMANCE
Manual 0-5399 OPERATION 3-17
Parameter Set (Plasma)
If selected in the Advanced Setup screen, the material type, thickness and tool used will appear here to guide the operator on the current
parameter selection.
NOTE!
Additional delays or adjustable time dialog boxes may appear, depend-
ing on how the controller has been set-up by an OEM or installer.
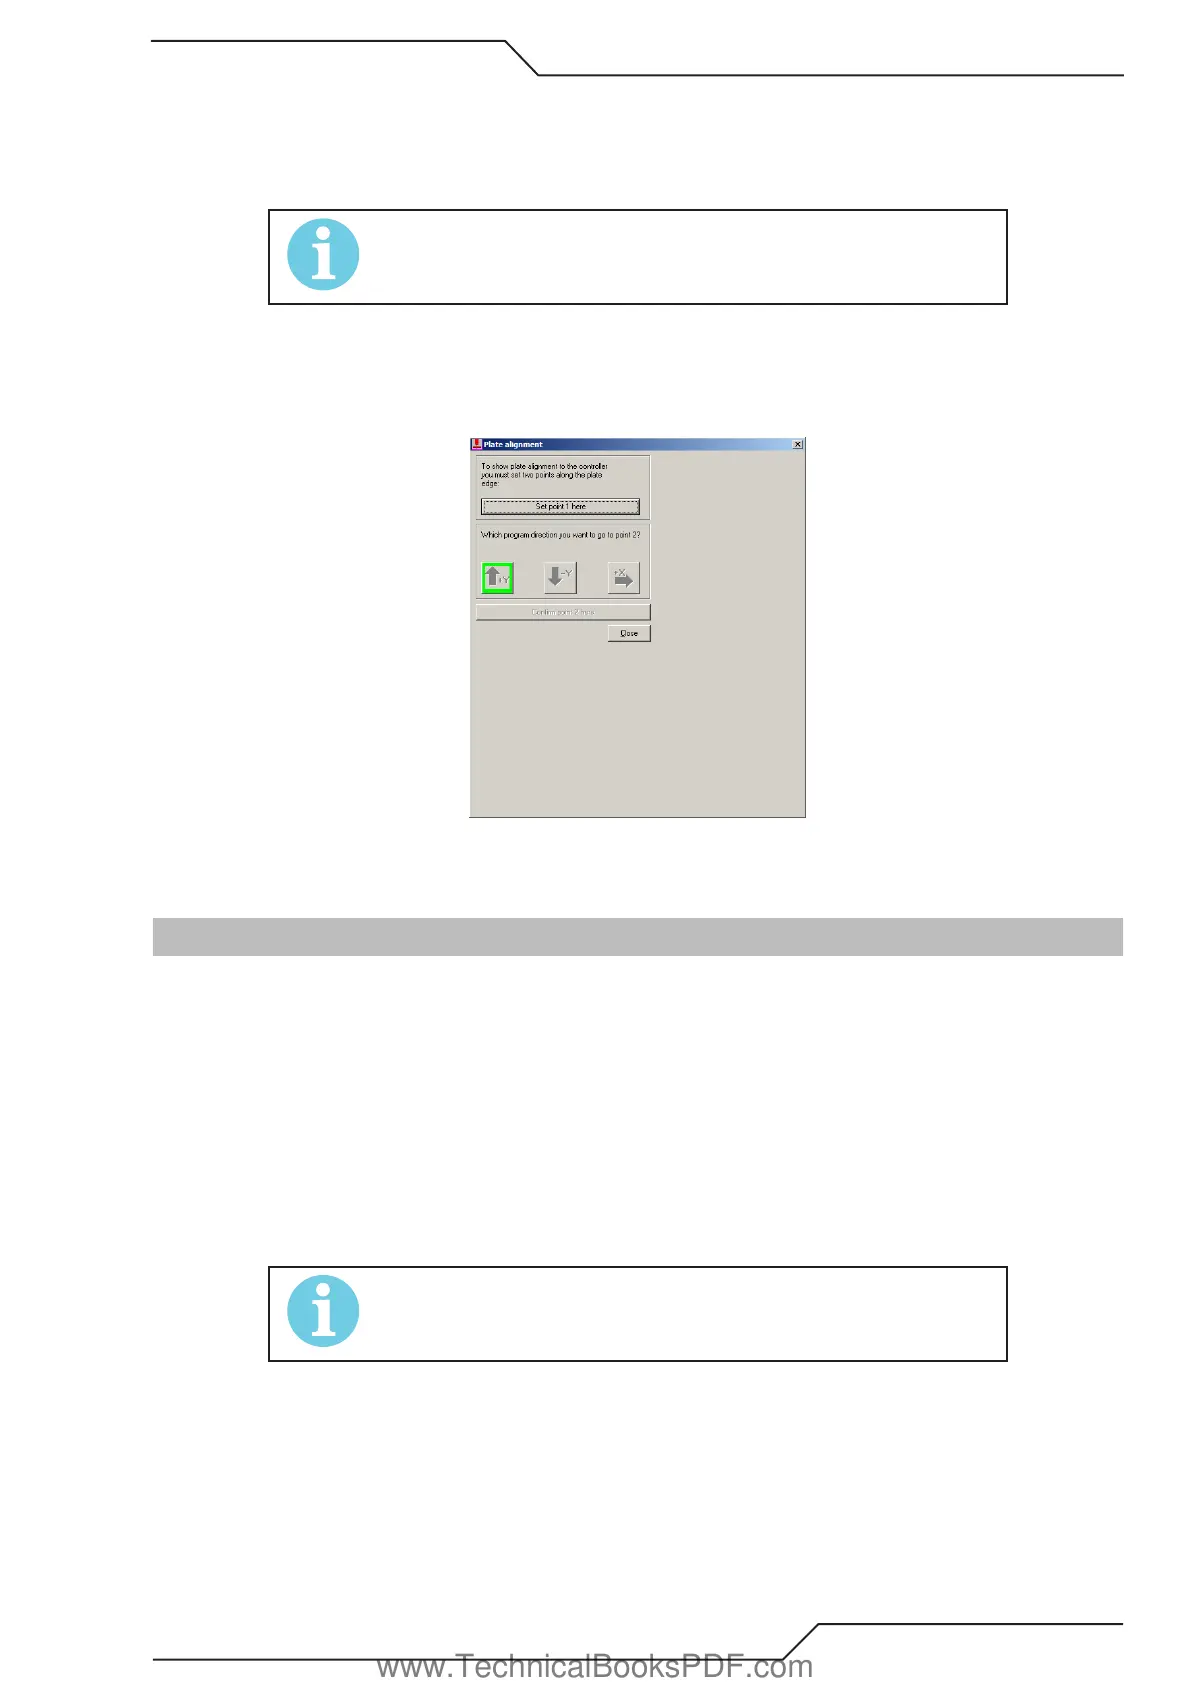
3.11.2 Plate Alignment
Activating Plate Alignment allows for a quick and easy way to pick two points on the edge of a skewed plate. Performing this exercise will
automatically rotate a part or program nest the same amount as the plate skew so that it will fit precisely onto the plate, reducing scrap or
manual plate squaring.
To use the Plate Alignment feature, locate a corner or plate edge and click Set point 1 here. Select which direction the next point is relative
to the first location, travel to the second point and click on Confirm point 2 here. This will automatically rotate the program to match the
skewed plate
3.12 How To Proceed When Something Happens
3.12.1 How to Cancel a Cutting Program
1. Stop the machine movement and cutting by pressing TORCH ON/OFF or STOP BACKUP button.
2. Use the left mouse button to click the CANCEL PROGRAM button located at the top of the current job screen.
3. Wait until a new dialog box opens telling that the machine must return to 0,0-point. Click OK and machine runs back to 0,0-point
(original starting point of the cancelled program).
If you want to terminate the program during the rapid movement, the procedure is mainly the same. The only difference is that you stop
the machine using STOP BACKUP button instead of the TORCH ON/OFF.
3.12.2 Difficulties While Piercing
NOTE!
If the piercing fails in Plasma Mode, the machine will stop.
1. Adjust the speed slower with the SPEED knob if necessary.
2. Drive slowly backwards by pressing and holding STOP BACKUP and the machine will reverse on program path.
3. Stop the movement after passing the missed piercing point by releasing STOP BACKUP again.
4. Turn the speed back to 100%.
3. Start the program again by pressing MOVE AHEAD.
If the piercing fails at the first programmed piercing point, start a new piercing sequence by pressing TORCH ON/OFF.
Please notice that the movement backwards without cutting may be adjusted so that the speed is automatically reduced.
www.TechnicalBooksPDF.com