iCNC PERFORMANCE
Manual 0-5399 NESTING 5-19
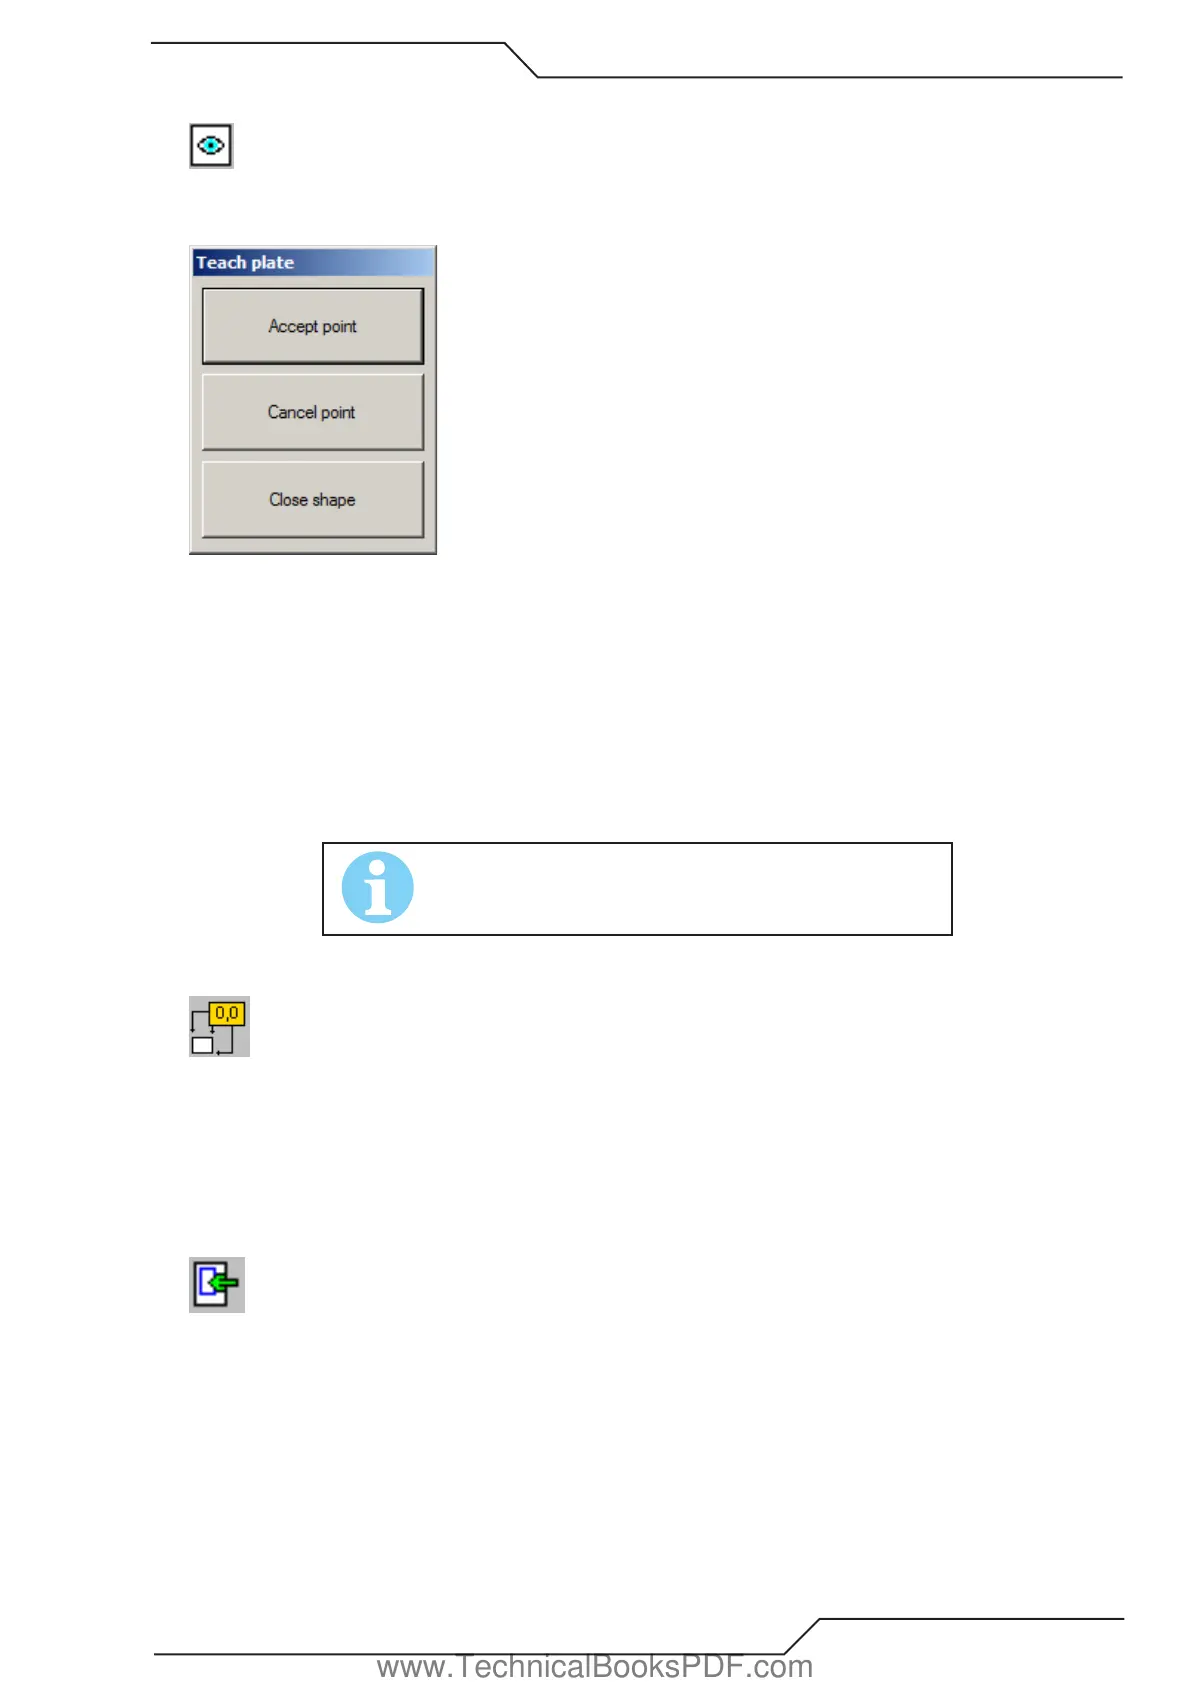
5.3.18 Teach Plate
Use this tool to teach the shape of the plate. Just drop the plate on the cutting table and then use the laser pointer or the torch to
show the edges of the plate.
Follow these steps:
• Place the plate on the cutting table.
• Start this tool. A new window opens (see above).
• Move the laser pointer (or the torch) over the edge of the plate. Then click Accept point.
• Move the laser pointer over the next corner of the plate. Click Accept point again. Repeat this step while you have shown all the
corners of the plate.
• Finally click Close shape and your plate is ready.
• If you ever do a mistake while teaching the shape, just click Cancel point to remove the last point.
Hint: You can use this tool to teach new parts for cutting if you convert the plate to a part by using the tool Plate-Part-Plate.
NOTE!
This tool can be used only with a ProMotion iCNC controller.
5.3.19 Set Origin
This tool sets one of the plate corners* to the origin.
• Click one of the corners to set it as a new origin.
* In this case “CORNER” means one end of an element, which is one of those elements that form the plate profile. Thus it is possible
that it is not a corner at all.
5.3.20 Show Nesting Area
Use this tool to define nesting areas on the plate. Nesting areas are useful with combination of automatic nesting and multitorch tools.
Follow these steps to show nesting area:
• Start Plate editor.
• Select this tool. A red rectangle appears inside the plate. The rectangle is the new nesting area.
• Move the mouse cursor over the edge of the rectangle and press the left mouse button down. The border of the rectangle now
follows the movements of the mouse.
• Modify the rectangle as you like and finally close Plate editor to confirm your changes.
www.TechnicalBooksPDF.com