28
SERVICE
4. Replace the electrode in the torch body. Secure in place
with the electrode wrench.
5. Replace the tip in the front of the torch and secure it
with the tip wrench.
Do not overtighten the electrode or tip.
6. Inspect the shield cup for damage. Wipe it clean, or
replace if it appears to be damaged.
7. Re-install the shield cup. Apply a light coat of O-ring
lubricant to the shield cup O-ring (4). Use a slight
twisting motion to seat the cup properly on the O-ring
and against the torch face.
4.1 TORCH MAINTENANCE (continued)
CAUTION
Routine Inspection
and Replacement of
Consumable Parts:
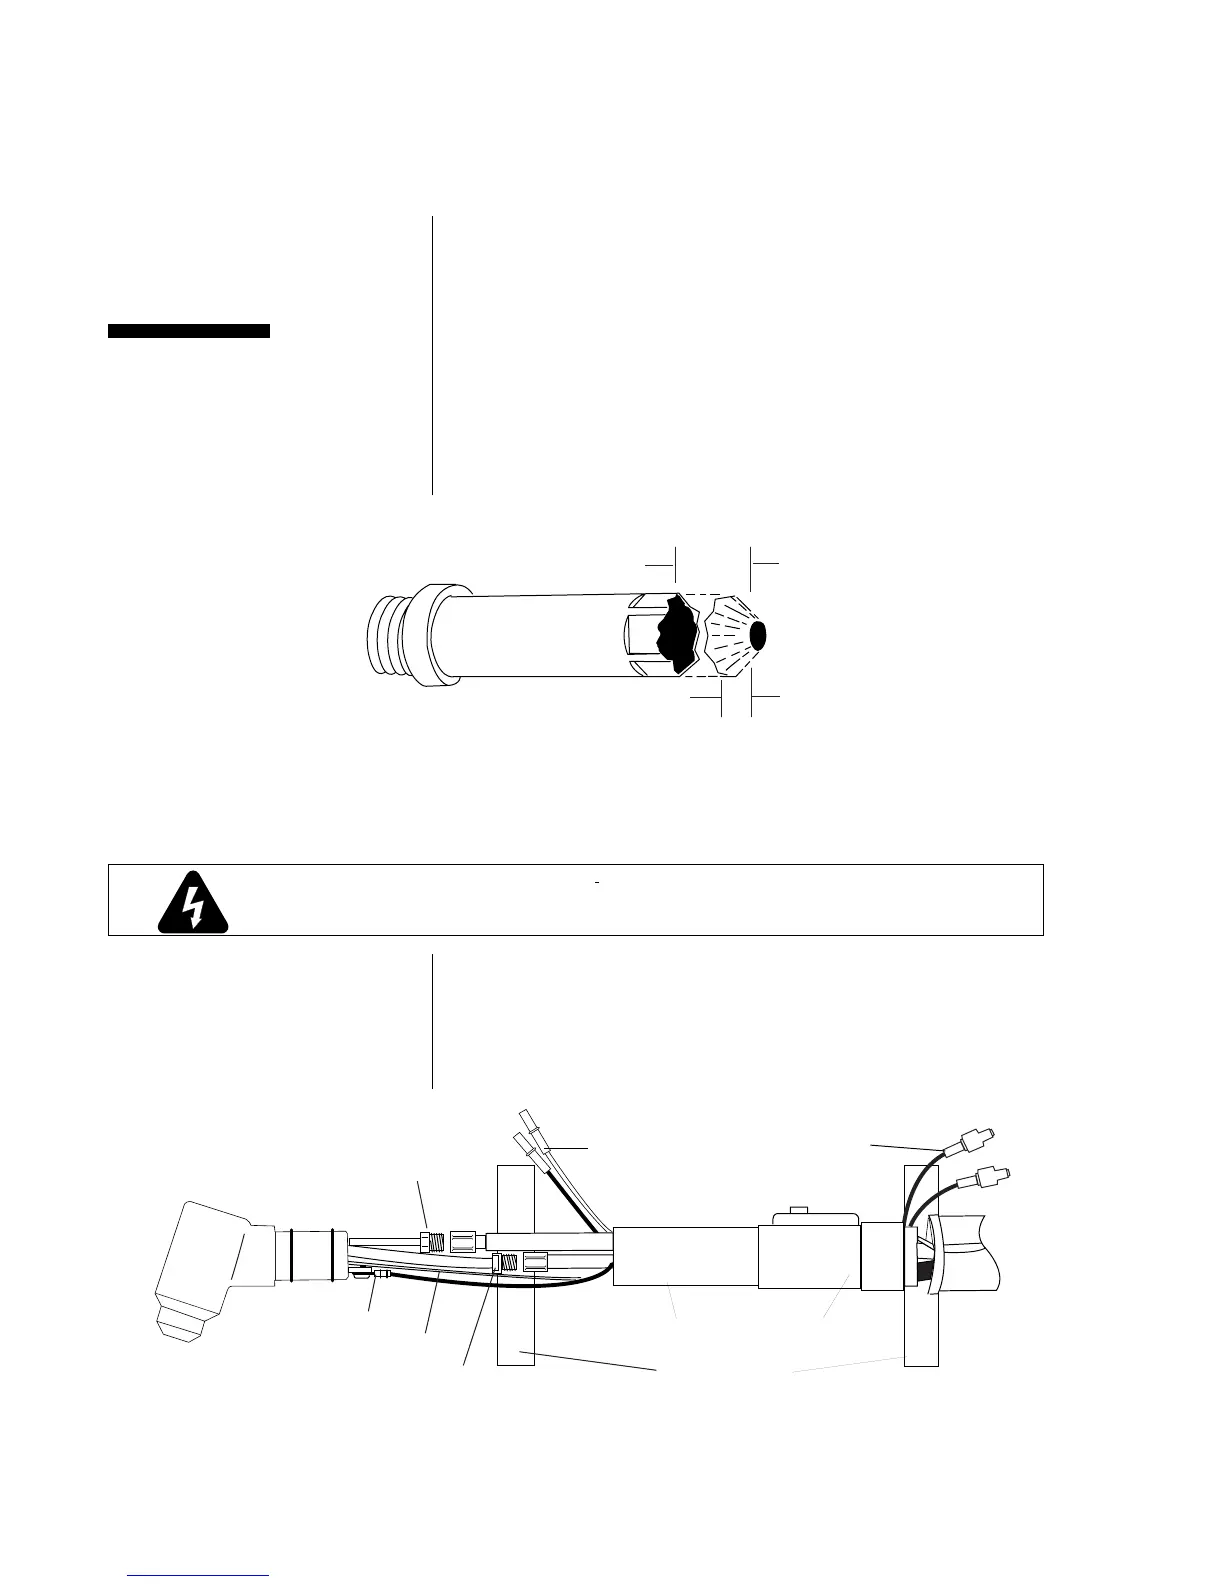
Figure 4-C Hand Torch Leads Replacement
4.2 TORCH LEADS REPLACEMENT
Figure 4-B Electrode Deterioration
Disconnect primary power to the system before
disassembling the torch, leads, or power supply.
WARNING
Refer to Figure 4-C and:
1. Roll the torch switch sheath up over the handle.
2. Remove the tape from the end of the leads sleeving and
pull the sleeving back approximately 12 in (305 mm).
3. Remove the tape from the two single-pin torch switch
connectors and disconnect the torch switch leads.
Hand Torch Leads
Replacement
Negative/Secondary Lead Connection
Negative/Plasma Lead Connection
Positive/Pilot
Lead Connection
Electrical Tape
Torch Switch Leads Connectors
Torch Handle and Sheath
A-01482
Insulating Tab
0.040" (1.0 mm)
0.100" (2.5 mm)
A-01481
 Loading...