54
OBJECTIVE OPERATIONS
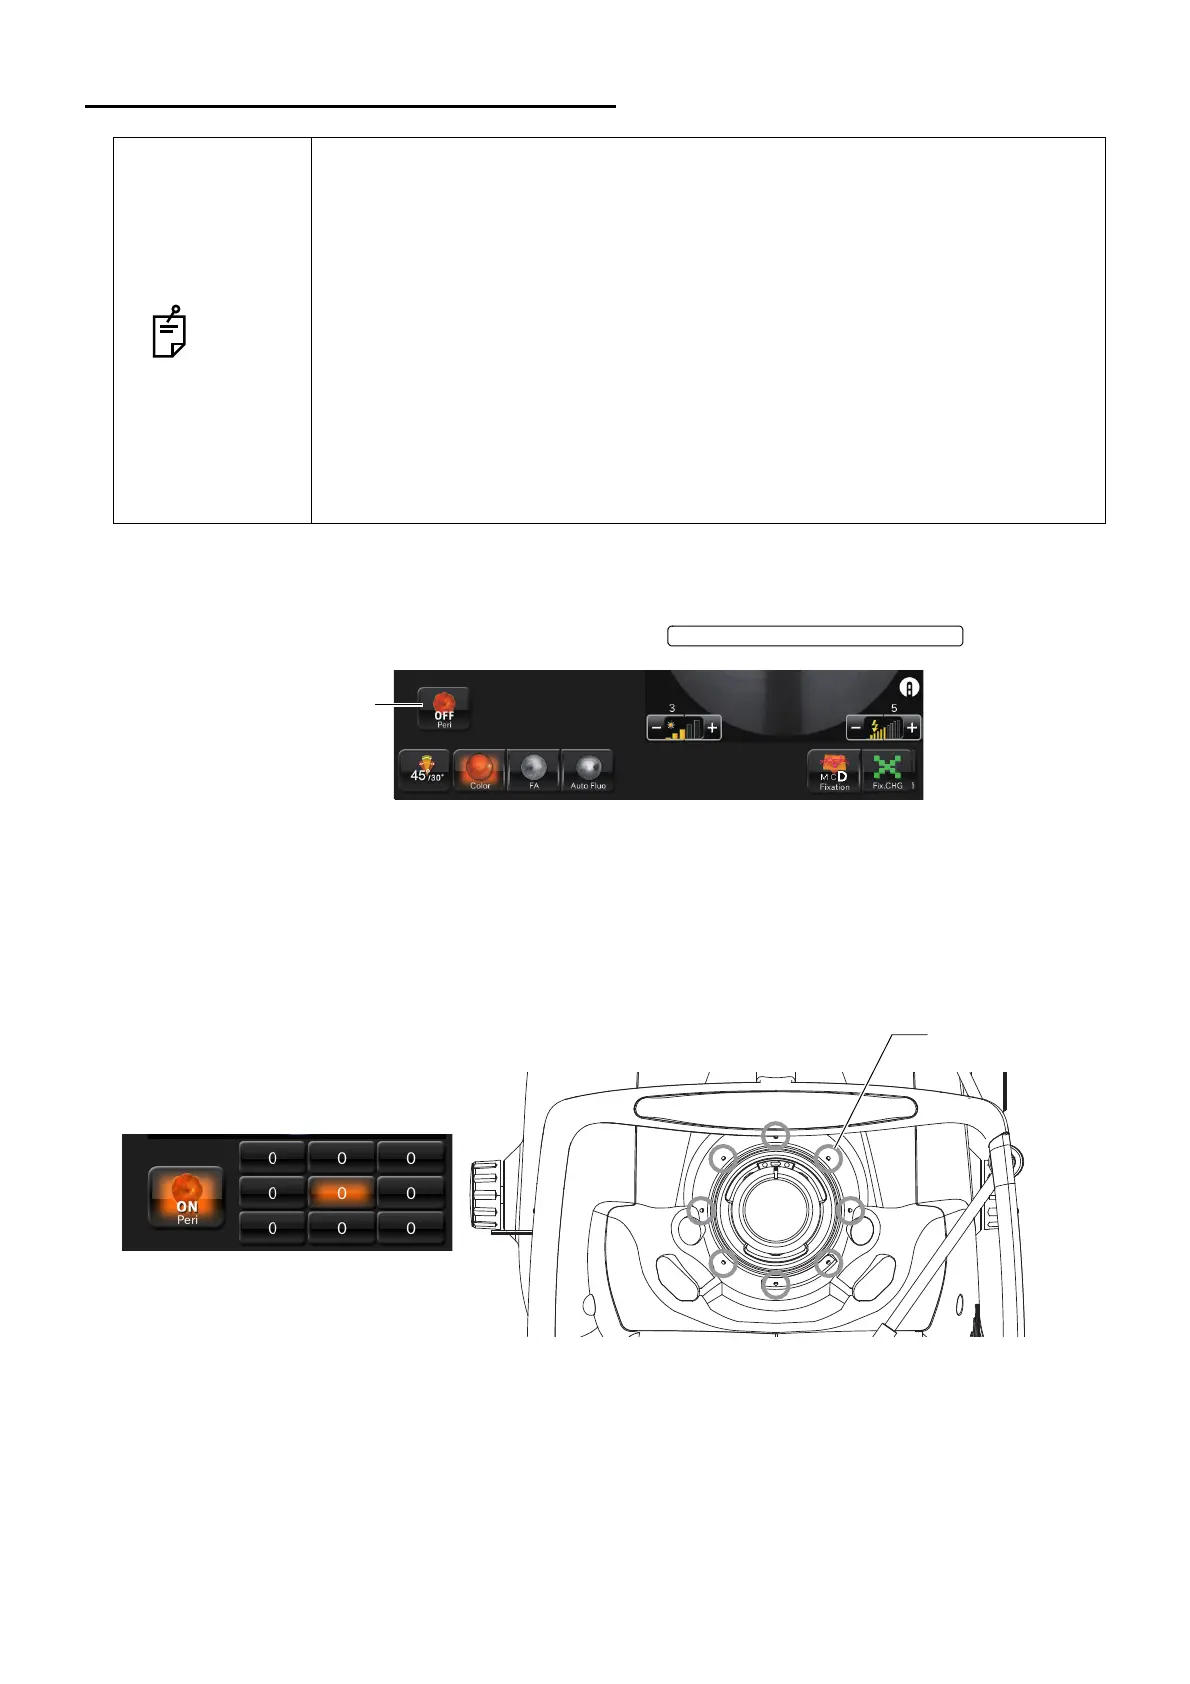
FUNDUS PERIPHERAL PHOTOGRAPHY
Selecting the photography icon
After selecting the fundus image capture icon, select the button.
Setting the picture position
• The fixation position can be changed in nine directions with the following buttons. On the button, the
capture count at each fixation position is displayed. The LED of the anterior segment fixation hole is
turned on because it corresponds with each button.
NOTE
Caution in photography
Under the following photography conditions, there is a bright spot on the cen-
ter of the picture.
• The patient's pupil is small. (This condition includes the case of "When
the small pupil diaphragm is set to "ON")
• The flash level is high.
• Alignment is not adjusted properly.
To improve these conditions, carry out the following operations.
• Darken the room to enhance dilation.
• Adjust alignment for the position where it is most difficult to see flare on
the monitor screen.
• Set the lowest flash level as far as circumstances allow.
Then, take a picture.
PERIPHERAL PHOTOGRAPHY SELECTOR
Peripheral photography
selector button
8×Window for
anterior fixation

 Loading...