59
OBJECTIVE OPERATIONS
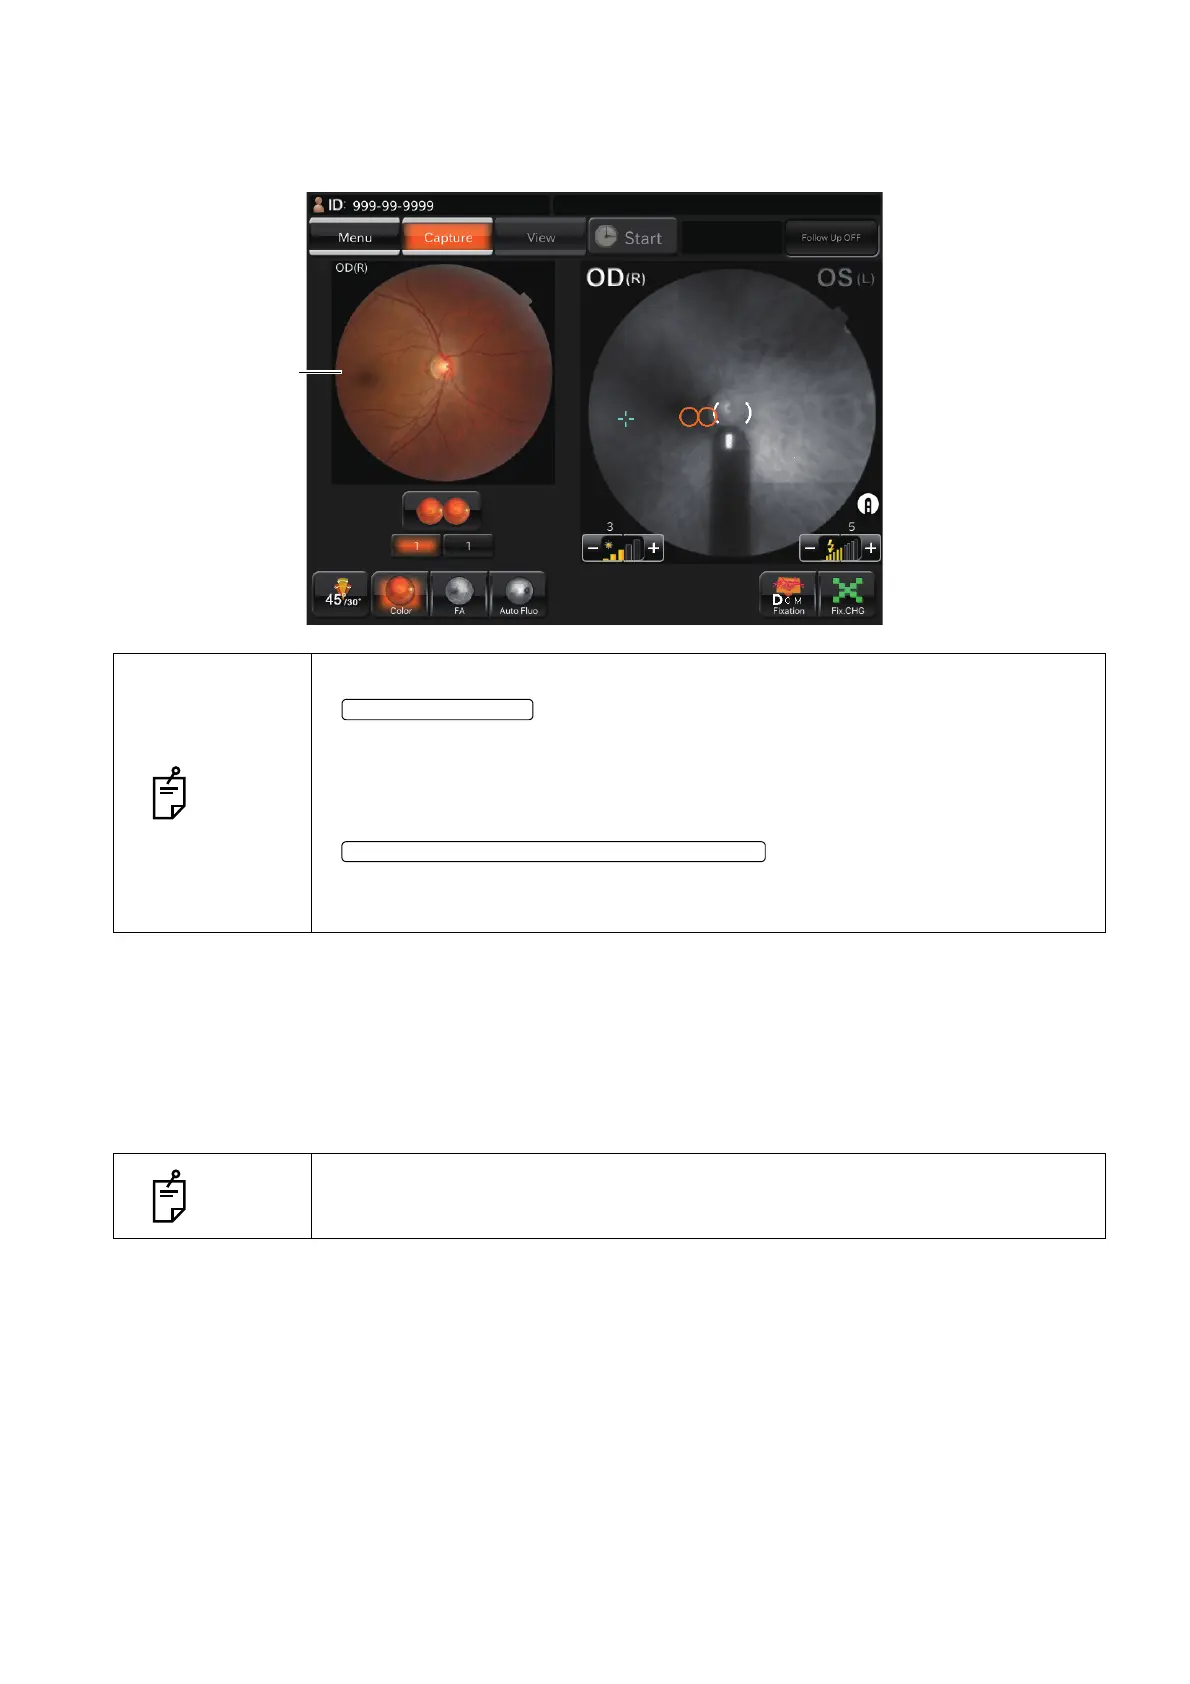
11 Each time you take a picture, the photographed image is displayed on the preview area at the
right side of the screen. The alignment bright spot is moved to the left.
12 Operate the control lever so that the moved alignment bright spot may be put into the ( ) scale.
13 When the positional relation between the instrument body and the patient's eye is proper for
photography after putting the alignment bright spot into the ( ) scale, the fundus photography is
automatically done by the auto shoot function. A picture of another eye is taken and the preview
screen appears.
NOTE
• If the light intensity of the photographed image is not correct, touch the
on the photography screen to adjust the light intensity.
Then, repeat alignment and photography. Refer to "Setting the flash level" on
page 40.
• Take a picture by repeating Procedure 1 - 11 if necessary.
• When you want to take a picture of the same eye again, select the
. The alignment bright spot is
moved from the left to the right and it is possible to carry out the operation of
Procedure 10.
NOTE
When the auto focus function is OFF, the operation is the same as the photogra-
phy at the right eye.
STEREOSCOPIC PHOTOGRAPHY SELECTOR BUTTON

 Loading...