Removal(Figure292)
1.Parkmachineonalevelsurface,lowercuttingdecks,stopengine,apply
parkingbrakeandremovekeyfromtheignitionswitch.
2.Disconnectseatelectricalconnectorfrommachinewireharness.
3.Supportconsolearmassemblytopreventitfromshifting.
4.Removeangenut(item29)andcarriagescrew(item28)thatsecure
supportbracket(item24)tosupportchannel(item22).
5.Removecapscrew(item30)thatsecuresconsolearmsupport(item23)to
couplingnut(item32).
6.Removecapscrew(item27),atwasher(item11),spacer(item26)andseat
beltbuckle(item31)fromseatandconsolearmsupport(item23).
IMPORTANT
Makesuretonotdamagetheelectricalharnessorotherpartswhile
movingtheconsolearmassembly.
7.Carefullymoveconsolearmassemblyawayfromseat.
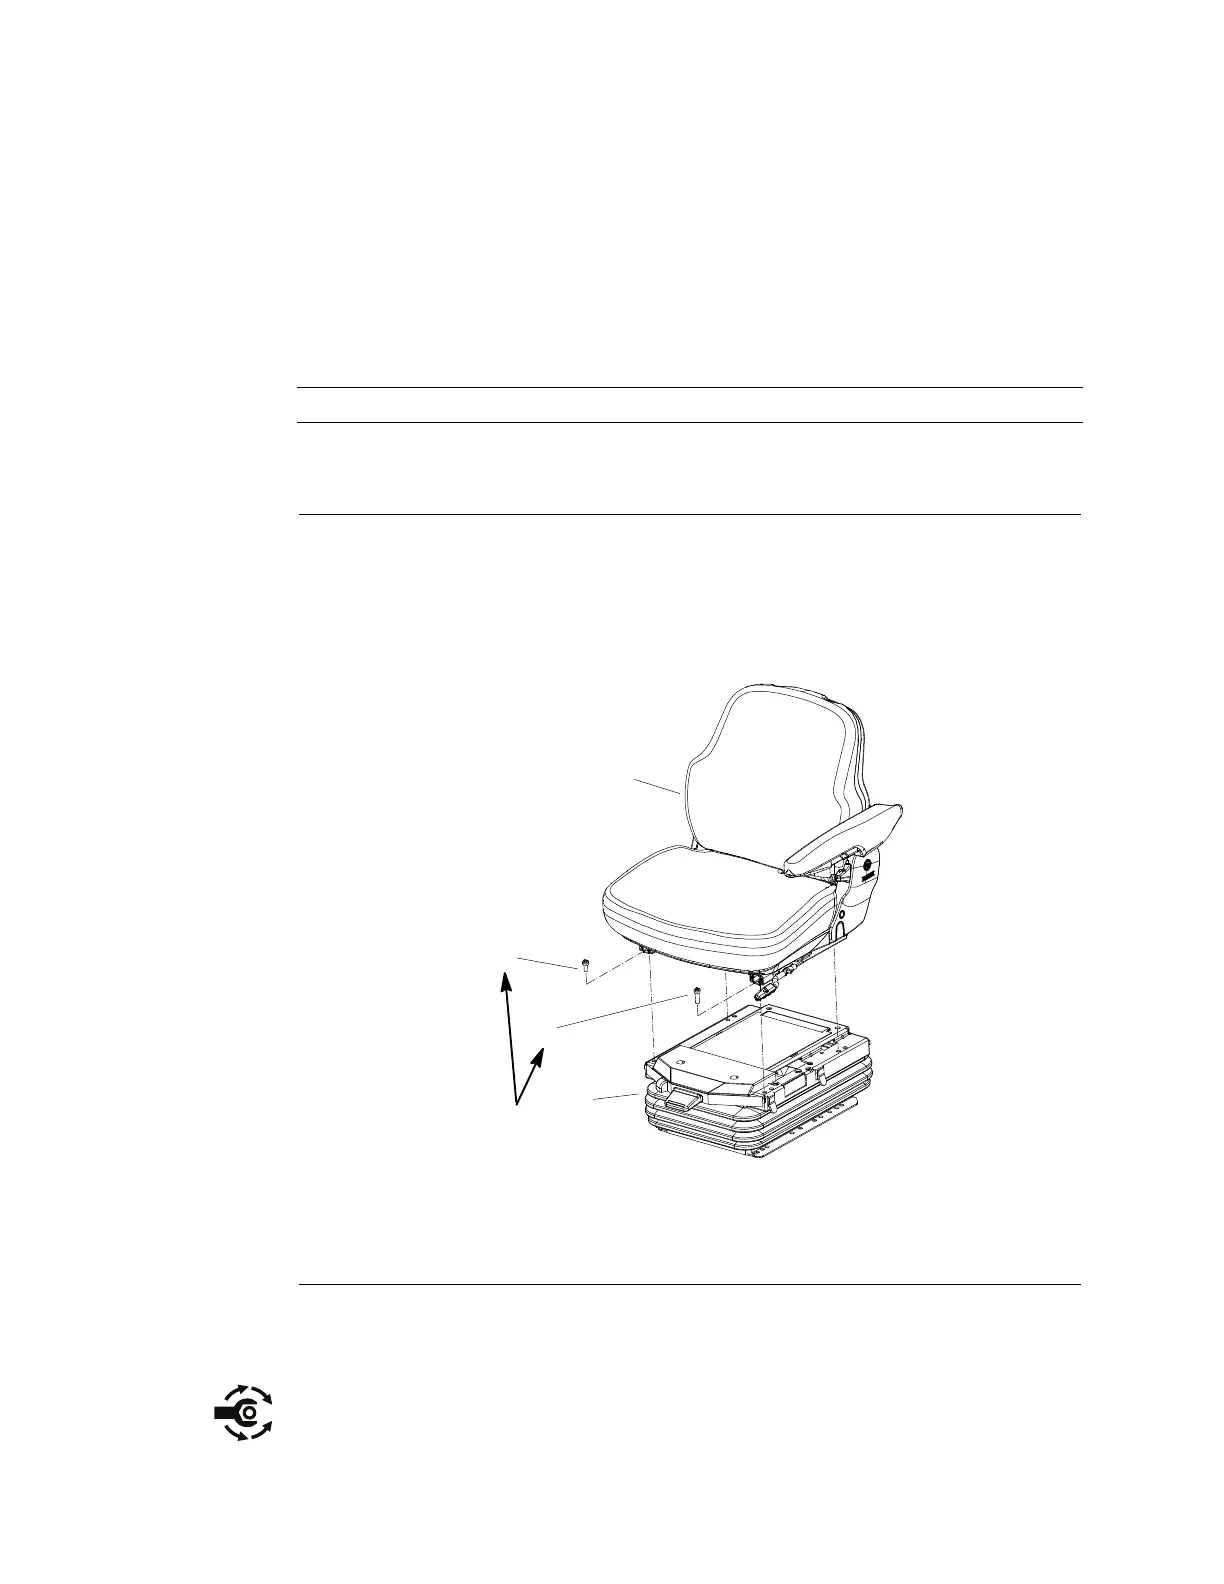
8.Removefour(4)torxheadscrewsthatsecureseattoseatsuspension
(Figure293).Notethatthescrewneartheseatadjustmenthandleislonger
thantheotherthree(3)screws.
9.Liftseatfromseatsuspensionandremovefrommachine.
g276884
Figure293
1.Seat3.Screw(M8x12)(3used)
2.Suspensionassembly4.Screw(M8x16)
Installation(Figure292)
1.Carefullypositionseattoseatsuspension.
2.Secureseattoseatsuspensionwithfour(4)torxheadscrews(Figure293).
Makesurethatlongerscrewispositionedneartheseatadjustmenthandle.
Torquescrews25N·m(18ft-lb).
Chassis:ServiceandRepairs
Page8–20
Groundsmaster
®
4500-D/4700-D
19245SLRevA
 Loading...


