3.Removetheairlterfromthehousing(Figure
40).
Note:Donotcleanausedlterelement
becauseyoumaydamagetheltermedia.
4.Wipecleantheinterioroftheair-ltercoverand
housing(Figure40).
5.Removetherubberdustvalvefromthecover
(Figure40).
6.Cleanthedirt-ejectionportlocatedinthe
air-cleanercover,thedust-valvecavity,and
replacethedustvalve(Figure40).
7.Inspectthenewairlterforshippingdamage,
checkingthesealingendofthelterandthe
body.
Important:Donotuseadamagedelement.
8.Insertthenewairlterbyapplyinglightpressure
totheouterrimoftheltertoseatitinthe
air-lterhousing(Figure40).
9.Aligntheair-ltercoverwiththedustvalveatthe
6o’clockpositionwhenviewedfromtheleftend
ofthecover(Figure40).
10.Securethelatchoftheair-ltercover(Figure
40).
Note:Resettheindicatorifitshowsred(if
equipped).
ServicingtheEngineOil
Note:Changetheoilmorefrequentlywhenoperating
conditionsareextremelydustyorsandy.
Note:Disposeoftheusedengineoilandoillterata
certiedrecyclingcenter.
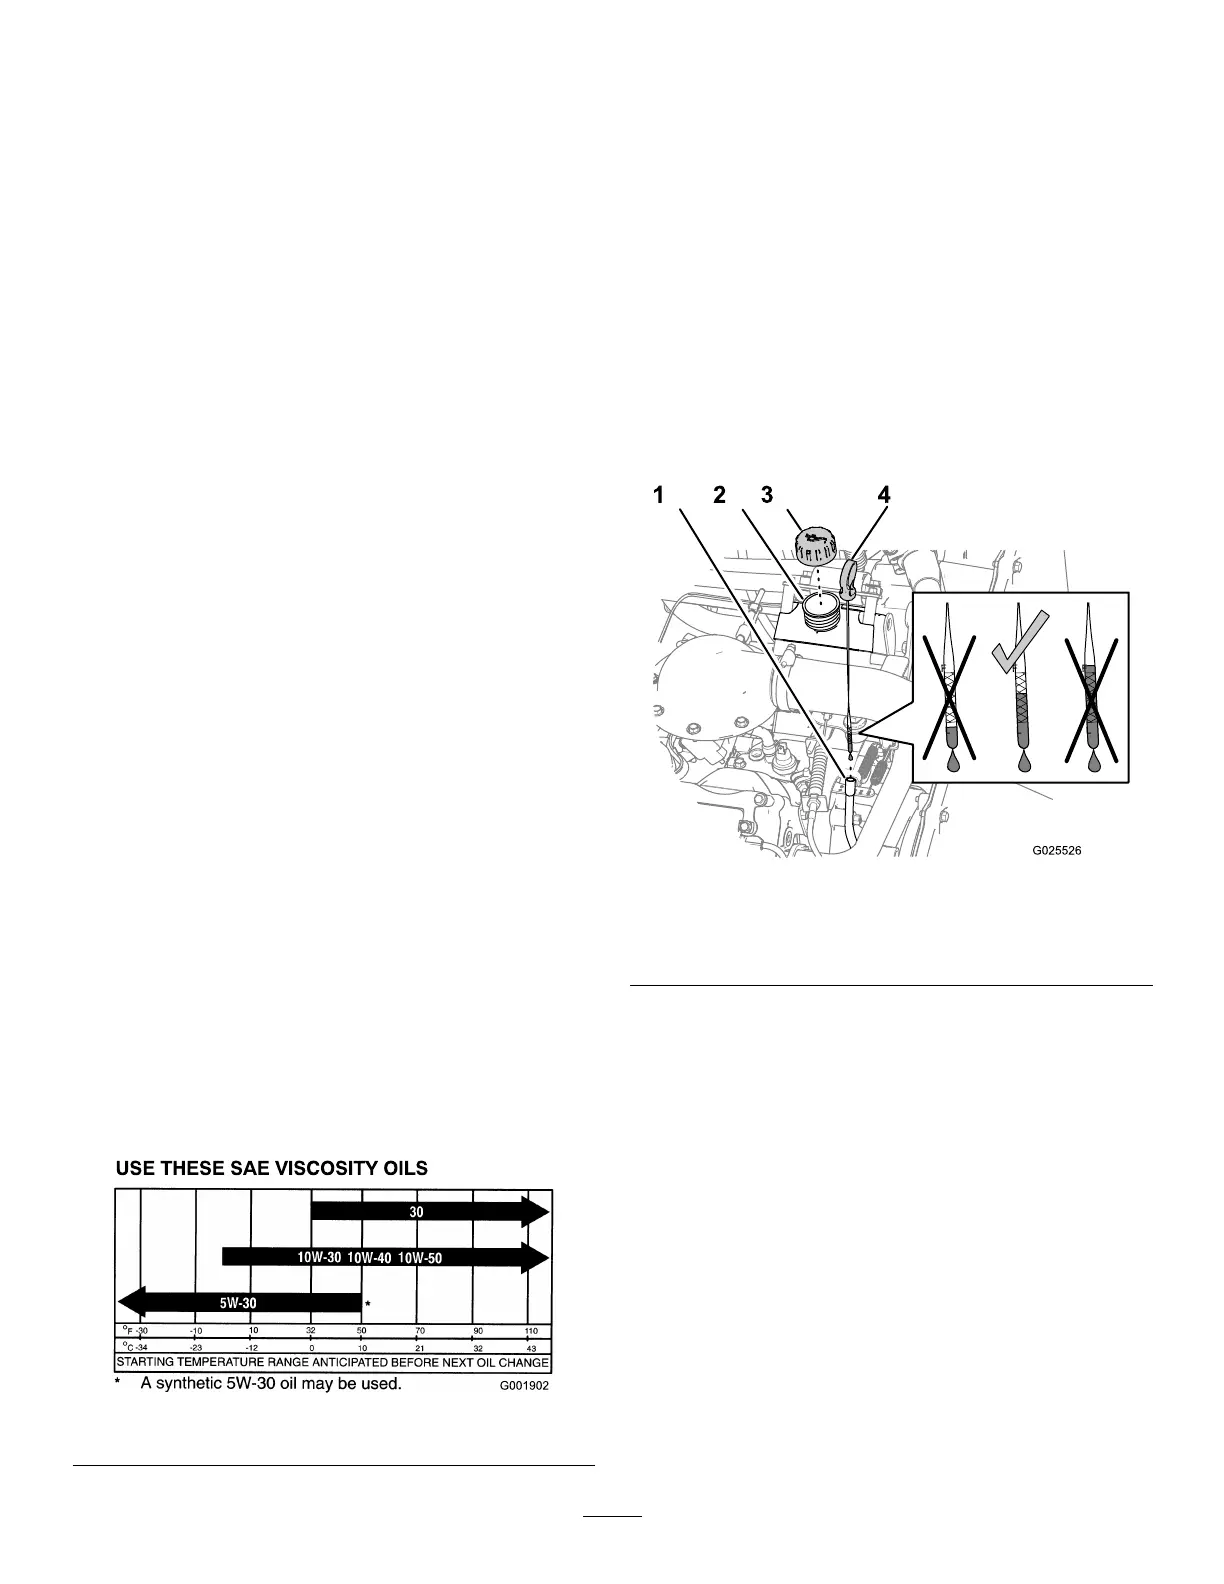
Engine-OilSpecications
OilType:Detergentengineoil(APISJorhigher)
CrankcaseCapacity:2.0L(2.1USqt)whenthe
lterischanged
Viscosity:Seethetablebelow.
g001902
Figure41
CheckingtheEngine-OilLevel
ServiceInterval:Beforeeachuseordaily—Check
theengine-oillevel.(Checktheoil
levelbeforeandaftertheengineis
rststartedanddailythereafter.)
Note:Thebesttimetochecktheengineoiliswhen
theengineiscoolbeforeithasbeenstartedforthe
day.Iftheenginehasalreadyran,shutitoffandwait
foratleast10minutesbeforecheckingtheoillevel.
1.Parkthemachineonalevelsurface.
2.Engagetheparkingbrake.
3.Shutofftheengineandremovethekey.
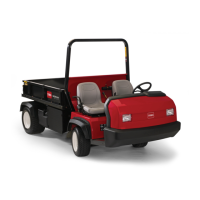
4.Removethedipstickandwipeitwithacleanrag
(Figure42).
g025526
Figure42
1.Dipsticktube3.Fillercap
2.Fillerneck4.Dipstick
5.Insertthedipstickintothetubeandensurethat
itseatsfully.
6.Removedipstickandchecktheoillevel(Figure
42).
7.Iftheoillevelislow,removethellercap(Figure
42)andaddenoughoiltoraisetheleveltothe
Fullmarkonthedipstick.
Note:Whenaddingoil,removedipstickto
allowproperventing.Slowlypourtheoilintothe
llerneck,andchecktheleveloftenduringthis
process.Donotoverlltheenginewithoil.
41