EasyManuals Logo

Trotec Speedy Series User Manual

Trotec Speedy Series
42 pages
To Next Page IconTo Next Page
To Previous Page IconTo Previous Page
Page #12 background imageLoading...
Page #12 background image
- 12 -
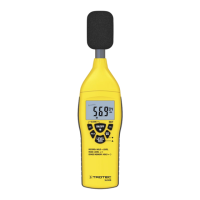
(3) Check or uncheck the [Quick Print] check box.
For the example in this document, please
check this box.
When cut data is sent to Trotec JobControl,
data is automatically output to the Trotec
Speedy Laser Engraver and cutting is per-
formed.
(4) Set [Cut Line] to [None].
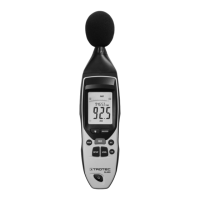
(5) Check the [Detect Cut Lines] check box.
(Required)
(6) Click the [Save] button.
The [Save Parameters and Hotfolders] dia-
log is displayed.
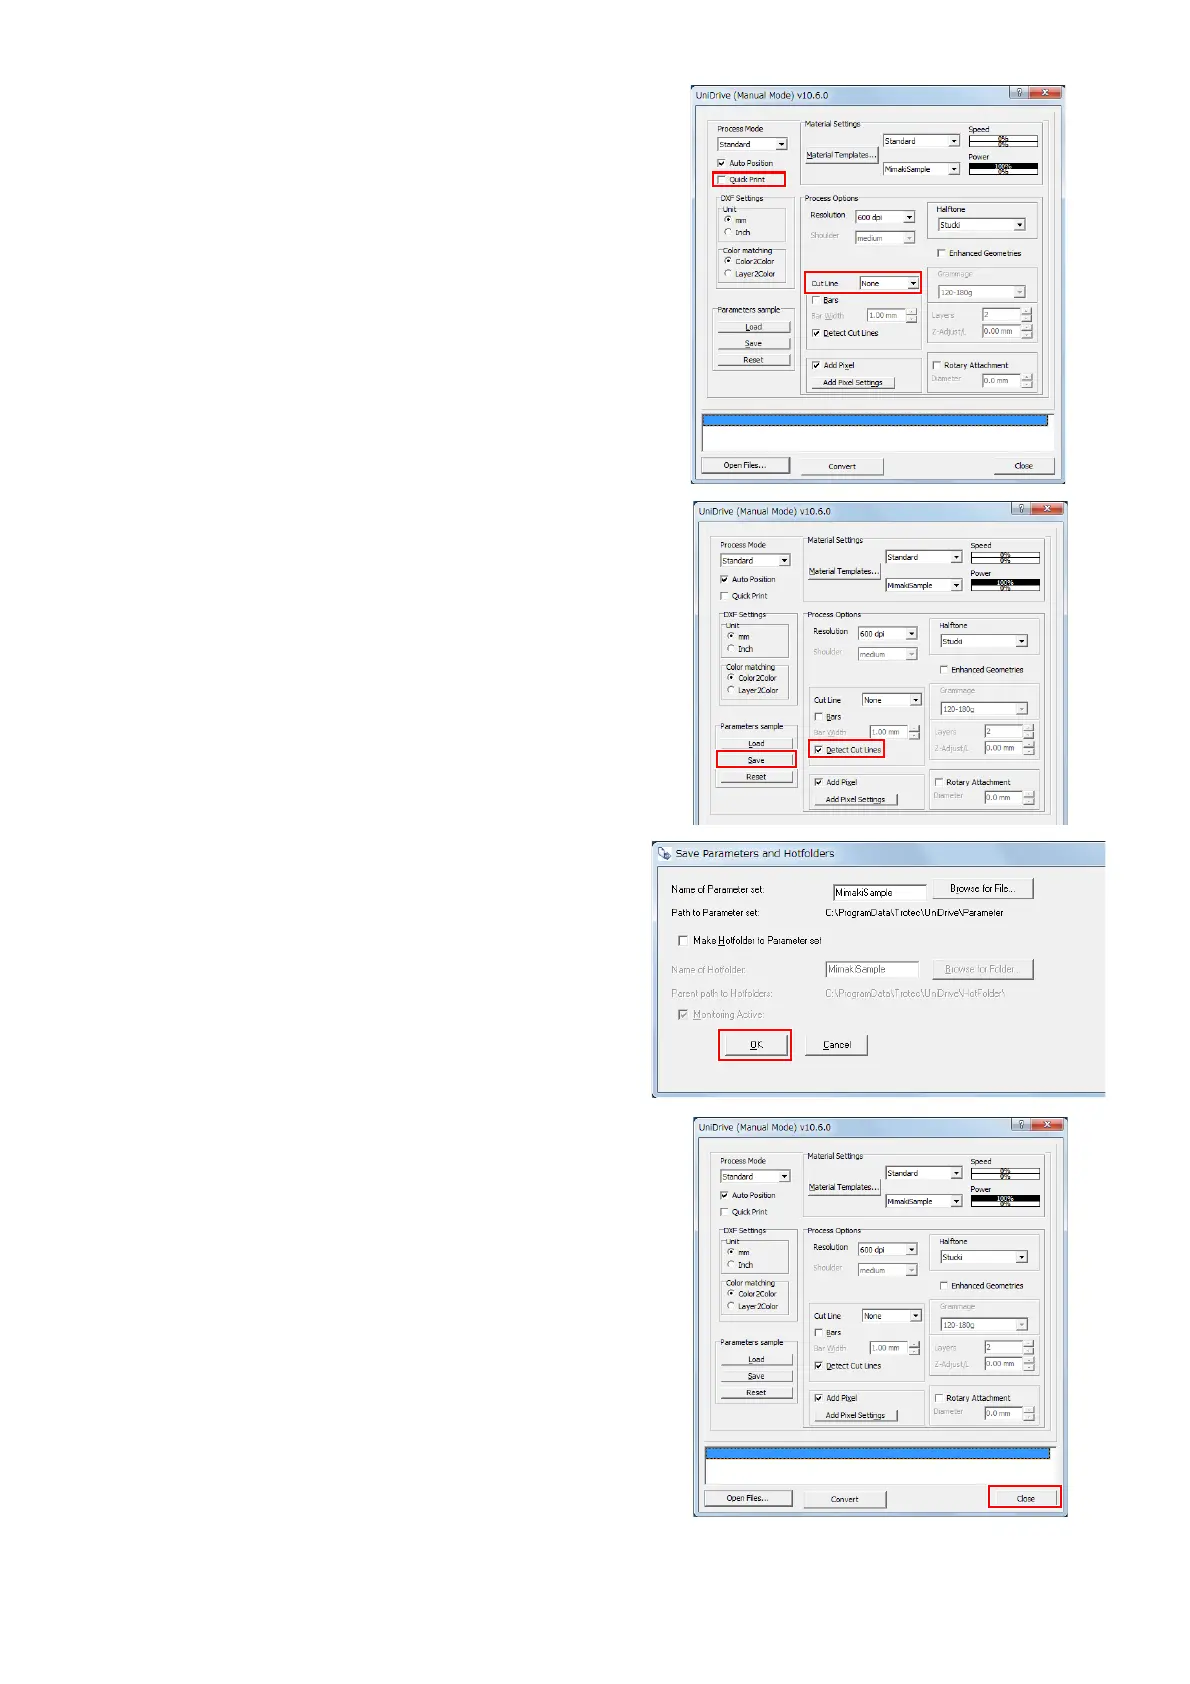
(7) Click the [OK] button on the [Save Parameters
and Hotfolders] dialog.
The parameter file will then be saved as the
[Name of Parameter set].
(8) Click the [Close] button on the [UniDrive
(Manual Mode)] dialog.
(3)
(4)
(6)
(5)

Table of Contents

Questions and Answers:

Question and Answer IconNeed help?

Do you have a question about the Trotec Speedy Series and is the answer not in the manual?

Trotec Speedy Series Specifications

General IconGeneral
ResolutionUp to 1000 dpi
Laser TypeCO2 laser
Work AreaVaries depending on model
Max. Workpiece HeightVaries depending on model
Laser PowerVaries by model
SoftwareJobControl
Supported File FormatsAI, BMP, PDF, DXF, PLT, JPG, GIF, TIFF, PNG
CoolingAir or Water (depending on laser power)
Power Supply50/60 Hz

Related product manuals