11
Parts Replacement 5
Amendment 10
11 May 2015
5.1.1 Oven Controller /
Encoder
To remo
ve the Digital Control Board:-
1.
Remove screw on underside of control panel.
2.
Lift panel up to unhook at top.
3.
Disconnect plugs from rear of control panel.
Note position of connectors before disconnecting plugs
from con
trol board.
4.
Disconnect earth connection at rear of control panel.
5.
Undo the shake-proof securing nuts (8).
6. Remove digital control board from rear of control panel.
To replace the Digital
Control Board:-
1
. Ensure 8 spacers are fitted to threaded studs on rear of contro
l
bo
ard before fitting new board.
2. Fit replacement digital control board to threaded studs
and
sec
ure with nuts supplied and tighten nuts hand tight.
3.
Re-connect plugs to control board, noting position
of
con
nectors when re-fitting.
5.1 Replacement
Control Panel Screw
Securing Nuts (8)
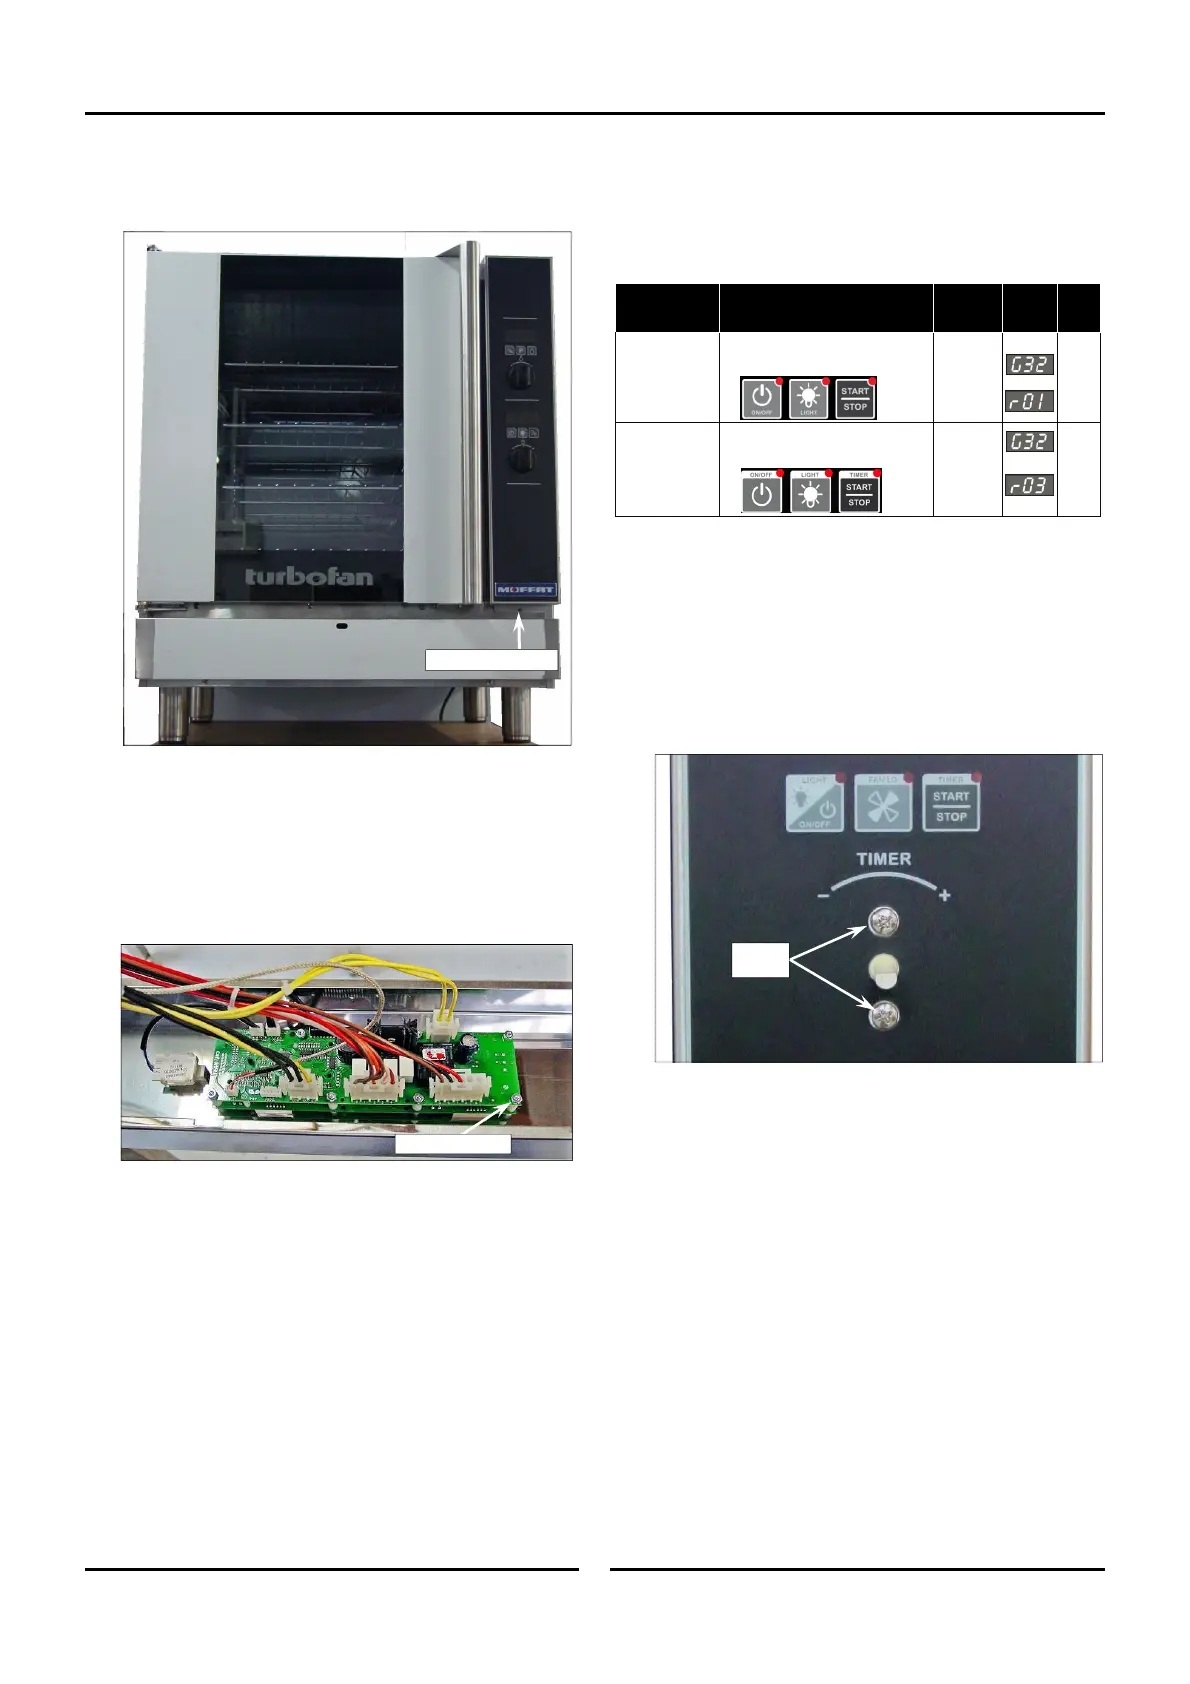
To Program the New Oven Controller
1. Check / adjust Parameters P01, P02 and P24 to the model
specific values shown belo
w.
Encoder
1. With control panel removed from the oven, remove control
knob
from control panel.
2. Disconnect encoder plug from digital control board.
3. Remove oven controller if necessary.
4. Remove encoder from control panel by removing 2 securi
ng
screw
s
.
Securing
Screws
Model /
Revision
Key Identifiers PO1 PO2 P24
G32D
Rev 01
No Light Key.
Fan LO Key.
°C / °F
as reqd.
N/A
G32D
Rev 03
Square Lights in Oven.
Keys - New style graphics
°C / °F
as reqd.
N/A

 Loading...