20
5 Parts Replacement
Amendment 10
11 May 2015
5.2 Adjustment & Calibration
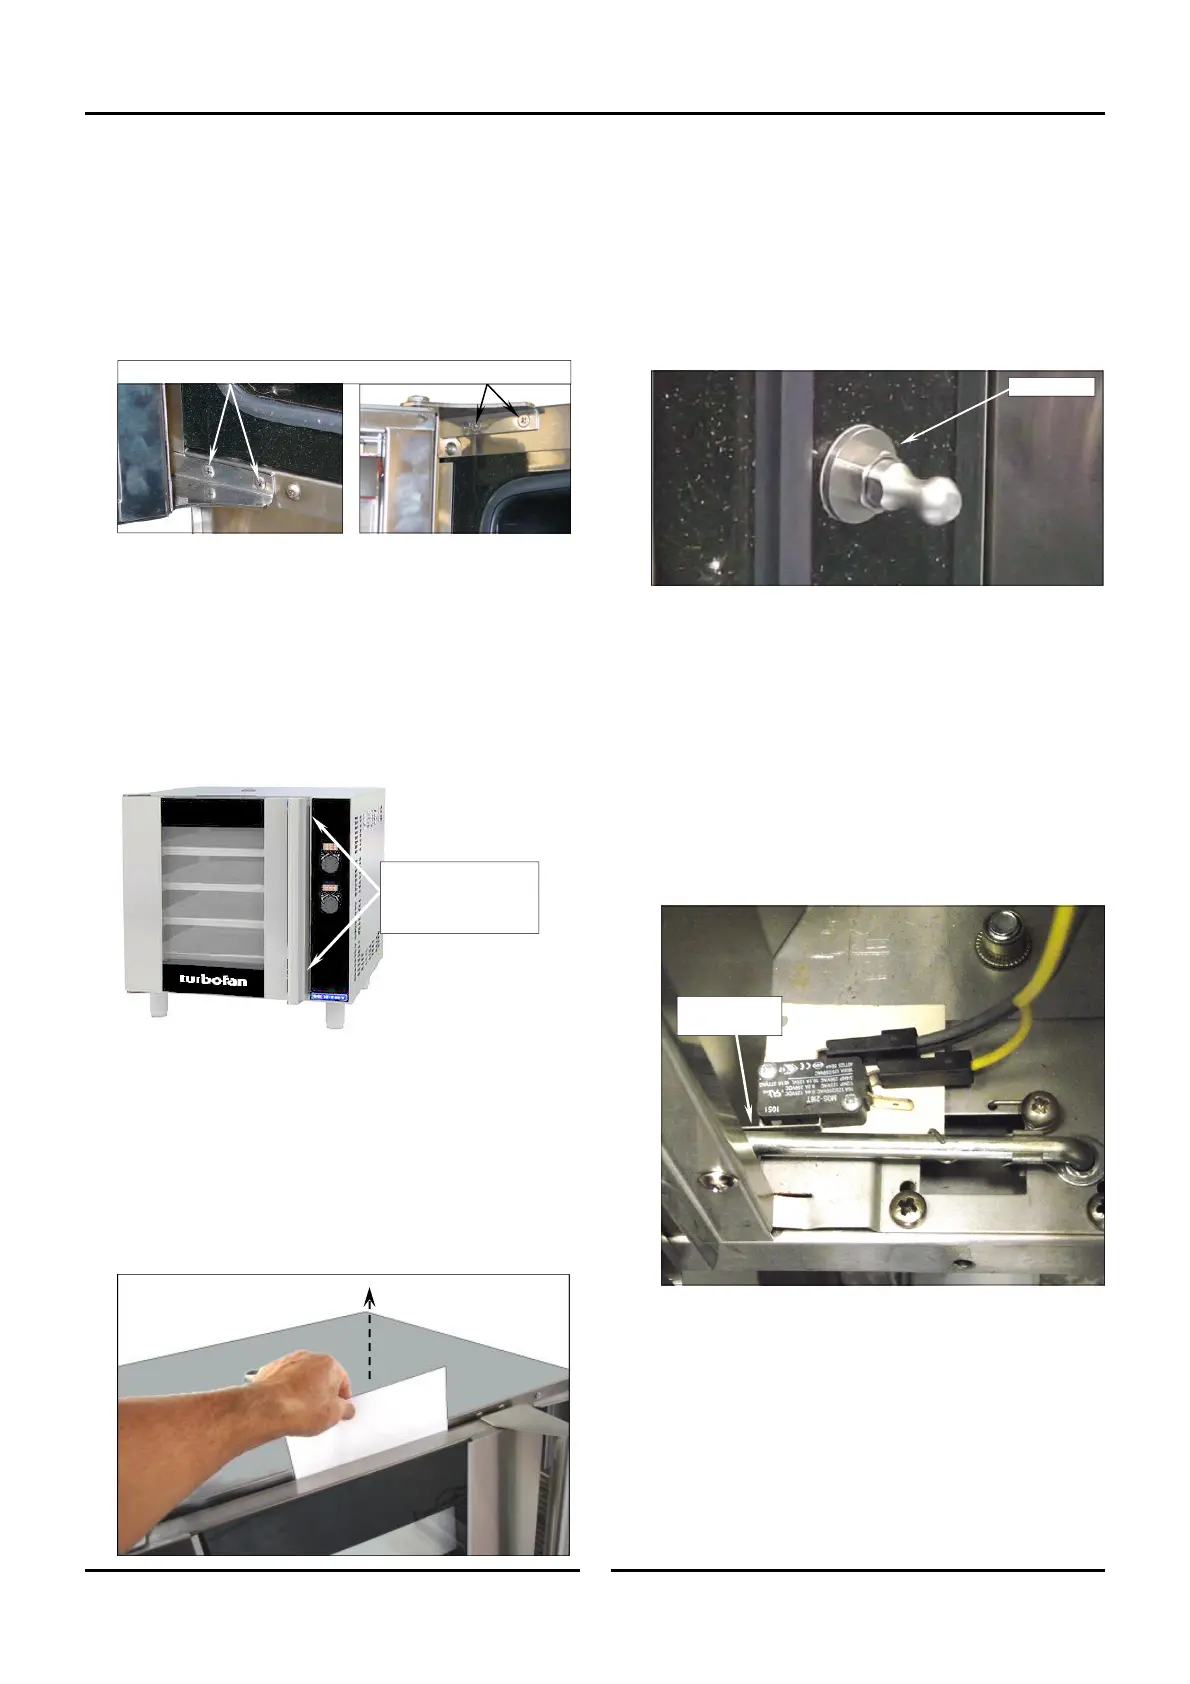
5.2.1 Door Alignment.
Ensuring Door is Square to Oven.
Check alignment and operation of the door. Ensure that the door
is correctly aligned horizontally and vertically.
There should be a
nominal gap of 6mm from edge of door to side of control
panel.
1. Slacken off the upper and lower hinge plates and correctly
align the door. Re-tighten both hinge plates on completion.
NOTE:
Check the nominal gap from front edge of door to side
of control panel. This should be 6mm.
If door is adjusted for correct alignment, ensure that
the door closes correctly. Check door closes correctly
as shown below at Section 5.2.2 ‘Door Catch / Latch
Adjustment’.
5.2.2 Door Catch / Latch Adjustment.
Ensuring Door Seals Properly:
If the door sealing requires adjustment, carry out the following to
adjust the door catch:-
1. Check that the door seals correctly when closed, by plac
ing a
s
heet of paper between the door and the seal
.
2
. Close the door on the paper and attempt to withdraw
the
paper by
firmly tugging on the paper. The paper should just
pull out with some resistance but without tearing.
Slacken these screws to adjust door vertically - horizontally.
3. To adjust door catch, loosen the locking nut on the door catch.
4. If paper withdraws easily,
screw door catch ‘In’ by ½ a
turn
and repeat test above until adjusted correctly.
5. If paper cannot be withdrawn and door springs open,
screw
door catch ‘Out’ by ½ a turn
and repeat the test above
unt
il adjusted correctly.
6.
Tighten the locking nut on the door catch.
Ensuring Door Latches Closed Properly:
1. Check that the door closes and latches correctly by push
ing
the door clo
sed and ensuring that the door remains clos
ed
w
ithout springing open.
2. If the door is hard to close and springs open,
screw door
catch ‘Out’ by ½ a turn
and repeat test above until door is
adjusted corre
ctly.
3.
If the door closes and feels loose once latched closed,
screw
door catch ‘In’ by ½ a turn
and repeat the test above until
d
oor is adjusted correctly.
4.
Tighten the locking nut on the door catch.
5.2.3 Door Microswitch
1. Remove control panel.
2.
Bend the microswitch activation arm so switch open circuits
when door is open.
3.
Check adjustment when door is opened and closed
.
Locking Nut
Microswitch
Activation Arm
Check Gap between Door
and Control Panel at top
and bottom of Door.
Should be 6mm nom.
 Loading...
