Service Procedures
13
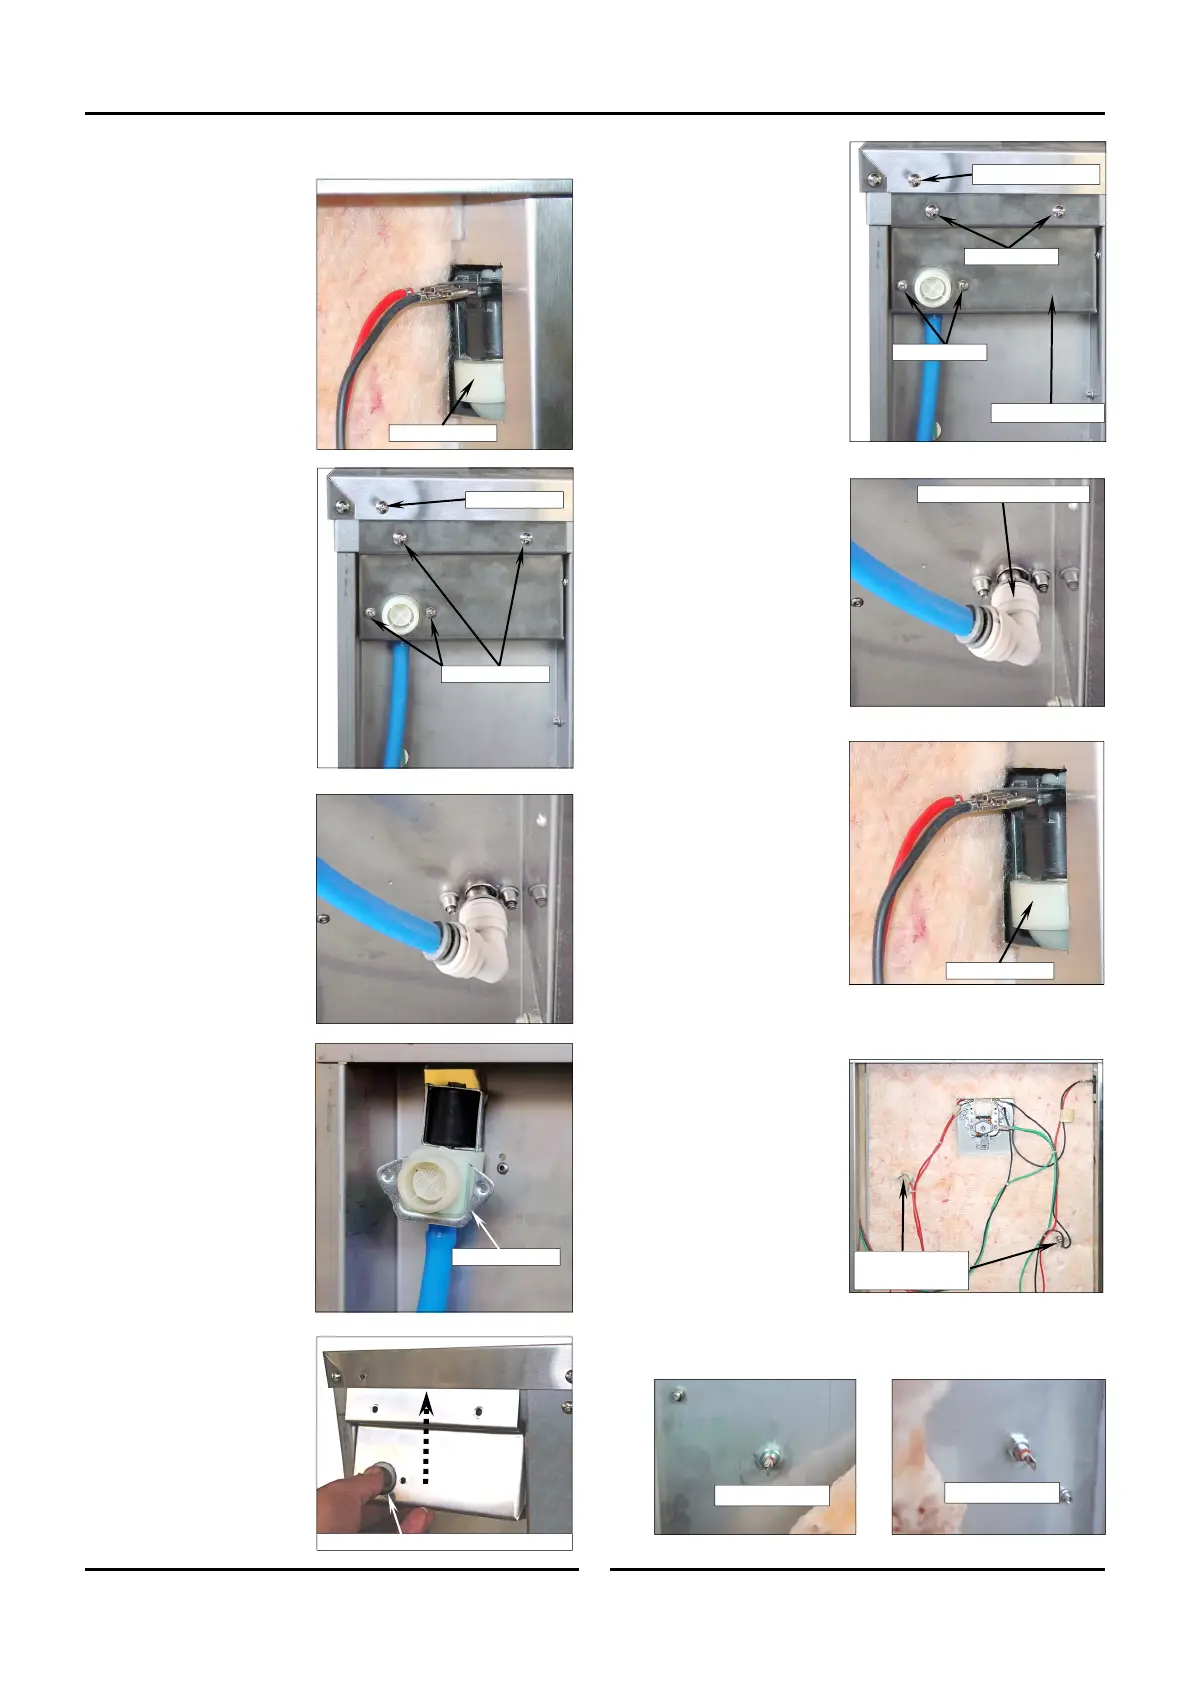
5.2.8 Water Solenoid
1. Turn Off water
supply to proofer /
holding cabinet.
2. Remove RH access
panel (refer Section
5.1.2).
3.
Disconnect wires from
water solenoid.
4. At rear of proofer /
holding cabinet, on top
left of rear panel,
slacken screw on rear
lip.
5. Remove 2 screws
securing bracket to
proofer.
6. Remove 2 screws
securing water solenoid
to bracket.
7. Pull down and out to
remove bracket from
rear of proofer.
8. Disconnect water hose
at inlet to proofer.
(This is a push fit
connection).
9. Remove water solenoid
and replace.
10. Insert replacement
water solenoid into
recess at rear of
proofer.
11. Refit water solenoid
mounting bracket by
pushing top of bracket
up under top panel lid.
12. Ensure water solenoid
inlet is located through
hole in bracket.
Slacken Screw
Remove Screws
Water Solenoid
Ensure Water Solenoid correctly located
13. Refit and tighten screws
securing water solenoid
to mounting bracket.
14. Secure mounting
bracket to rear of
proofer.
15. Tighten screw at top LH
corner of proofer.
16. Connect hose from
water solenoid to
proofer inlet at bottom
of proofer. (This is a
push fit connection).
17. Re-connect water
supply to proofer.
18. Connect electrical
connections to water
solenoid.
19. Refit and secure RH
access panel.
5.2.9 Dry Element
1. Remove RH access
panel (refer Section
5.1.2).
2. Disconnect electrical
co
nnections to the dry
element.
3. Pull back insulation to reveal terminals. Unscrew
locking nuts.
Tighten this Screw
Refit Screws
Refit Screws
Mounting Bracket
Water Push-Fit Connection
Disconnect Elect
Connections
L/Hand Terminal
R/Hand Terminal
Water Solenoid
Water Solenoid
 Loading...
