58
• Maintain the Battery Hatch securely in place and, using your
other hand, slide the Retaining Ring down off your thumb
and into position around the Battery Compartment.
• The tabs on the Retaining Ring fit down into the two slots
located at the 2 and 8 o'clock positions.
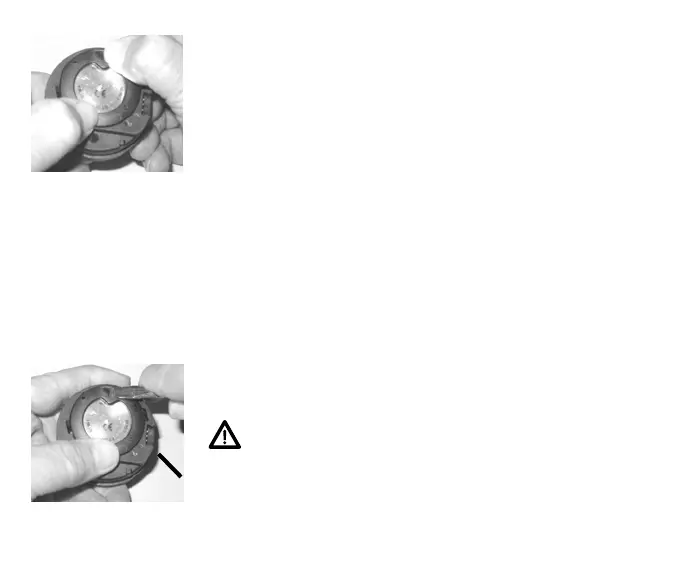
• Using your fingers, turn the Ring counter clockwise 5 de-
grees until the tabs engage (Fig. 67), then tighten it 5 more
degrees by turning it counter clockwise using the Battery
Hatch Tool (Fig. 68).
• While tightening the Retaining Ring, exert continuous inward
pressure on it until it is secured in the proper position. A
small symbol located on the Ring should be aligned with the
Locked symbol located on the Housing (Fig. 68a)
Inspection
• Activate the unit and watch carefully as it performs a full
diagnostic and battery check, and enters Surface Mode.
• Observe the LCD display to ensure it is consistently clear and
sharp in contrast throughout the screen.
WARNING: If there are any portions of the display
missing or appearing dim, or if a Low Battery condi-
tion is indicated, return the Element to an Authorized
TUSA Dealer for a complete evaluation before at-
tempting to use it.
Fig. 68 -TIGHTENING the
RETAINING RING
Fig. 67 -ENGAGING the
RETAINING RING TABS
a