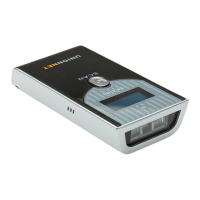
BarcodeGuy.com® - UnionNet SP2100 User’s Guide
2D Imager
Only
25
Unlike manipulating SP2100 settings using the System Menu, Setup Barcodes are a quick and easy way to
make changes to the settings of the SP2100’s decoder directly. The decoder is the hardware that controls how
the beam comes out of and how reflected returning light is interpreted and changed to ASCII before being sent
to the SP2100’s firmware and then to the connected host.
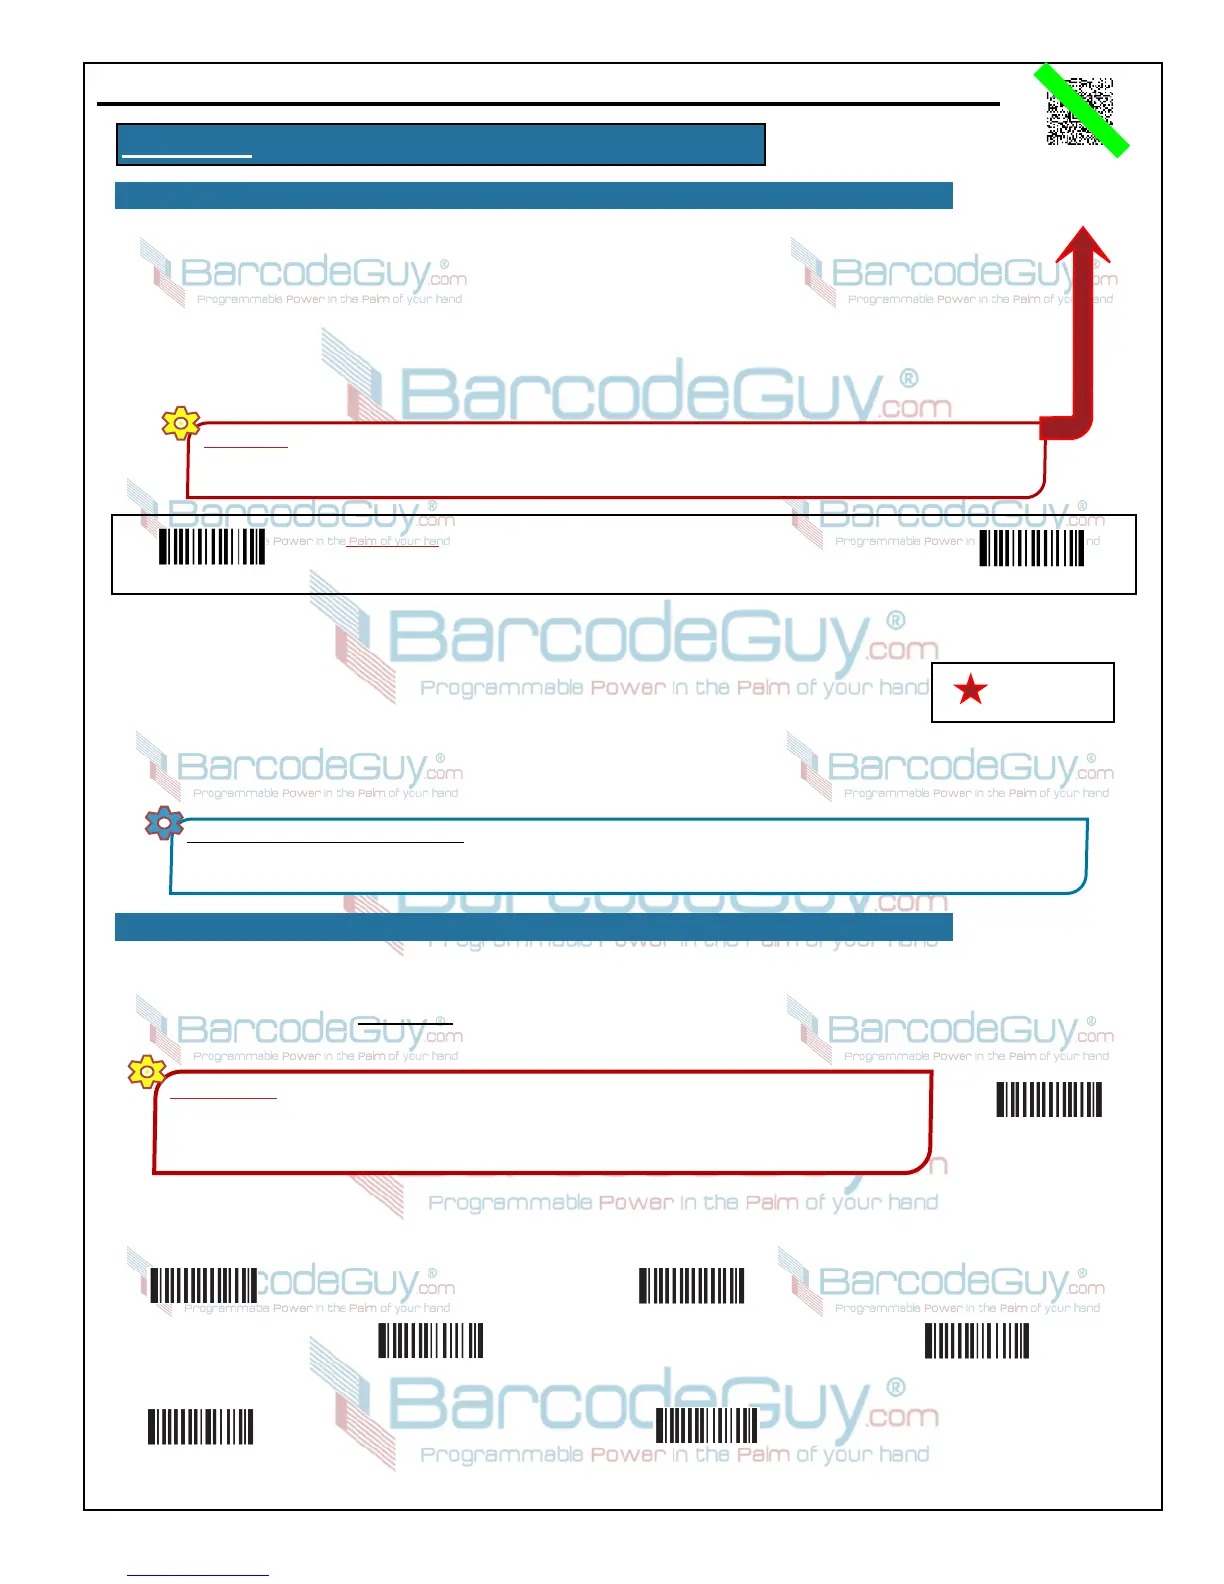
The format to change the option is to scan the Programming “ON” barcode, scanning the appropriate setup
barcodes then scanning the Programming “OFF” barcode.The Programming “ON” and Programming “OFF”
barcodes are provided at the top of each page of Appendix B and are labeled labeled as figure B.0.
For example, if you wanted to turn off or not allow the SP2100 decode any Plessey barcodes, you would turn the Plessey
barcode symbology off by scanning setup barcodes in the following sequence:
1. Scan the Programming “ON” barcode from figure B.0 at the top of the page.
2. Scan the Plessey Disable barcode.
3. Scan the Programming “OFF” barcode.
From Appendix H, you can see the full list of barcodes your SP2100 supports, depending on whether you have the 1D or
2D model. In this Appendix the defaults are marked with a red star beside them for easy identification.
If you’ve changed any of the options associated with the barcode symbologies, scan the Factory Default barcode to reset
the SP2100’s imager back to its “Factory Defaults”. This will undo any changes you might make. Barcode Symbology
Factory Defaults are listed in Section B.29 of this (Appendix B) of this User’s Guide and indicated by a red star in this
section.
Set Factory Defaults
IMPORTANT By scanning this barcode, you are resetting the options of the SP2100 2D IMAGER DECODER.
The barcode scanner options throughout Appendix B of this User’s Guide are completely different than those
options available from the SP2100’s SYSTEM MENU (Appendix K) AND WON’T EFFECT SYSTEM MENU
SETTINGS! These settings are for the IMAGER only! Refer to Appendix B for SP2100 LASER decoder settings!
Programming “ON”
Programming “OFF”
Figure B.0
Instructions: To change the option, first scan the Programming “ON” barcode.
Then scan the Option Code. Finally scan the Programming “OFF” barcode.
CRITICAL! These barcodes set the decoder in the SP2100 2D imager ONLY!!! If you have an imager and use these codes to
change the settings in the SP2100 2D Imager decoder, you can verify you’re using the right codes by looking for this mark in the
top right of the page. If you have the SP2100 2D Laser Scanner, use the Decoder Setup Barcodes in Appendix C
Successfully Reading Setup Barcodes: The setup barcodes in this guide may be printed densely enough that your SP2100 may
read a code adjacent to the one you intend. To be safe, just put a piece of white paper or an index card over adjacent barcodes so the
imager of the SP2100 can’t see the adjacent code.
Denotes Decoder
System Default
Disable All
Symbologies
Enable All
Symbologies
Disable 1-Dimensional
Symbologies
Enable 1-Dimensional
Symbologies
Disable 2-Dimensional
Symbologies
Enable 2-Dimensional
Symbologies
Unlike manipulating SP2100 settings using the System Menu, Setup Barcodes are a quick and easy way to make changes
APPENDIX B - SP2100 2D Imager Setup Barcodes
B.1 - Method of programming the SP2100 2D Imager decoder with Setup Barcodes
B.2 - General Options