Ceilometer CT25K
CT25K-U059en-2.1 User’s Guide
113
8.6 Compensation Fiber
8.6.1 Compensation Fiber replacement
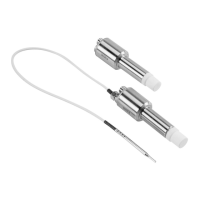
The Compensation fiber is made from optical fiber. Handle the fiber with
care. Don’t twist. Do not allow the ends of the fiber to be contaminated by
grease or dust.
When there is reason to suspect malfunction of the Compensation fiber
(CT25015) do as follows: (Note Paragraph 8.3 Start-up procedure.)
1. Identify the black compensation fiber, which leads from the CTR21
Receiver to the Center Block of the optics tube. See Figure 8-3 in
paragraph 8.4.3.
2. Check with care the position and alignment of the fiber at the Center
Block end: The fiber is attached with a flat metal part, which is also
supplied with the new fiber. Mark the position of the edges of this part in
respect to the Center Block with a pencil.
3. Open the fiber attachment screw at the receiver bottom (shown in Figure
8-3) with a 1.5 mm hex key. Take this fiber end gently out from the
receiver.
4. Open the M3 slotted head screw (sealed with red paint) that fixes the
fiber to the Center block. Look at the replacement fiber and carefully note
the shape of the end of the fiber. Take the hooked fiber end carefully out
from the center block.
5. You can visually compare the old and new fibers now. If the old fiber is
totally broken, no light is seen transmitted through it, when one end of the
fiber is pointed towards a lamp or other light source. If there are only
fractures in the fiber, the light is dim at the other end of the fiber.
6. Try to place the new fiber exactly in the same place as the original one
was. Tighten the two attachment screws mentioned.
7. Perform steps 3 and 4a & 4b under the title 8.4.2 Replacement.
8. Perform the Compensation adjustments, all steps under the title 8.4.3
Compensation adjustments.
9. Turn the power off. Then start the Ceilometer again and verify that it is
operating properly.
 Loading...
