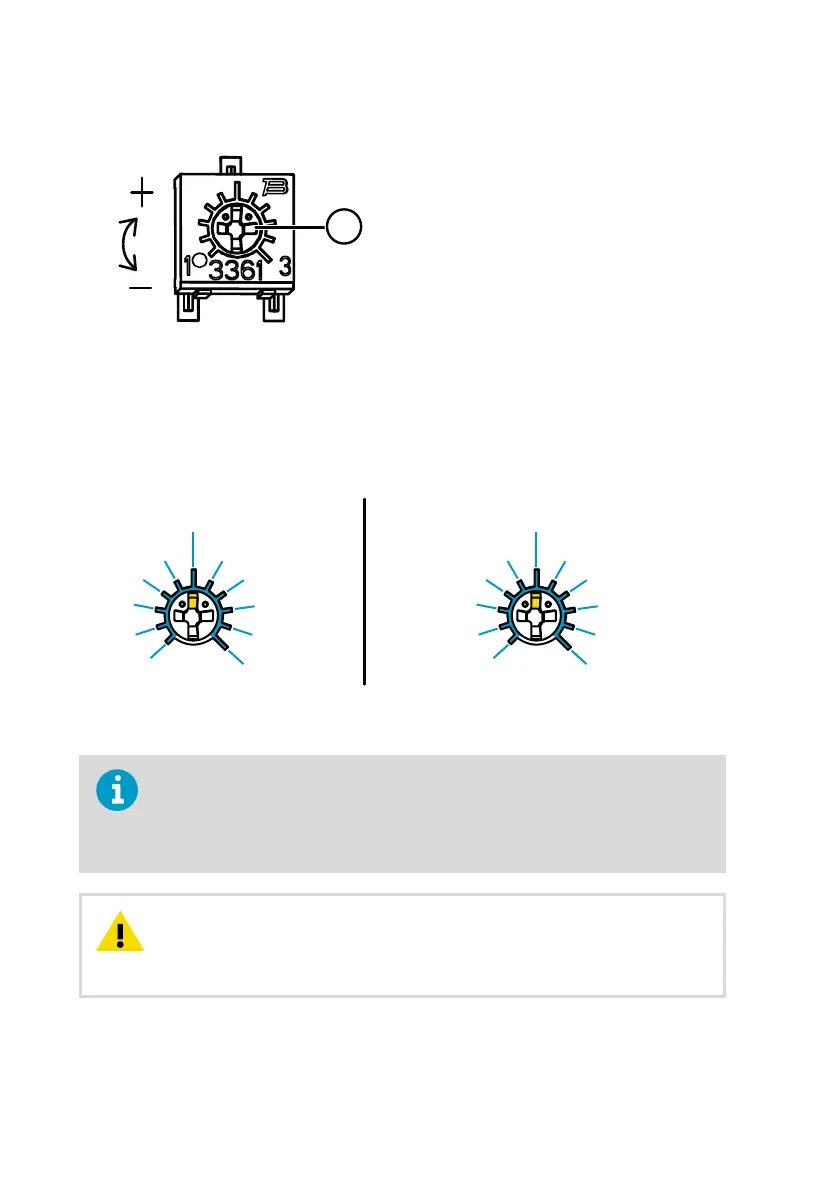
2.5.4 Trimmers
Figure 5 Component Board Adjustment
Trimmer
1 Use a Phillips head screwdriver (PH0)
to rotate the RH or T adjustment
trimmer. To increase the measurement
output value, rotate the trimmer
clockwise. To decrease, rotate
counterclockwise.
Note that there is a slight delay before
the measurement output changes
after rotating the trimmer.
You can adjust the transmitter's RH or T measurement output with the trimmers on the
component board. During trimmer adjustment, the output of the transmitter is corrected using
the trimmers until the output matches the known value of a reference.
±0 %RH
−1 %RH
−2 %RH
−3 %RH
−4 %RH
−5 %RH
+1 %RH
+2 %RH
+3 %RH
+4 %RH
+5 %RH
±0 °C
−0.06 °C
−0.12 °C
−0.18 °C
−0.24 °C
−0.3 °C
+0.06 °C
+0.12 °C
+0.18 °C
+0.24 °C
+0.3 °C
RH: −5 %RH ... +5 %RH T: −0.3 °C ... +0.3 °C
RH T
Figure 6 RH and T Trimmer Adjustment Ranges (Indicative)
You can only calibrate the relative humidity measurement (RH) and temperature
measurement (T). Other parameters (available for HMD62) are calculated
internally based on RH and T. Check that the output selection DIP switch is set to
RH when making adjustments with the physical trimmer; when using the Insight
PC software, set all DIP switches to the OFF position.
If you use the Insight PC software to adjust the measurement or to
restore the factory settings, always return the physical trimmer to the middle
position before starting. When you make an adjustment with Insight, the
position in which the trimmer is at that point is set as the ±0 point.
CAUTION!
HMD65 User Guide M212243EN-A
10

 Loading...