Section 5 - Operation MC095 - MCP-8 Control Unit
62
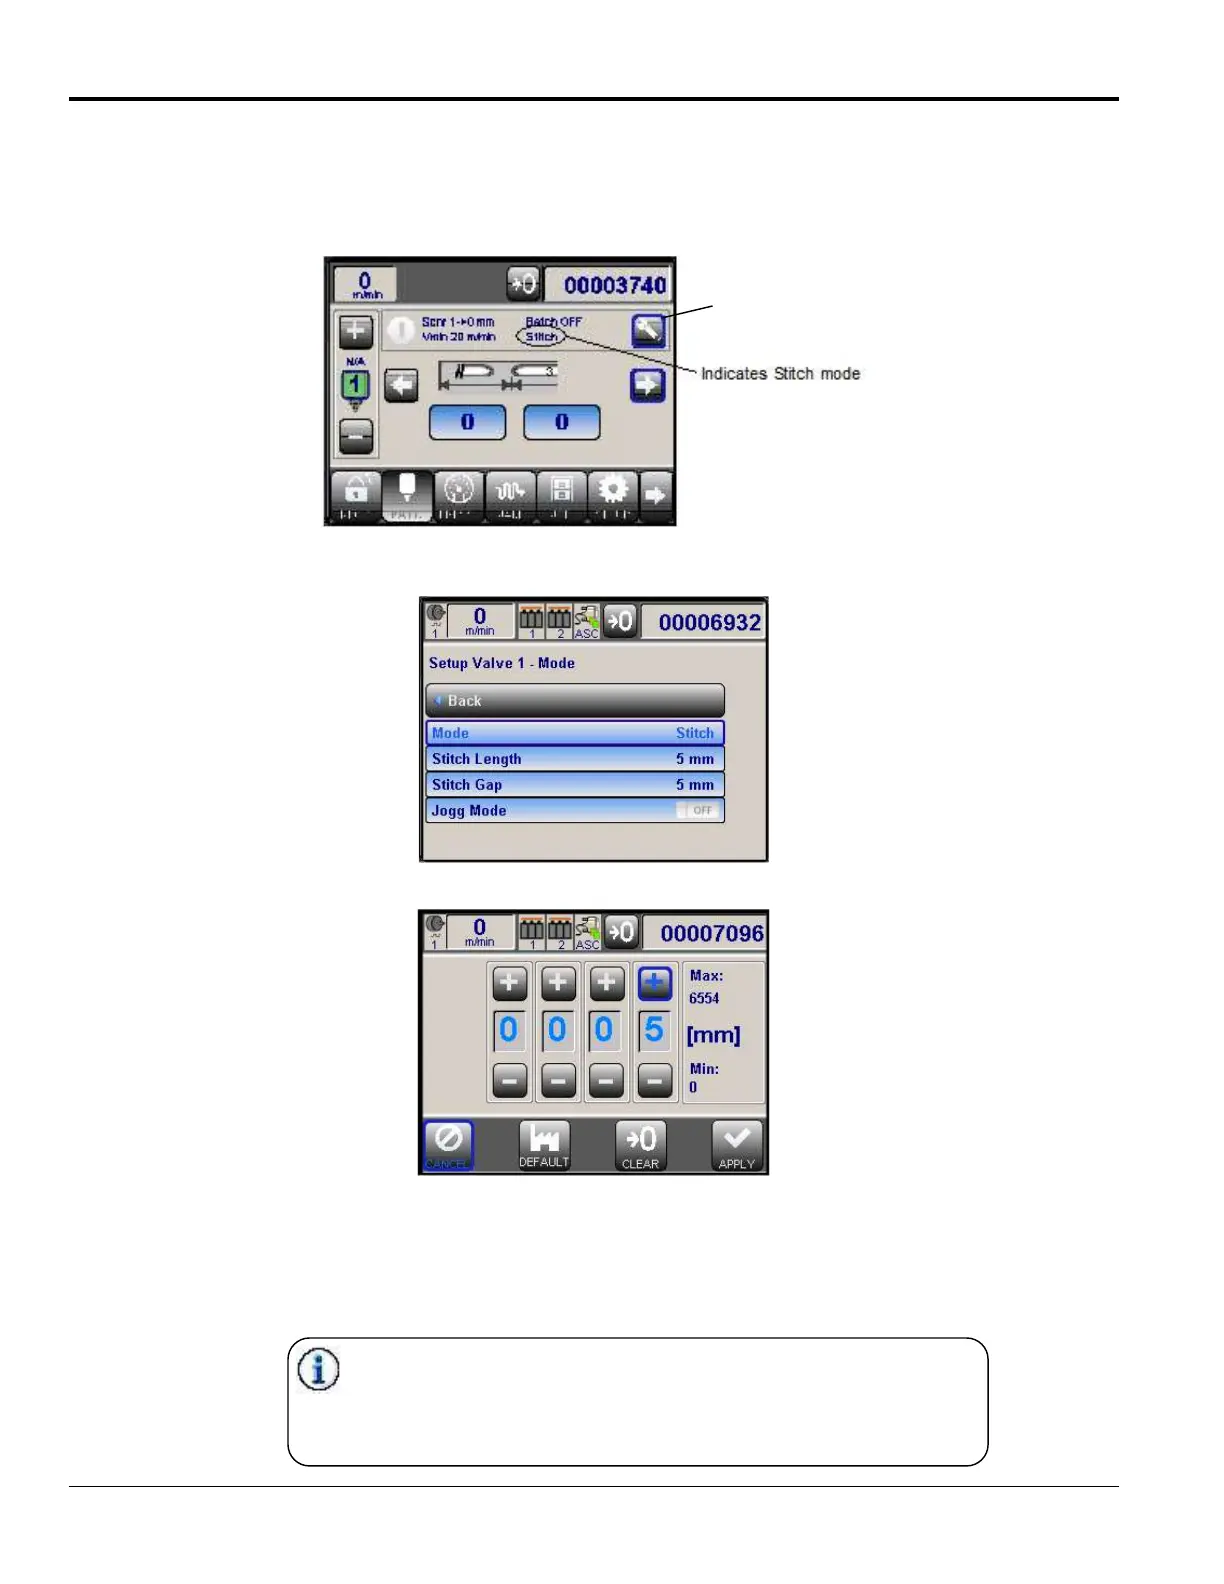
Set the Pattern Menu Information - Continued
2. Stitch Mode is very similar to Standard Mode, with the exception that the glue “patterns” are applied in a
stitch-like arrangement of smaller beads and gaps. The beads and gaps are entered in units of length.
a. To change a bead or gap length, press the Pattern Setup button. Select “Mode.” The Mode Menu
opens.
b. Select “Stitch Length” (bead) or “Stitch Gap” to edit that value. A thumbwheel sub-menu opens.
c. After changing the value, select “Apply” to set the changes.
3. Continuous - Applies adhesive continuously when speed is higher than the Vmin setting.
4. Auto - Applies a strip of adhesive based on the length of the scanner signal. Input the start delay (length
from the leading edge of the product to the beginning of the glue line) and the end delay (the end of the
glue line to the trailing edge of the product).
The minimum glue pattern lengths depend upon the valve type, due
to the varying amount of time it takes to open the valve.
The minimum would be approximately 2 mm for an MX valve; 5mm
for cold glue valves.
The maximum is 6554 mm.
 Loading...