VECTRIX VX-2 SERVICE MANUAL
Installation Procedure
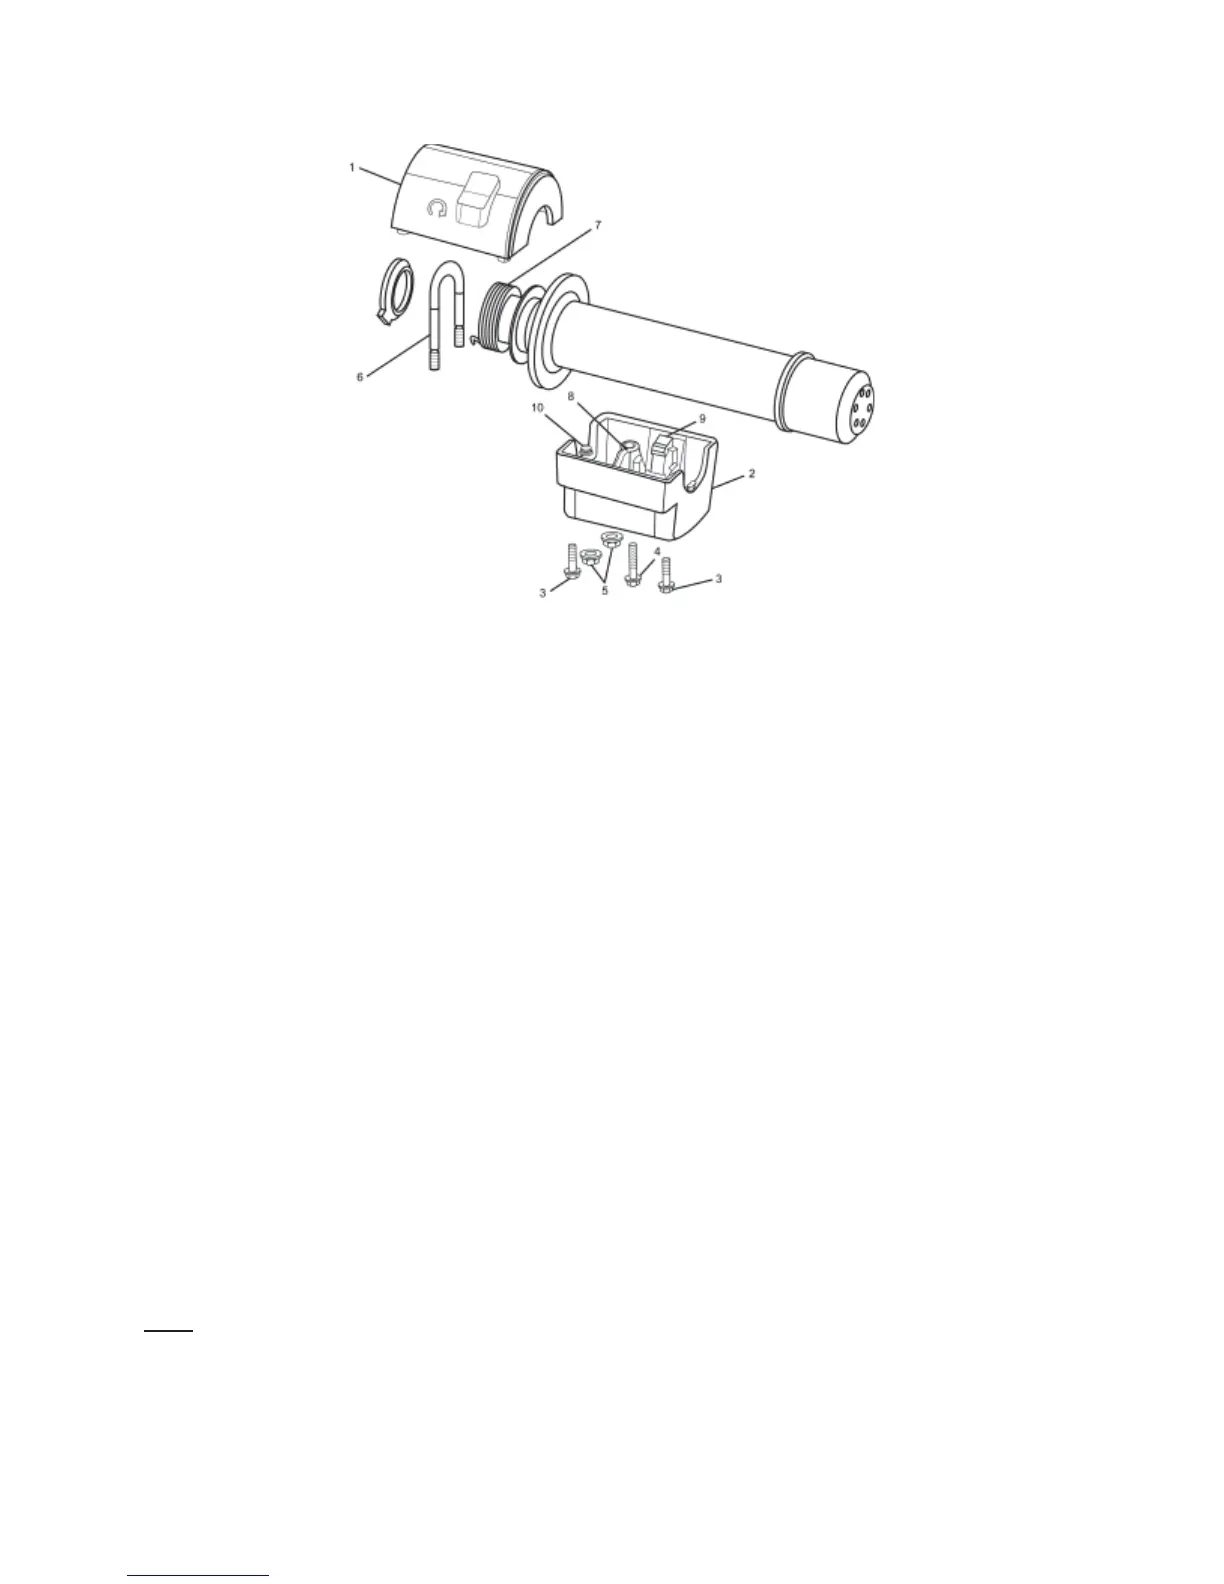
1. Install the U-Bolt into the box and start one of the nuts on the first thread of the rear stud of
the U-Bolt.
2. Slide the assembly onto the handlebar; ensure that the kill switch harness is installed into the
slot of the lower box.
3. With the lower box pivoted away from the handlebar slide the throttle assembly onto the
handlebar.
4. Position the return spring (7) onto the spring post (8) of the lower box and twist the throttle
until the throttle stop is resting on the lower box throttle stop (9).
5. Ensure that the tab (10) on the bottom of the lower box is into the hole in the handlebar.
6. Using tool 01545, install the other U-Bolt nut and tighten both nuts.
7. Twist the throttle to ensure free movement and that it returns to a neutral position.
8. Using 8mm Hexagonal Socket S02445, install the kill switch cover onto the box and install the
3 screws, tighten. Alternate tightening of the 2 nuts until reaching a torque value of 2 Nm.
9. Check the Regen Throttle adjustment. Refer to Throttle Position Checking Procedure.
Note
: If needed, to remove the old throttle position magnet sensor, install the new sensor
magnet and screw it in until lightly seated, then back out 1 full turn. Continue to unscrew the
throttle position magnet sensor until the throttle is properly aligned.
Version 1.0/May 2011
VECTRIX, LLC