To turn on the appliance
1
Connect both AC power connectors on the rear panel of the appliance to two
main AC power supply outlets.
2
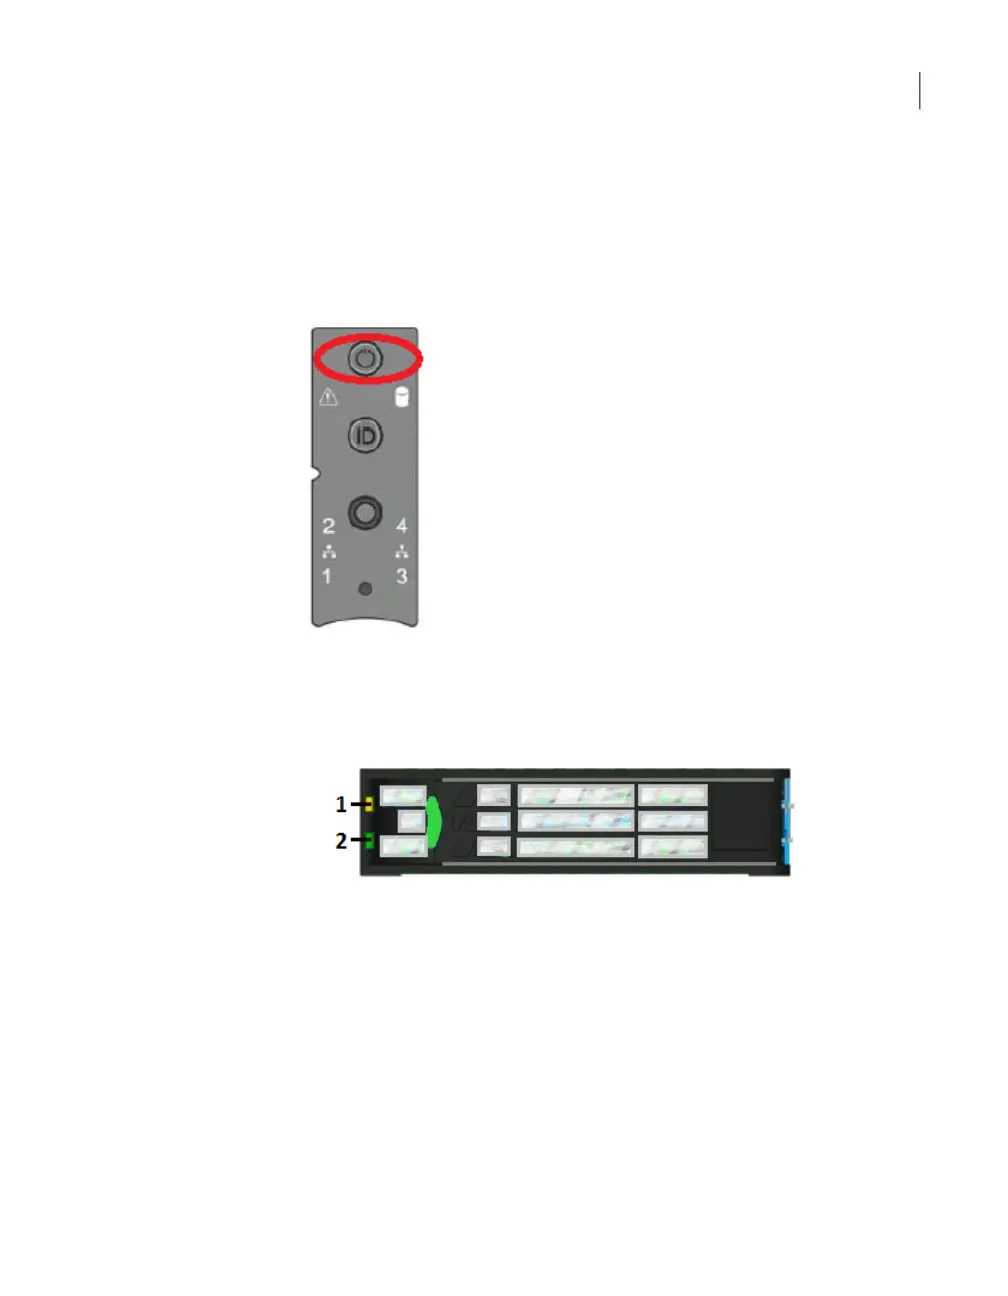
Turn on the appliance, using the power button which is located on the right
side of the front panel.
3
Determine if the appliance is running properly.
■ Check the Status LED (1), and Activity (2) LED on the installed disk drives
on the front panel.
The Status LED (1) should not be lit. The following indications are possible:
■ A solid, amber, LED indicates a disk fault.
■ A blinking, amber, LED indicates that a RAID rebuild is in progress.
The Activity LED (2) indicates the following:
■ The LED is not lit when the disk has spun down, although power is on.
■ The LED is solid green when there is no disk activity, although power is on.
■ The LED blinks green when the disk spins up.
■ The LED blinks green occasionally when commands are processed.
77Adding 3U16 storage shelves to an operational NetBackup 5230 Appliance
Turning on the hardware and verifying operation

 Loading...


