10
Chapter 2 Videonics MX-Pro User Guide
Q
UICK
S
TART
S
TEPS
Setting Up
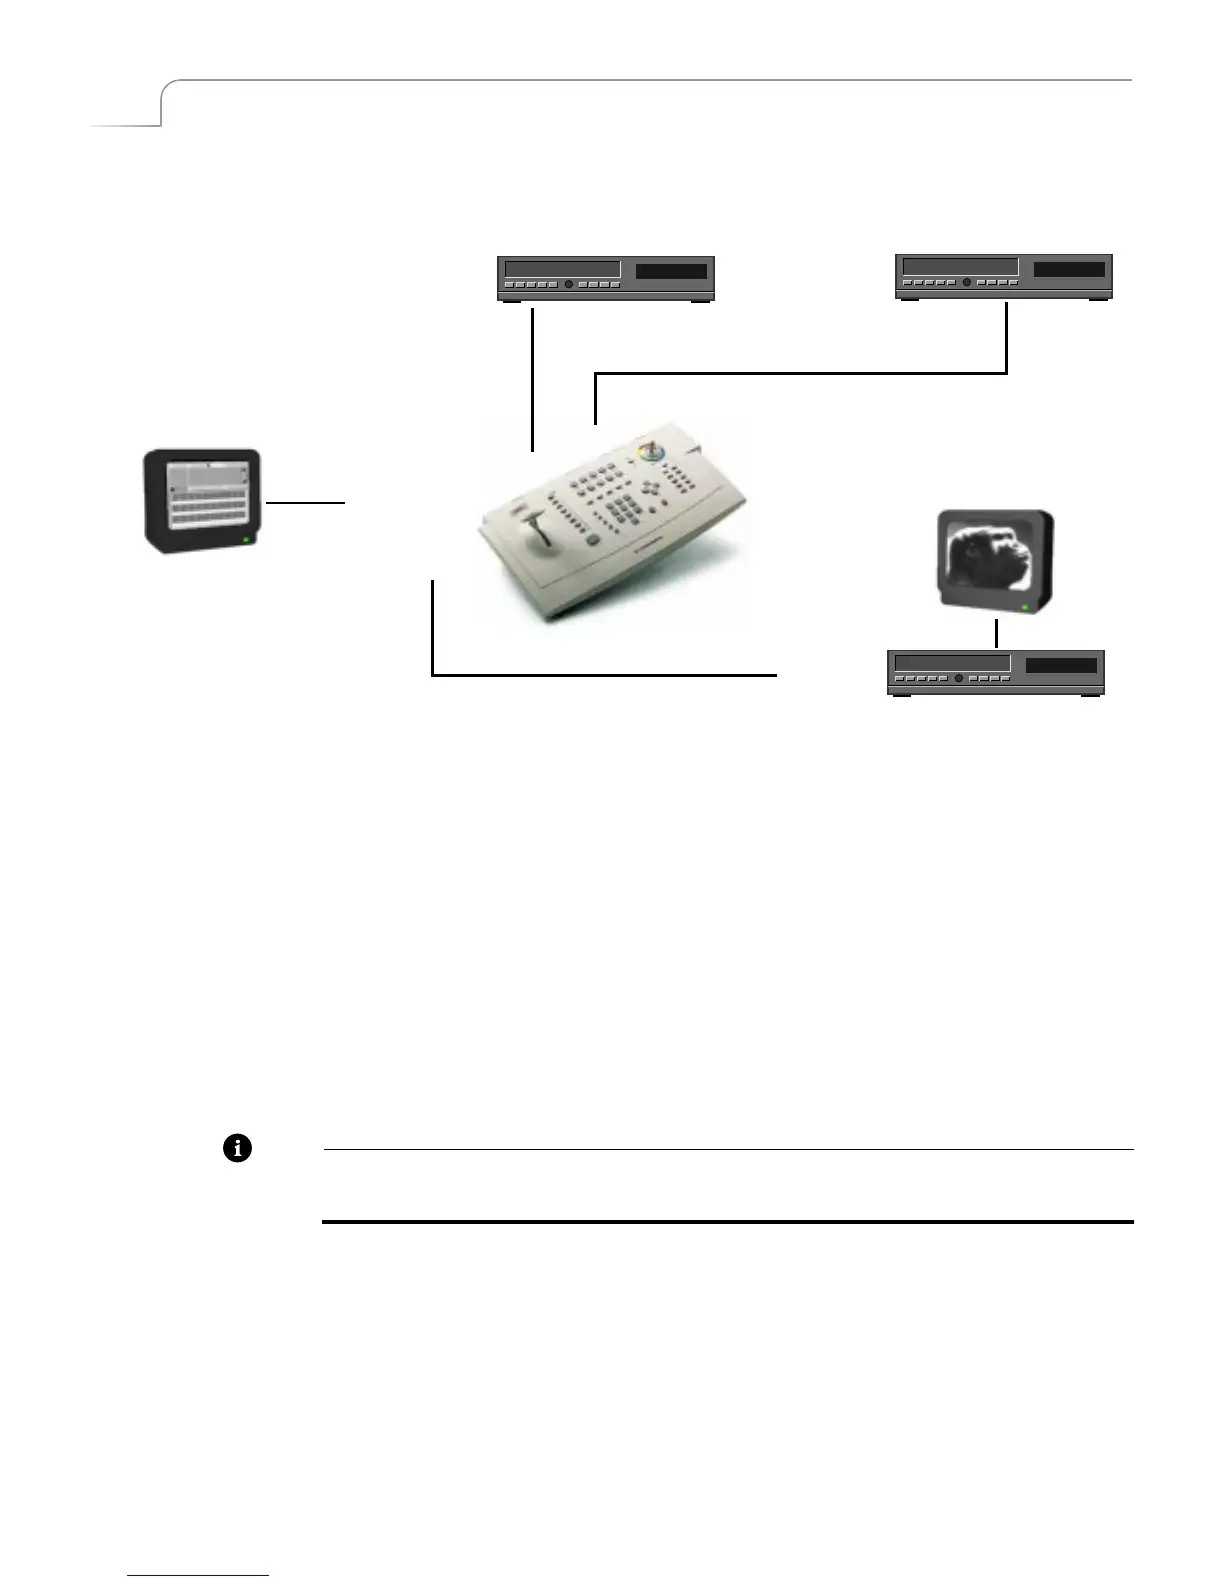
¨
Connect a COMPOSITE-type monitor to MXPro’s PREVIEW OUT jack.
¨
Connect an Input Source (such as a VCR or camcorder) to MXPro’s IN 1 jacks.
¨
Connect a second Input Source to MXPro’s IN 2 jacks.
MXPro is set up, by default, to expect S-Video (Y/C) devices to be connected to the IN
1, IN 2, IN 3, and IN 4 input jacks. If you connect Composite devices to any of the
jacks, you must tell MXPro this fact. See “Using the Route Function” below after
completing the following steps.
¨
Connect a VCR’s VIDEO IN and AUDIO IN jacks to the OUT jacks on the MXPro rear
panel. This is the device where you record the program.
¨
Connect a television or monitor to the recording VCR according to their instruc-
tions. Having this monitor available lets you see exactly what is being recorded (or,
output).
Note
These instructions assume a two-monitor setup. If you are using only one monitor, con-
nect it to PREVIEW OUT.
¨
Connect the MXPro power supply to the power supply jack on the rear panel.
¨
Connect the MXPro’s power cord to a suitable outlet.
¨
Turn on all devices (the MXPro power switch is located on the right end of the unit)
and let the tapes roll.
00:00
00:00
00:00
Preview Monitor
Input
Source
Input
Source
Output Device
Output Monitor
PREVIEW OUT
VIDEO IN
AUDIO IN
OUT Jacks
IN 1
IN 2