55
Transitions Selecting Sources to Use During Transitions
SELECTING SOURCES TO USE DURING TRANSITIONS
An important step in setting up a transition is to identify the CURRENT and NEXT
sources. Use CUT and NEXT to choose the two sources. MXPro provides feedback in a
couple of different ways to confirm your choices.
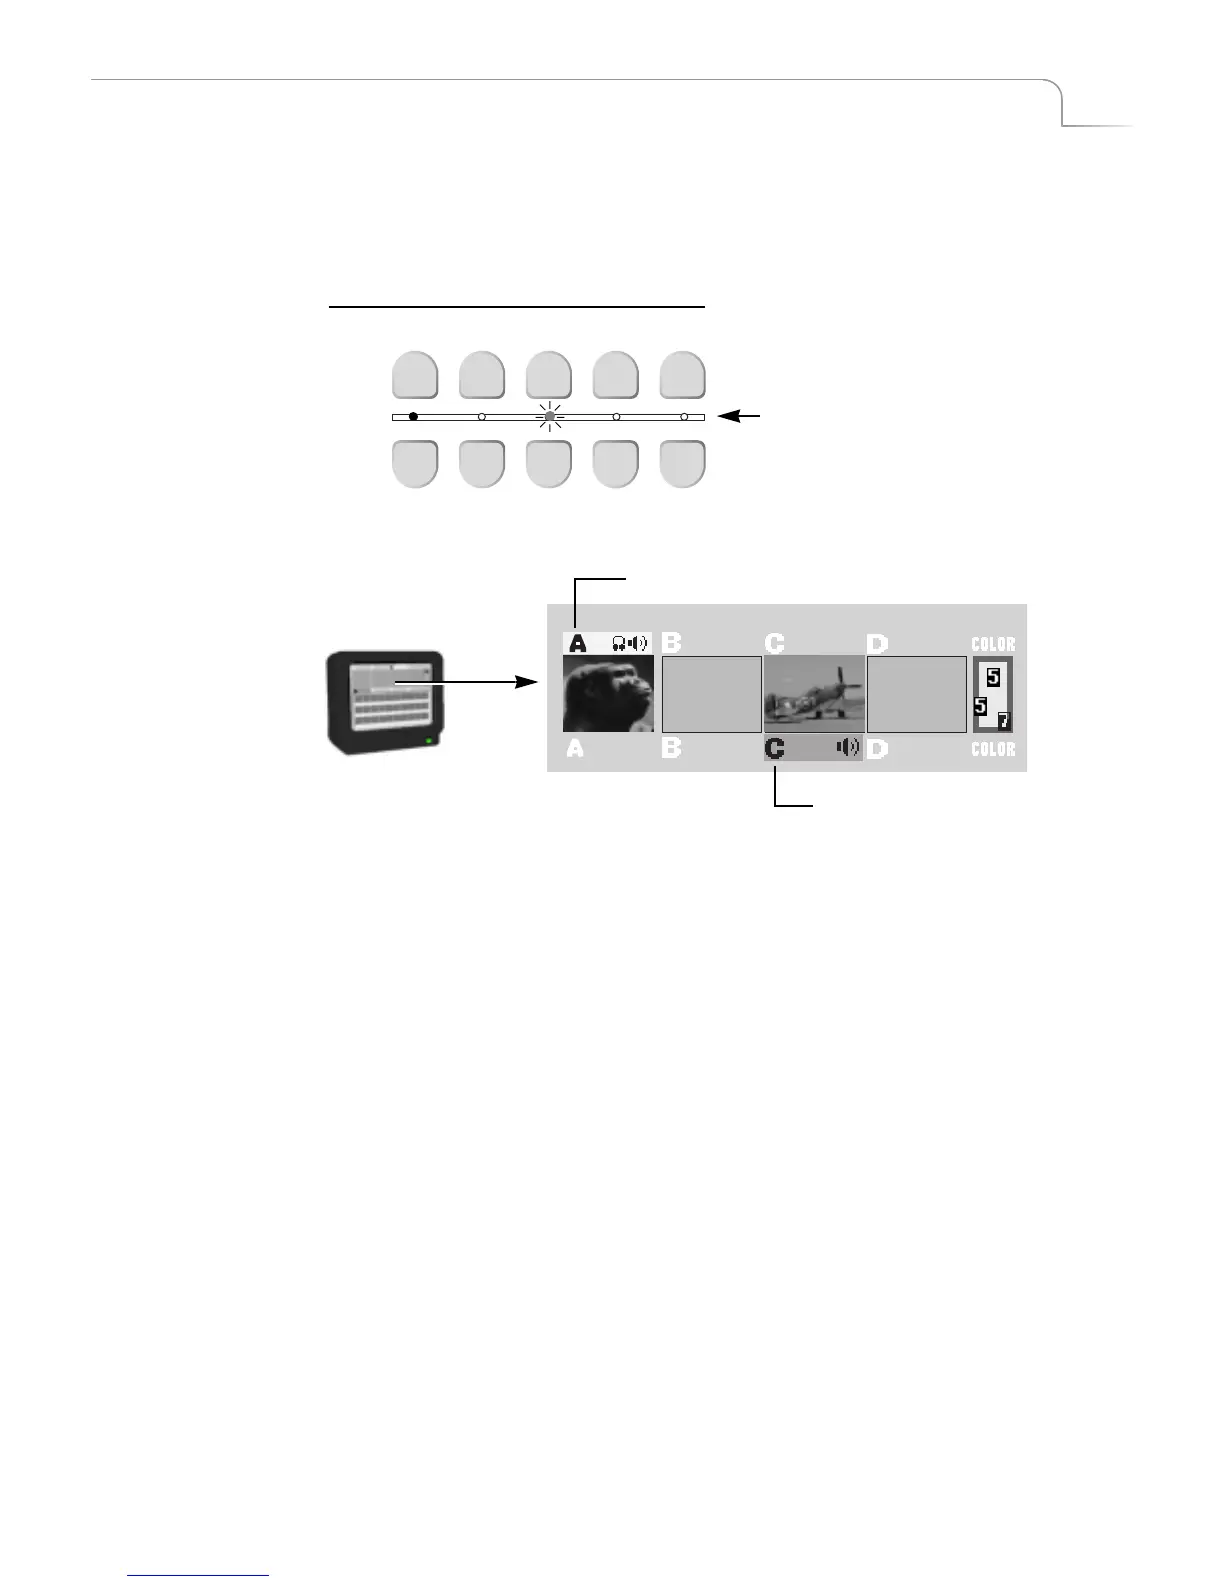
MXPro identifies the CURRENT source by a yellow highlight on the Preview screen
and a steady light beneath the corresponding CUT button. It identifies the NEXT
source by a green highlight on the Preview screen and a flashing light above the cor-
responding NEXT button.
If you make CURRENT and NEXT the same source, the source light (between the two
rows of buttons) flashes as though it were just the NEXT source.
Setting the CURRENT Source
In many cases you don’t need to select the CURRENT source because the ending source
from the previous transition automatically becomes the new CURRENT source (see the
diagram on page 51). However, if you want to change the CURRENT source, press the
corresponding CUT button. For example, pressing CUT/D makes D the CURRENT
source, and the Program monitor immediately displays D’s signal.
Setting the NEXT Source
To specify the NEXT source, press the corresponding NEXT button. For example, to
make D the next source, press NEXT/D.
CUT
NEXT
A B C D COLOR
A B C D COLOR
The lights between the rows of CUT and
NEXT buttons act as indicators. A steady
light identifies the CURRENT source (A) –
a flashing light identifies the NEXT
source (C).
Selecting Sources and Getting Feedback
Yellow highlights the CURRENT source (A)
Green highlights the NEXT source (C)