12
Chapter 2 Videonics MX-Pro User Guide
Using the Route
Function
The Route functions ensures that MXPro understands where your input devices are
connected on the rear panel. If you connect S-Video (Y/C) devices to the IN 1, IN 2, IN3,
and/or IN 4 jacks, re-routing is not necessary. Go on to the next section, “Running the
Demo”. Otherwise:
¨
After starting MXPro with all devices connected and turned on, press ROUTE to dis-
play the Route screen.
¨
Press LEFT ARROW. Note that the S highlight (for S-Video, or Y/C) under IN 2
moves left to highlight the V (Composite Video) option.
¨
To route other inputs to different channels, press NEXT/X, where X is the channel
to which you want to route. Then repeat the preceding step.
¨
Press ROUTE again to exit from the Route screen.
Running the Demo
The Demo gives you a quick look at some of MXPro’s important features and assort-
ment of transitions.
¨
Press SHIFT+DEMO.
You should see the two sources alternating, with a variety of transition effects in
between.
¨
Press any key to stop the Demo whenever you want.
MUTE
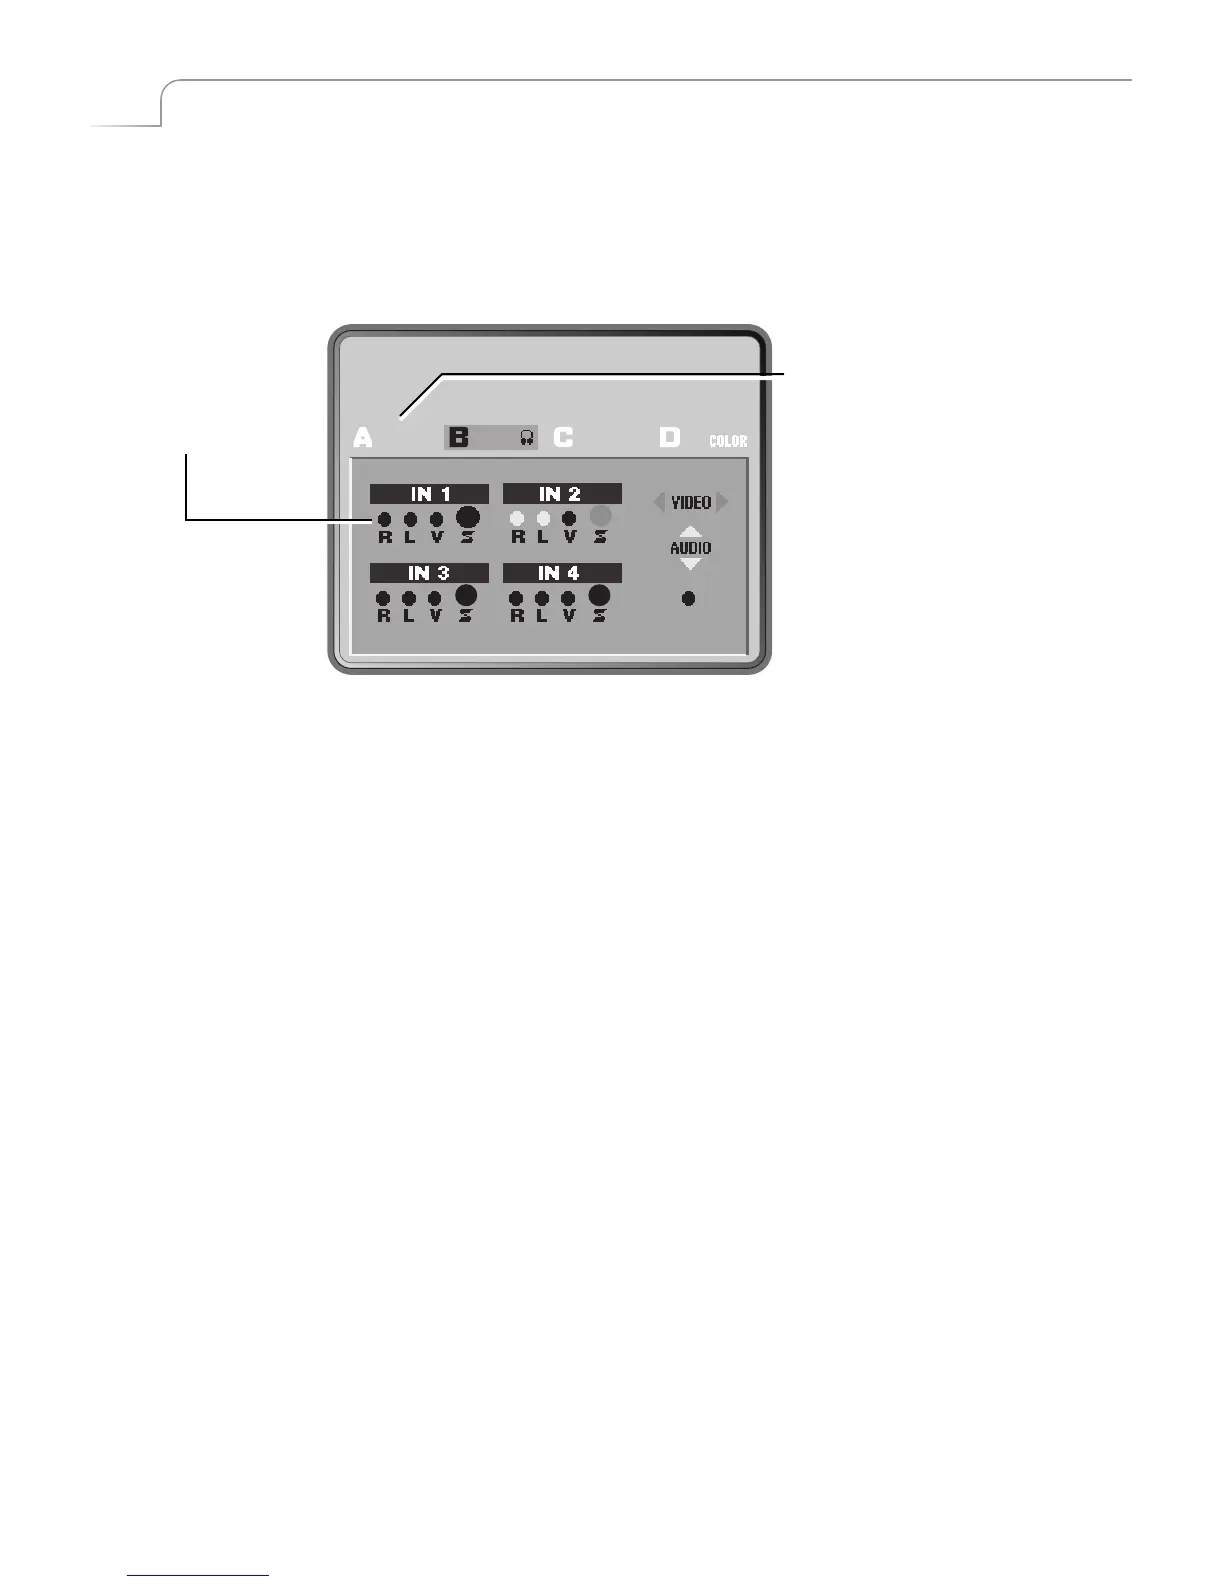
Press NEXT/X where X is the channel (A,
B, C, or D) TO WHICH you want to route
the signals. MXPro highlights the
channel you select.
This display
indicates the S-
Video (Y/C) and R/L
audio connections
from IN 2 are routed
to Channel B.
The following instructions explain
how to change the video routing for
channel B from the S-Video (Y/C)
connection on IN 2 to the Composite
connection on IN 2.