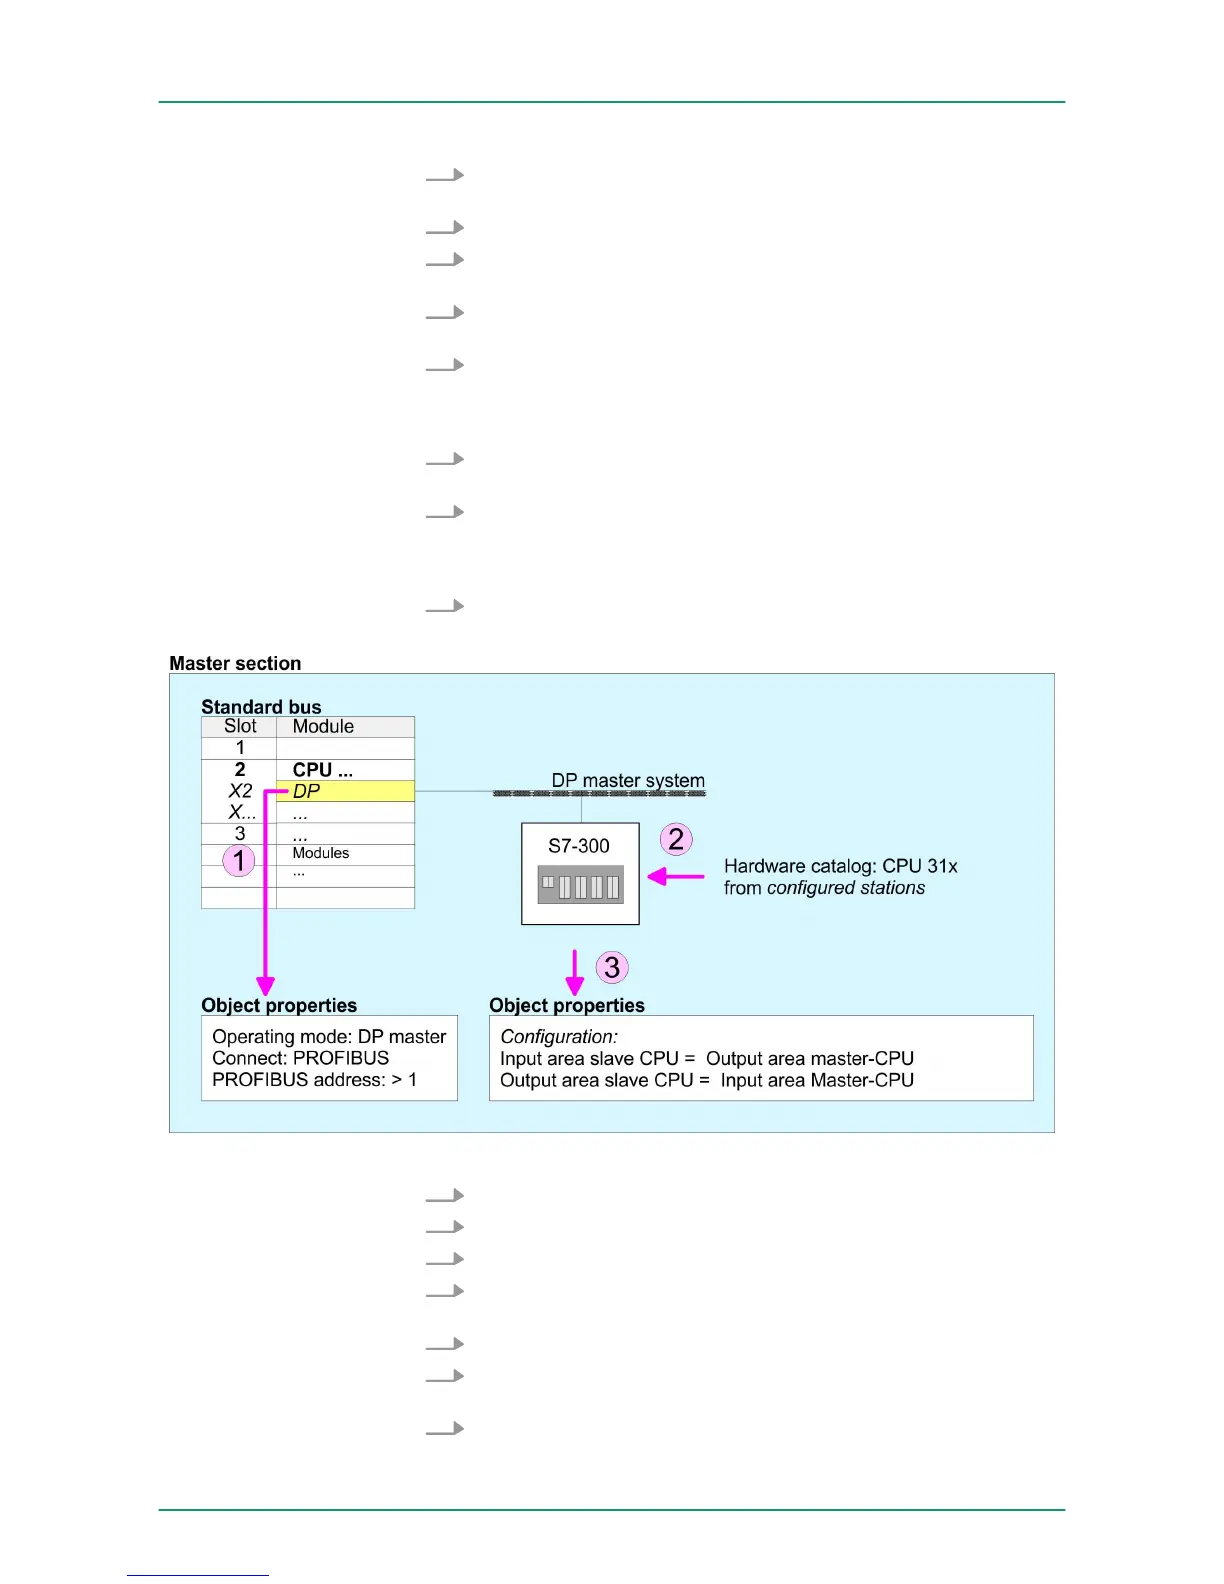
4. Open the properties dialog of the DP interface of the CPU by
means of a double-click at ‘DP’ .
5. Set Interface: type to "PROFIBUS".
6. Connect to PROFIBUS and preset an address (e.g. 2) and con-
firm with [OK].
7. Switch at Operating mode to "DP master" and confirm the dialog
with [OK].
8. Connect your slave system to this master system by dragging
the "CPU 31x" from the hardware catalog at Configured stations
onto the master system and select your slave system to be cou-
pled.
9. Open the Configuration
at Object properties of your slave
system.
10. Via double click to the according configuration line you assign
the according input address area on the master CPU to the
slave output data and the output address area to the slave input
data.
11. Save, compile and transfer your project to your CPU.
DP master and DP slave are in different projects
1. Create a new project, add a station and configure a CPU.
2. Designate the station as "...DP master".
3. Add your modules according to the real hardware assembly.
4. Open the properties dialog of the DP interface of the CPU by
means of a double-click at ‘DP’ .
5. Set Interface: type to "PROFIBUS".
6. Connect to PROFIBUS and preset an address (e.g. 2) and con-
firm with [OK].
7. Switch at Operating mode to "DP master" and confirm the dialog
with [OK].
VIPA System 300SDeployment PROFIBUS communication
Deployment as PROFIBUS DP slave
HB140 | CPU-SC | 313-6CF13 | GB | 15-50 180