1. Connect your PC to the PB-DP jack X3 of your CPU via a MPI
programming cable.
2. Load your project in the Siemens SIMATIC Manager.
3.
Choose in the menu ‘Options è Set PG/PC interface’.
4. Select in the according list the "PC Adapter (PROFIBUS)"; if
appropriate you have to add it first, then click at [Properties].
5. Set in the register PROFIBUS the transfer parameters of your
PROFIBUS net and enter a valid PROFIBUS address. The
PROFIBUS address
must be assigned to the DP master by a
project before.
6. Switch to the register Local connection.
7. Set the COM port of the PCs and the transfer rate 38400baud
for the MPI programming cable from VIPA.
8.
Transfer your project via ‘PLC è Load to module’
via
PROFIBUS to the CPU and save it with ‘PLC
è Copy RAM to ROM’ on a memory card if one is plugged.
Transfer via PROFIBUS is available by DP master, if pro-
jected as master and assigned with a PROFIBUS address
before.
Within selecting the slave mode you have additionally to
select the option "Test, commissioning, routing".
5.10.2 Transfer via Ethernet
For transfer via Ethernet the CPU has the following interface:
n X5: Ethernet PG/OP channel
So that you may access the Ethernet PG/OP channel you have to
assign IP address parameters by means of the "initialization".
Ä
Chapter 5.7 ‘Hardware configuration - Ethernet PG/OP channel’
on page 51
1. For the transfer, connect, if not already done, the appropriate
Ethernet port to your Ethernet.
2. Open your project with the Siemens SIMATIC Manager.
3.
Set via ‘Options è Set PG/PC Interface
’ the access path to
"TCP/IP ® Network card .... ".
4.
Click to ‘PLC è Download
’ Download ® the dialog "Select
target module" is opened. Select your target module and enter
the IP address parameters of the Ethernet PG/OP channel for
connection. Provided that no new hardware configuration is
transferred to the CPU, the entered Ethernet connection is per-
manently stored in the project as transfer channel.
5. With [OK] the transfer is started.
Proceeding Transfer via
PROFIBUS interface
Initialization
Transfer
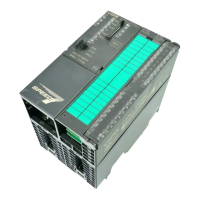
VIPA System 300SDeployment CPU 313-6CF13
Project transfer > Transfer via Ethernet
HB140 | CPU-SC | 313-6CF13 | GB | 15-50 62