35
Channel icon
Channel
indicator
Channel 1 off Channel 1 on
De-activating a
channel
To de-activate the channel, press the Channel key
twice (once if the channel menu is already
selected).
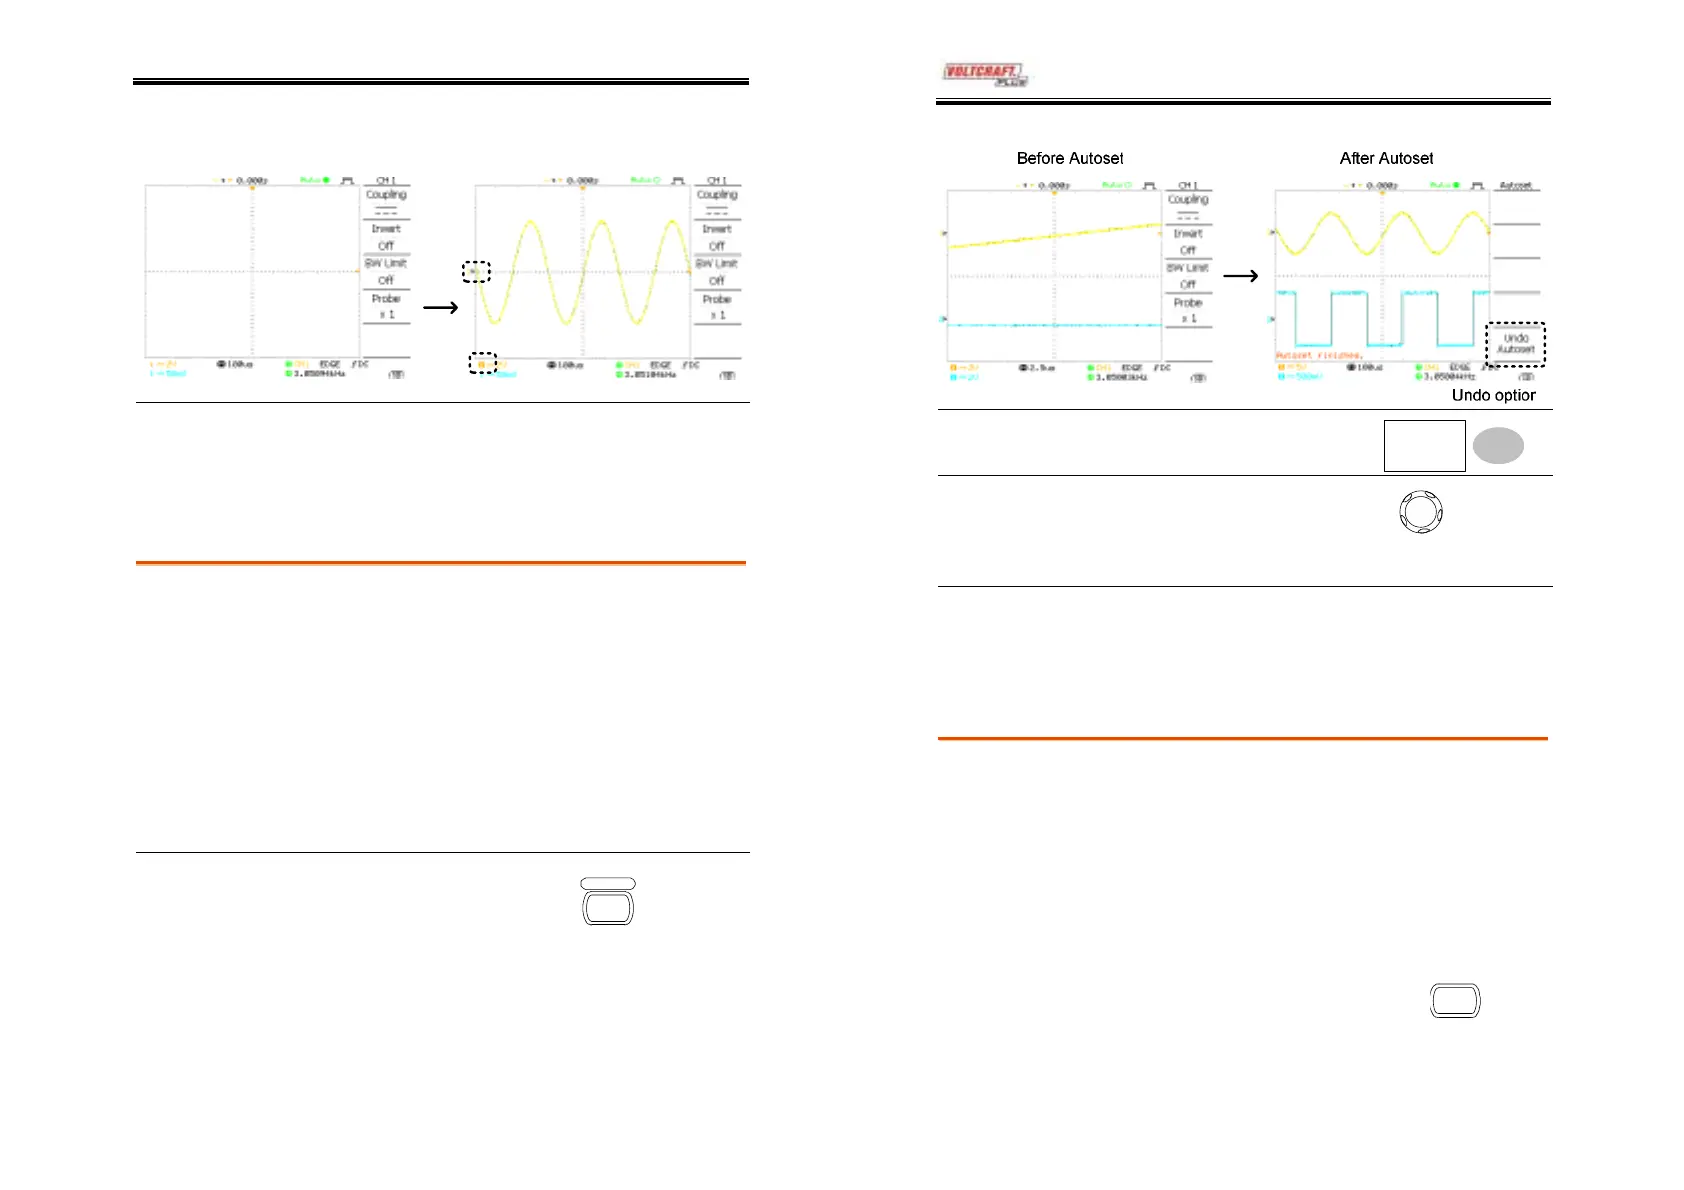
Using the Autoset
Background
Autoset function automatically configures the
panel settings to the best viewing conditions, in the
following way.
• Selecting the horizontal scale
• Positioning the waveform horizontally
• Selecting the vertical scale
• Positioning the waveform vertically
• Selecting the trigger source channel
• Activating the channels
Procedure
1. Connect the input signal to
the oscilloscope and press
the Autoset key.
utoset
2. The waveform appears in the center of the
display.
DSO-4000 User Manual
36
Undoing the
Autoset
To undo the Autoset, press
Undo (available for 5 seconds).
Undo
Adjusting the
trigger level
If the waveform is still
unstable, try adjusting the
trigger level up or down by
using the Trigger Level knob.
LEVEL
Limitation
Autoset does not work in the following situation.
• Input signal frequency less than 20Hz
• Input signal amplitude less than 30mV
Running and stopping the trigger
Background
In the trigger Run mode, the oscilloscope
constantly searches for a trigger condition and
updates the signal into the display when the
condition is met.
In the trigger Stop mode, the oscilloscope stops
triggering and thus the last acquired waveforms
stay in the display. The trigger icon at the top of
the display changes into Stop mode.
Pressing the Trigger Run/Stop key
switches between the Run and Stop
mode.
Run/Stop
(Continued on next page)