Plumbing the instrument 2-7
Identifying instrument tubing
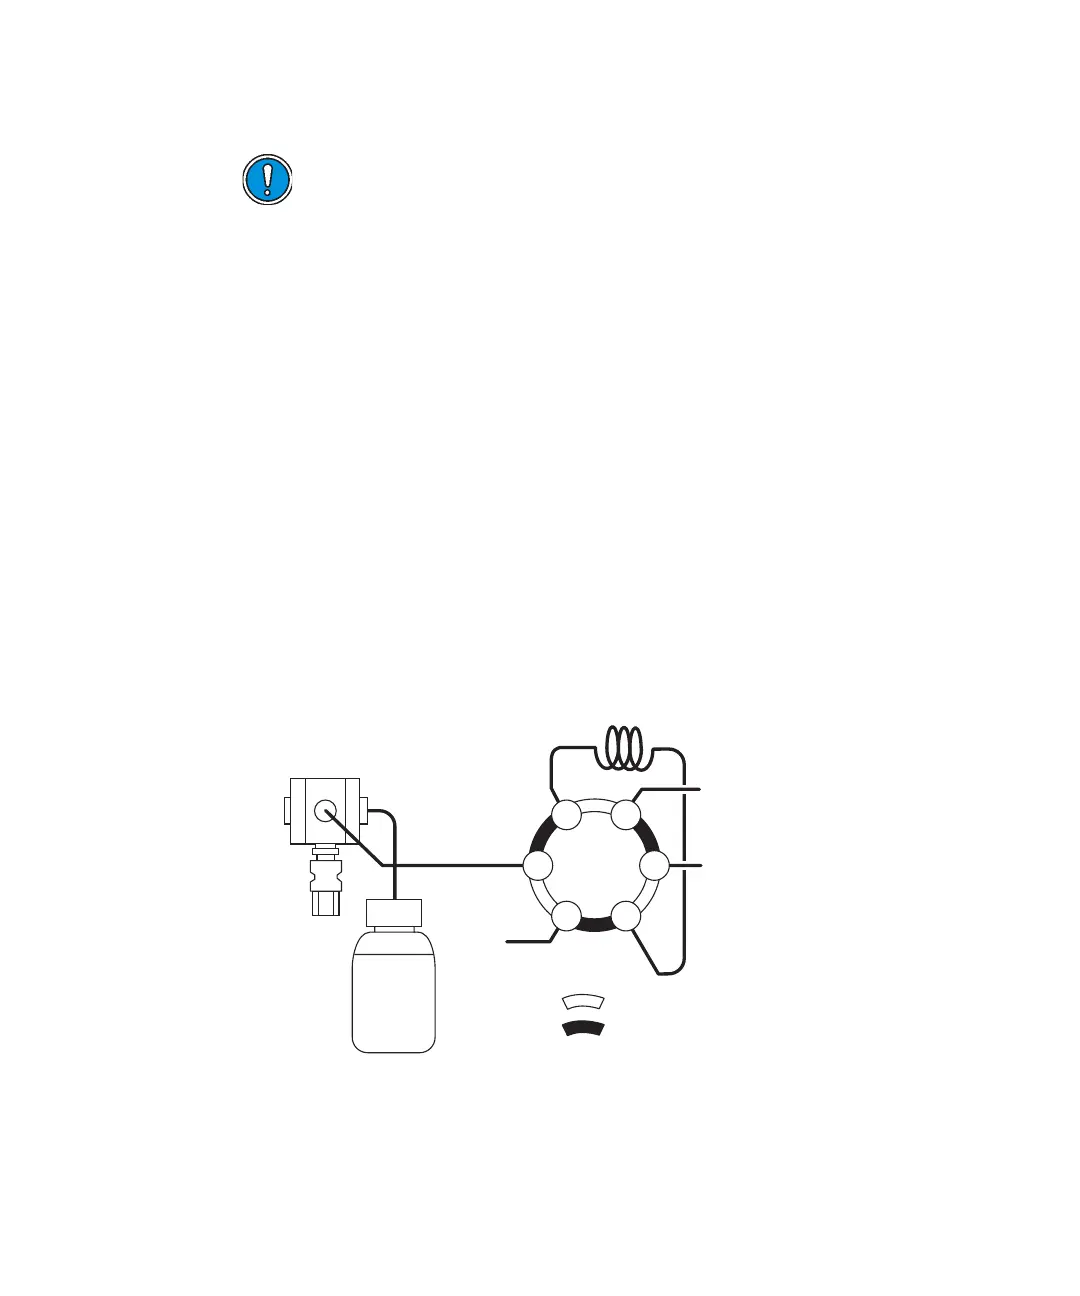
When all components are installed, the following fluid-line connections are
made:
• Clear – Plastic tubing for wash solvent.
• Blue – High-pressure steel tubing, 0.03-inch (0.75-mm) ID; connects the
instrument to the pump.
• Red – High-pressure steel tubing, 0.009-inch (0.25-mm) ID; connects the
instrument to the column.
• Drain – Two 0.25-inch clear lines; attach to the drip trays on the
instrument’s bottom. One drains solvent and sample spills; the other
drains water from the cooler as well as sample spills and mobile phase
leaks.
Fluid-line connections
Recommendation: If air bubbles appear in the syringe or injection
precision is poor, ensure that the fittings on the syringe valve, needle
Caution: To avoid extreme environmental conditions, which can
impede instrument performance, choose an indoor operating
location away from direct heat, sunlight exposure, excessive dust,
and shocks.
5
1
2
3
4
6
Wash bottle
INJECT position
LOAD position
Needle
assembly
Column (red)
Pump (blue)
Loop
Dispenser
(clear)
Syringe
valve