Removing or replacing the injection valve rotor seal 3-5
Removing or replacing the injection valve rotor seal
The plastic rotor seal of the instrument’s injection valve requires periodic
cleaning and replacing.
Tip: While injection frequency and solvent cleanliness determine the
seal’s cleaning and replacement intervals, most seals require annual
replacement.
To remove or replace the injection valve rotor seal
1. Disconnect all tubing from the valve.
Exception: Keep the sample loop intact.
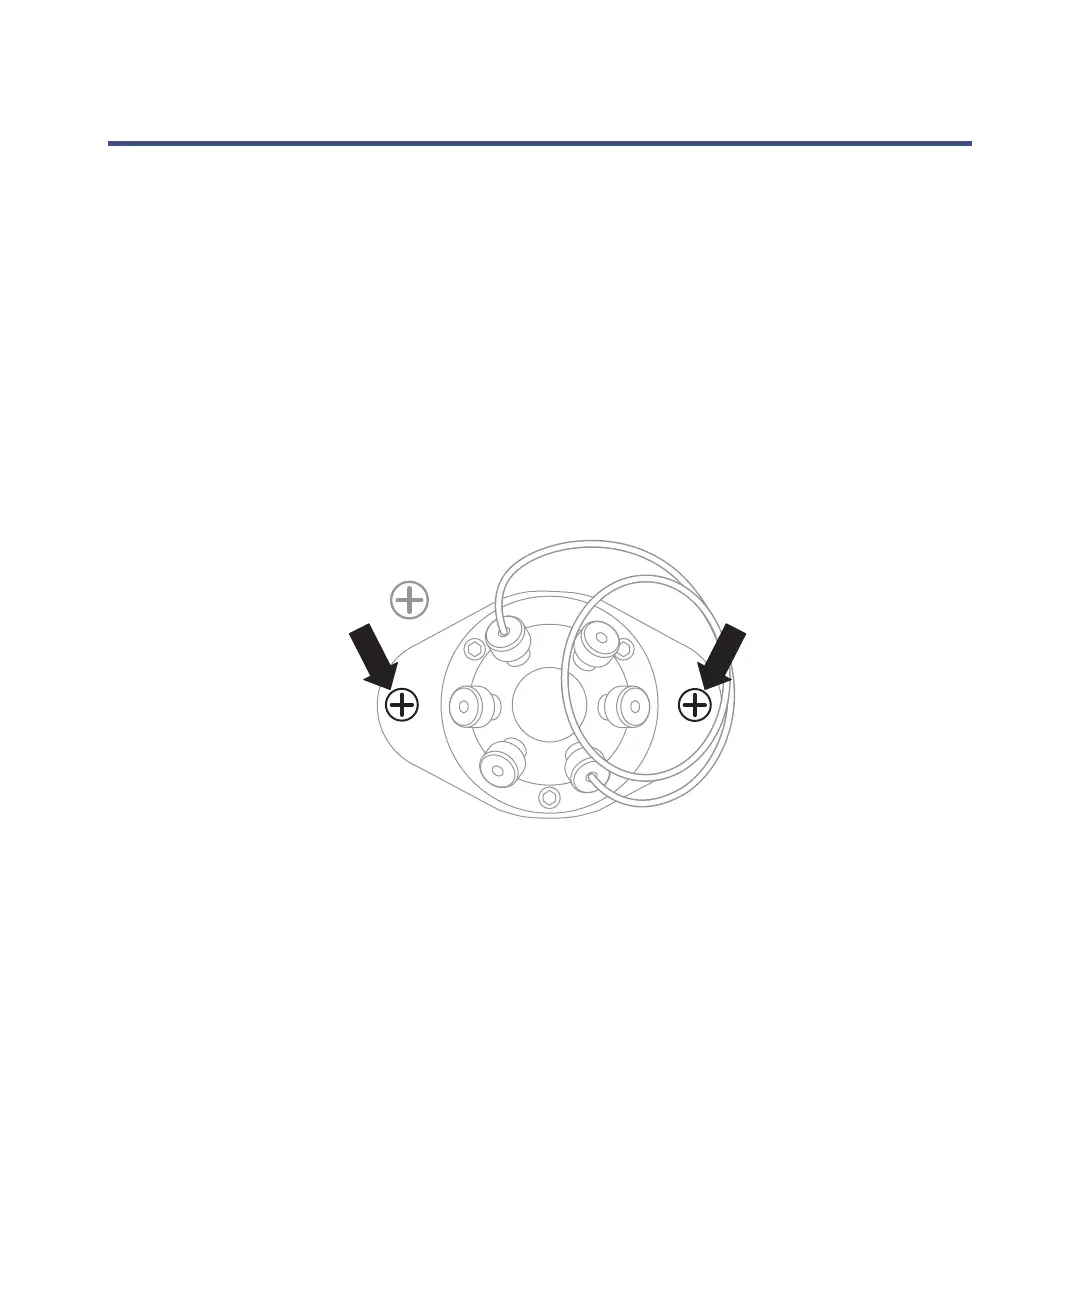
2. Using a #2 Phillips
®
screwdriver, remove the two screws on either side of
the valve body.
Tip: The two removed screws secure the plastic valve flange to the
instrument’s chassis. Do not remove the screw that is diagonal to the
valve on the sheet metal.
3. Using a 2.5-mm hex key wrench, remove the three screws from the
stator part of the valve.
Recommendation: Loosen each screw a half-turn each in rotation until
all screws disengage.
4. Gently open the valve, and remove the rotor seal.
5. Clean and/or replace the seal.
6. Place the stator back on the rotor, and fasten the screws.