Waves eMotion LV1 Classic User Guide | Chapter 2: Channel
Window Window
Channels and Presets
S
ELECTING A
C
HANNEL
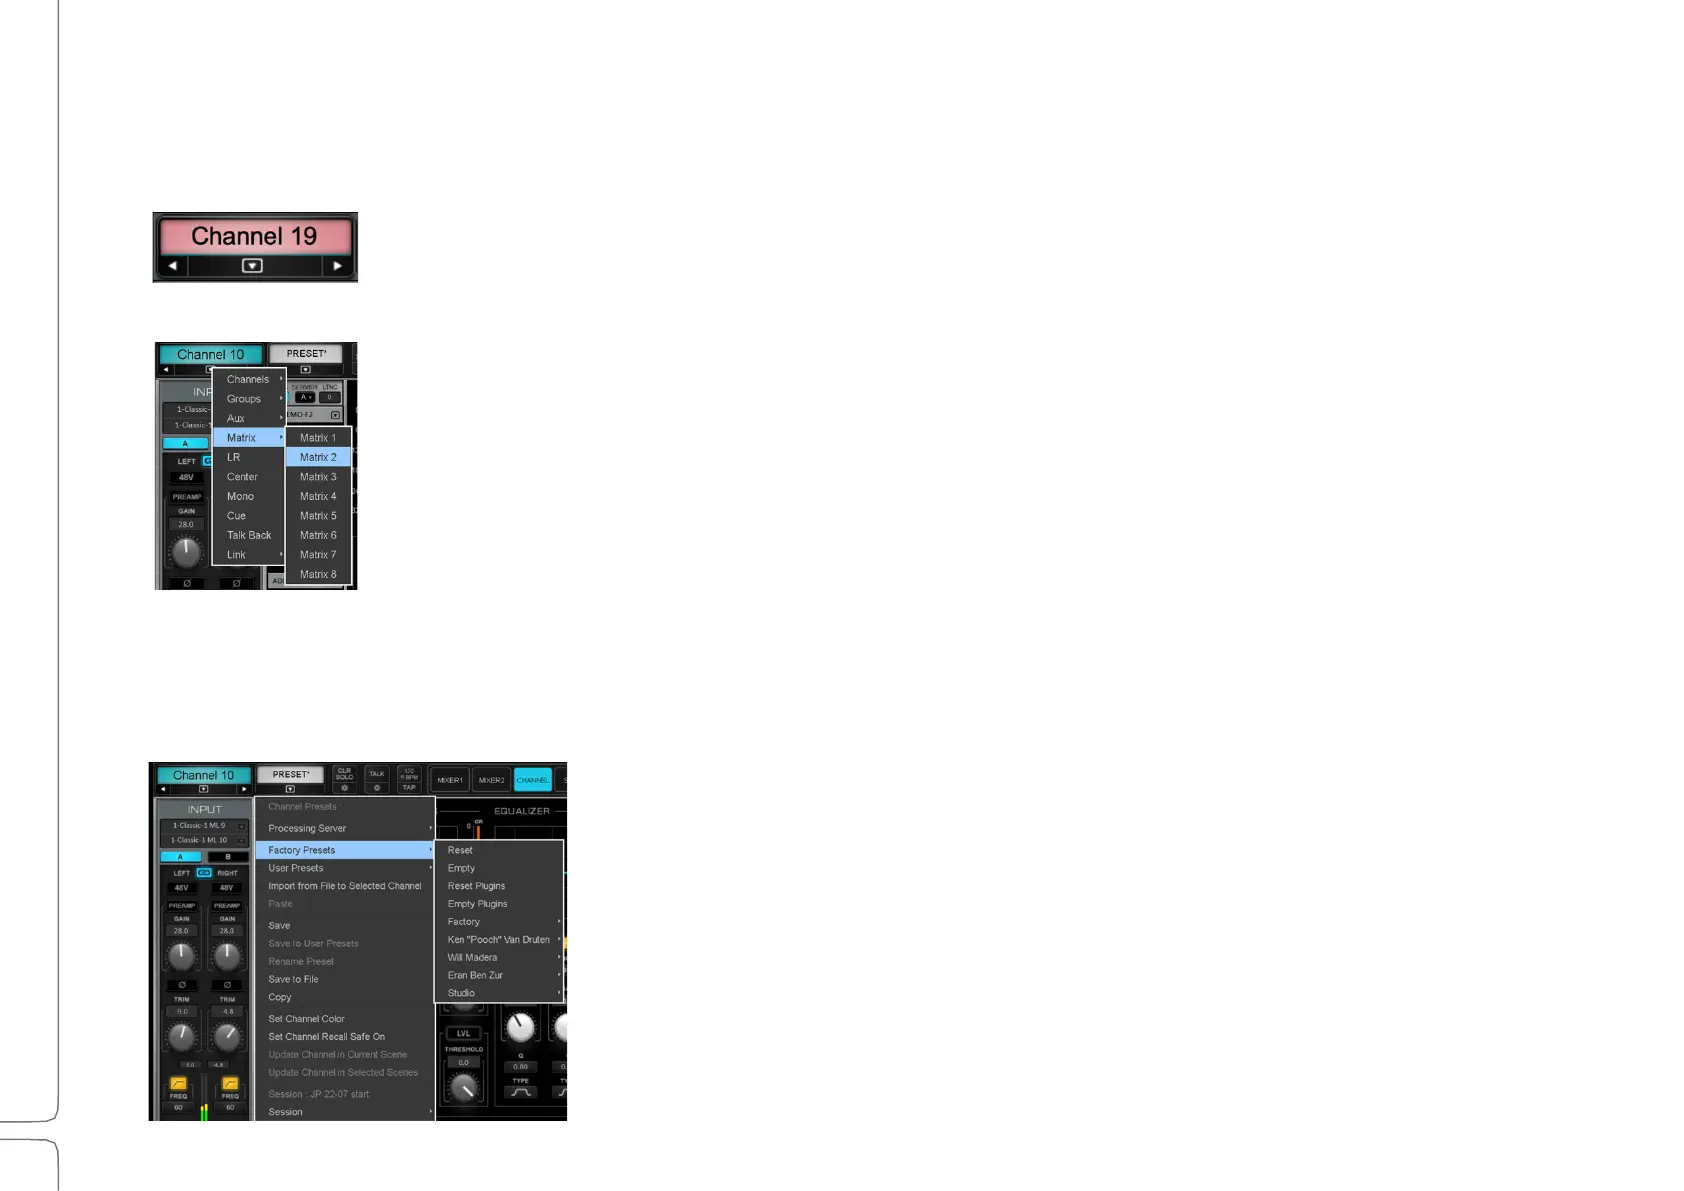
The selected channel is focused in the Channel mixer. To name a channel, double-click on the box. The
channel name can also be changed in the Mixer and Patch windows. The selected channel name is
always shown in the Name box on the left side of the Top Bar.
A channel can be selected in several locations:
1. Mixer Window: Touch a channel strip on the screen. The channel strip becomes highlighted,
indicating that the channel is selected.
2. Fader Bank: Use the Channel Select button at the top of a channel strip.
3. Fader Bank or Screen: Touch a fader (Channel Select Follow Faders must be On in the U/I
Settings page).
4. Fader Bank or Screen: Touch a Solo button (Channel Select Follow Solo/Cue must be On in the
U/I Settings page).
5. Top Bar: Use the Channel Navigation menu in the Top Bar to directly access a channel. You can
also use the right/left arrows to move the selection up or down one channel at a time. This
menu is always visible.
C
HANNEL
P
RESETS
Channel presets are managed in the Preset menu in the Top Bar. These
presets allow you to immediately load all of a channel’s settings (i.e.,
audio routing, assignments, plugins and their parameters, aux sends, and
control groups) and then adjust its parameters. You can save these
settings as a new preset.
Complete sessions can be created from channel presets, or you can
copy/paste channels to use as starting points for other channels. You can
copy all or part of a channel’s parameters from one channel to another.
 Loading...