REMOVING CONNECTING ROD CAP
1.
Remove the connecting rod bolts from connecting
rod
cap.
2.
Detach the connecting
rod
caps.
IMPORTANT:
Apply
engine
oil
to
the
connecting
rod
bolts
and
tighten
them
to
26
to
30 Nm
(2.7
to
3.1
kgfOm,
20
to
22 ft-Ibs).
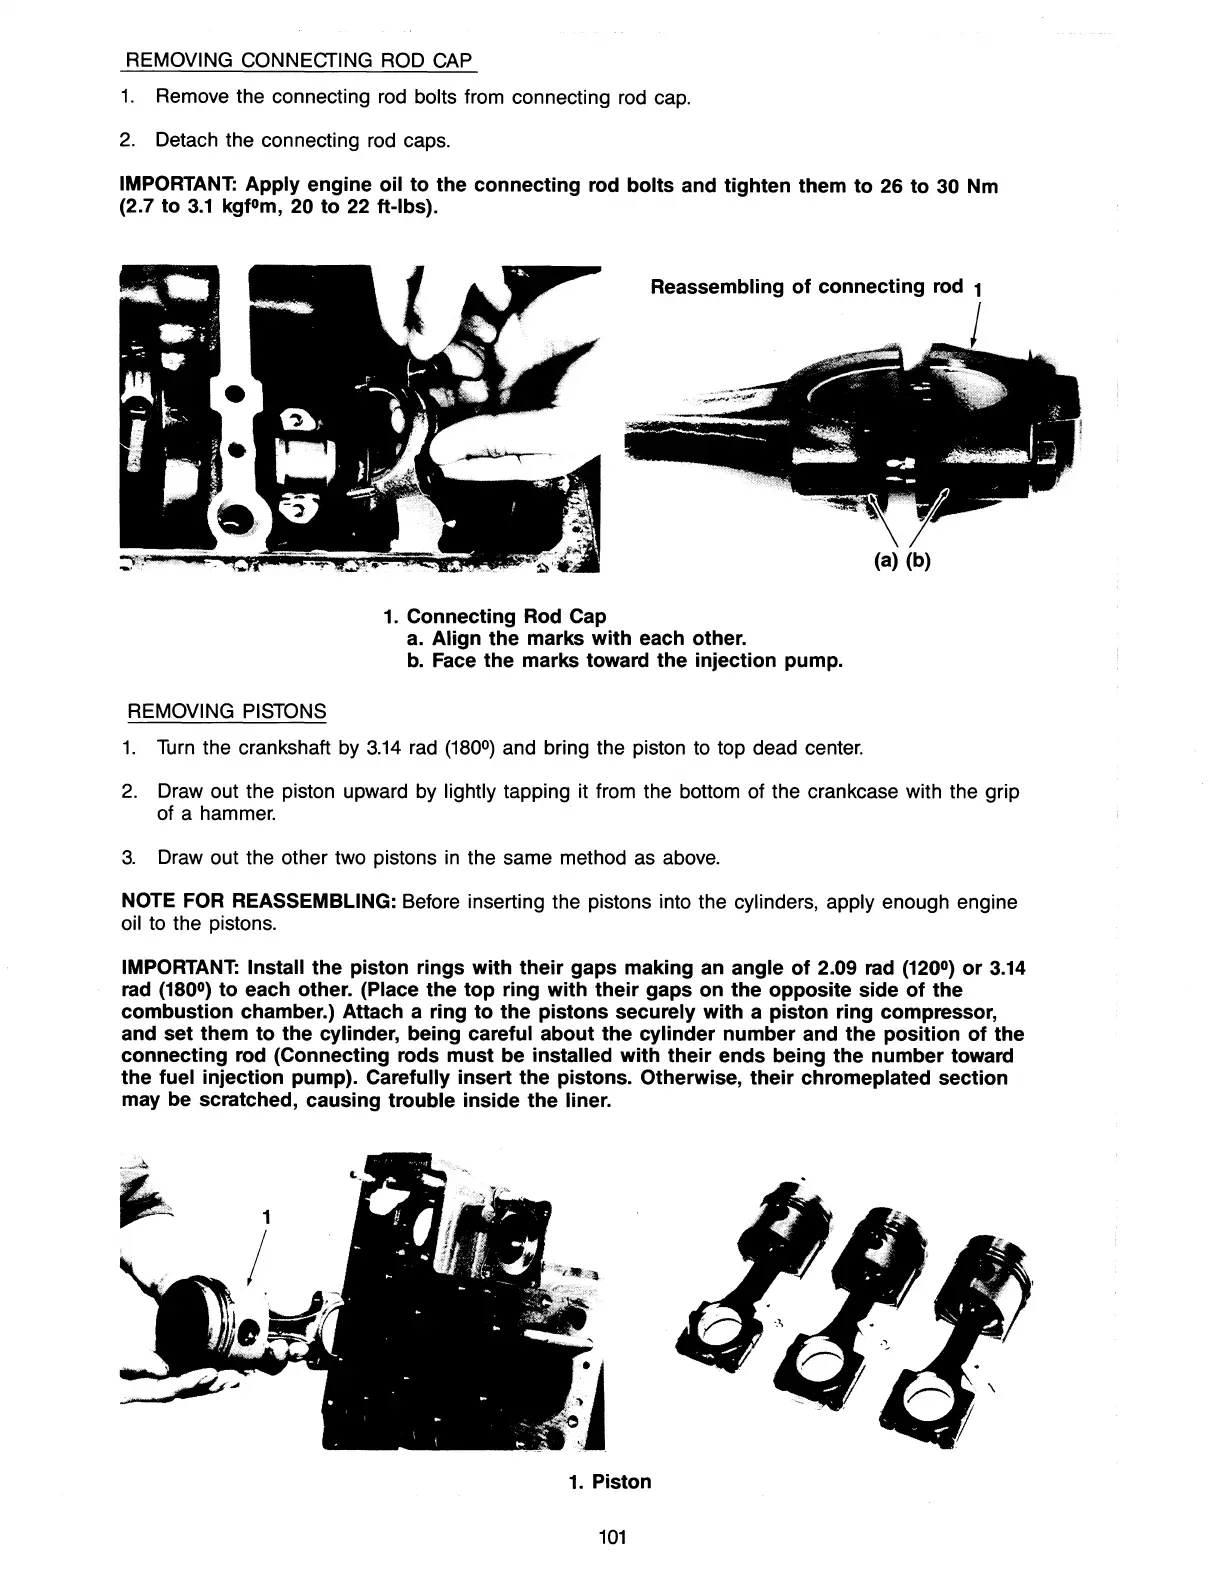
Reassembling
of
connecting
rod 1
(a) (b)
1.
Connecting
Rod Cap
a.
Align
the
marks
with
each other.
b. Face
the
marks toward
the
injection
pump.
REMOVING PISTONS
1.
Turn
the crankshaft by
3.14
rad
(180
0
)
and bring the piston to top dead center.
2.
Draw out the piston upward
by
lightly tapping it from the bottom of the crankcase with the grip
of a hammer.
3.
Draw out the other two pistons
in
the same method as above.
NOTE
FOR REASSEMBLING: Before inserting the pistons into the cylinders, apply enough engine
oil to the pistons.
IMPORTANT: Install
the
piston
rings
with
their
gaps making an angle
of
2.09 rad
(120
0
)
or
3.14
rad (180
0
)
to
each other. (Place
the top
ring
with
their
gaps
on
the
opposite
side
of
the
combustion
chamber.) Attach a ring
to
the
pistons
securely
with
a
piston
ring
compressor,
and
set
them
to
the
cylinder,
being
careful
about
the
cylinder
number
and
the
position
of
the
connecting
rod (Connecting rods
must
be installed
with
their
ends
being
the
number
toward
the
fuel
injection
pump). Carefully
insert
the
pistons. Otherwise,
their
chromeplated
section
may be scratched, causing
trouble
inside
the
liner.
1.
Piston
101