65
Machine control board, Software
704 67 020 00 _ 111
OPERATING INSTRUCTIONSGF Robimat XL / XM
M
L
E
E
0 ou 9
M
M
M
M
M
M
M
M
M
M
M+L
E
M M
M M
M
M
E
E
E
E
M
E
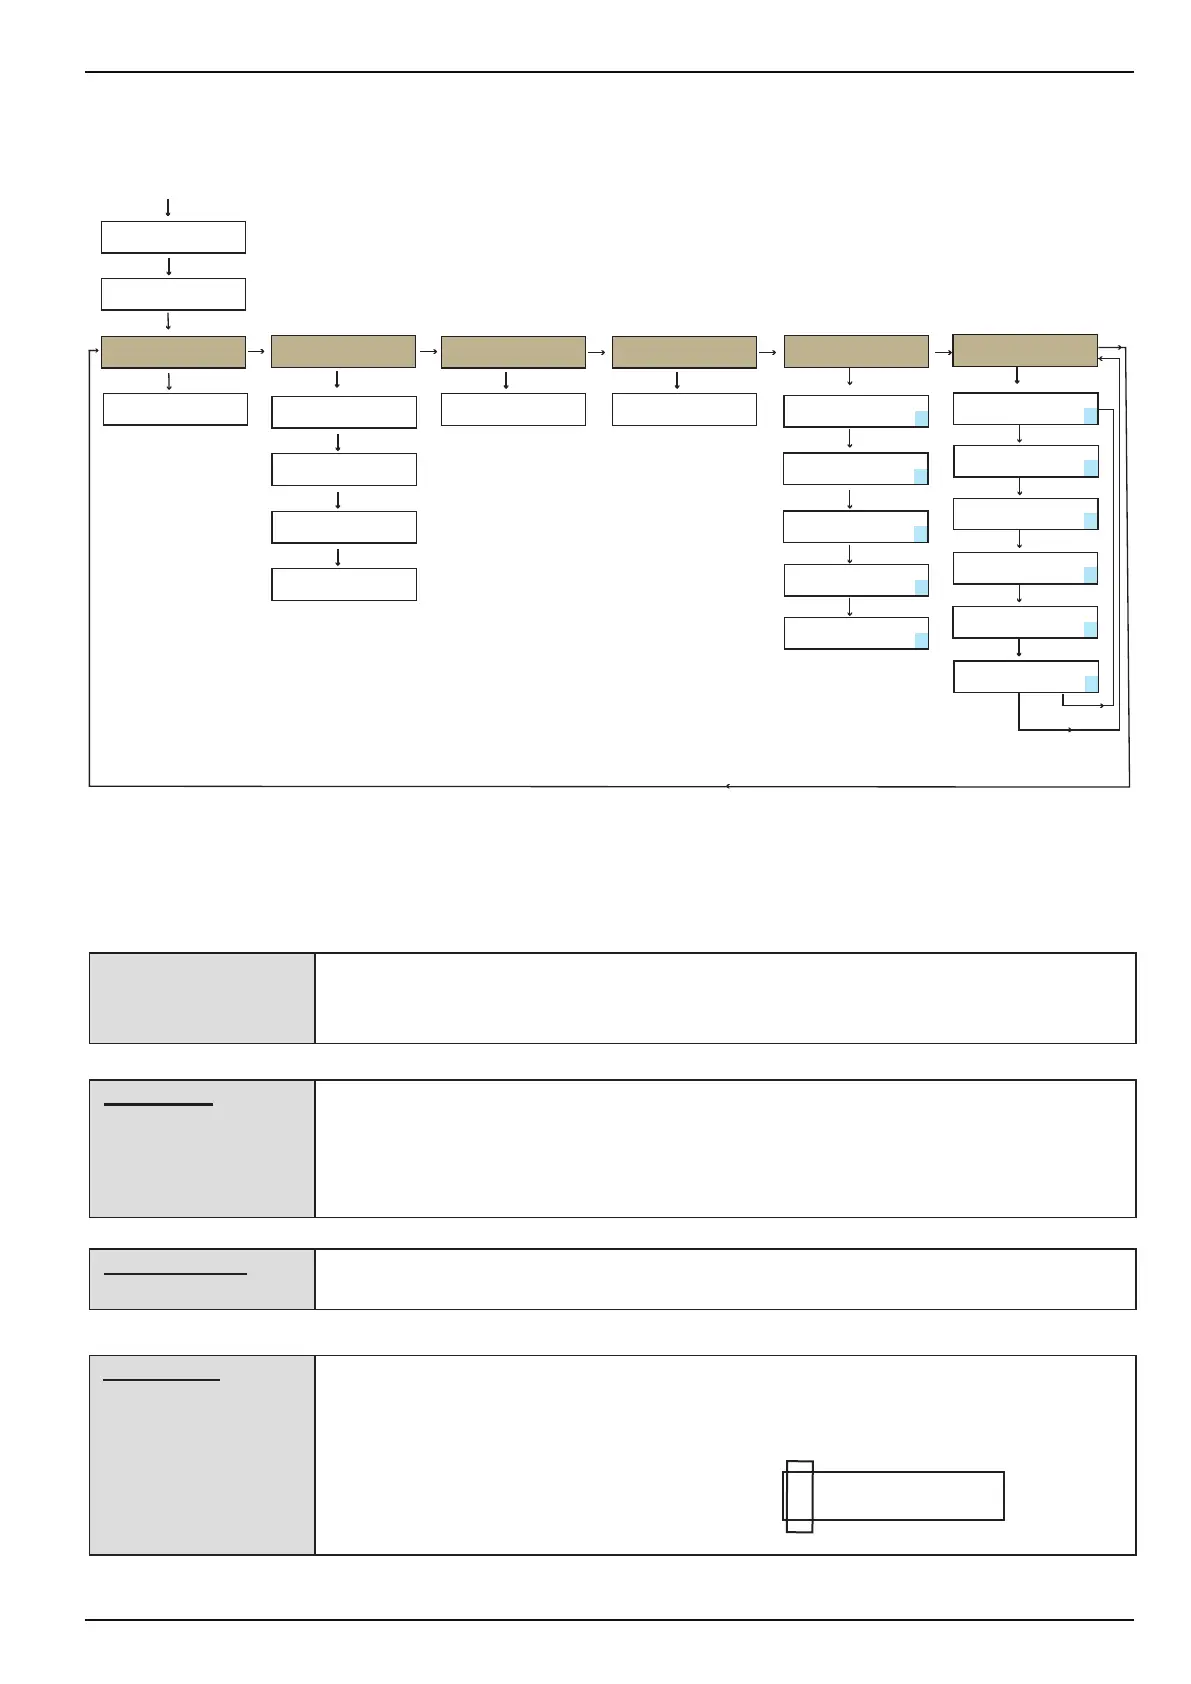
CHECK
←L SEL. M→ :E
ROBIMAT
←L SEL. M→ :E
AutoConfig
E:Start
ResetXY
E:Start
AutoConfig
SCANNING...
ResetXY
GOING HOME...
AutoConfig
E:Start
x level(s) found
9:Save 0:Cancel
AutoConfig
Saving...
HWAutomat: ROBXL
E:Edit
HWAUTOMAT: ROBXL
1:Change 9:Save
HardwareTest
E:Change
HWT Light
E:Change
MasterOffset
E:Enter
XMOffset: 00.0mm
E:Edit
YMOffset: 00.0mm
E:Edit
XScale: 00.0mm
E:Edit
YScale: 00.0mm
E:Edit
Goto shelf: 50
E:Start
HWT Inputs
E:Show
HWT Lift
E:Move
HWT Shutter
E:Move
HWT Basket
E:Move
HWT TestFunction
E:Enter
ShowConfig
E=Show
S S S S L L L L
5537230901000000
The lift and the product basket will be moved to the dened zero position / reference point
bottom left.
The lift and the basket will return to this position after each delivery.
The control board determines how many shelves have been tted into the machine. This
menu must be accessed if the shelves have been changed.
After pressing button [ E ] the basket moves from the bottom upwards and ascertains the
shelf positions via the light barrier and the brackets mounted.
Finally the number of levels located must be conrmed by pressing button [ 9 ].
In this menu the machine type is registered on the control board.
ROBXL = Robimat XL; RobXM = Robimat XM
[ This menu shows at which possible positioning holes a shelf is located and the size of the
shelf.
Refer to example: A shelf with size "S" on the highest position, i.e. 55 holes up from the
bottom
S S S S L L L L
5537230901000000