27
2. For the Installer
Installation sequence:
– Fit „rear cover“ (part 5) at the rear, use 4 nuts to secure to reserve supply container – Fig. 27.
– Connect 4-pin plug of InfoWIN cable. The 5-pin plug should only be connected if you are using an REG control.
It should not be connected if you are using an MESplus control – Fig. 28.
2.11 Installing the feed unit
For FireWIN Exklusiv and FireWIN Premium with pneumatic pellet feed only.
See separate assembly instructions: „Installation of Feed Unit in FireWIN or VarioWIN“.
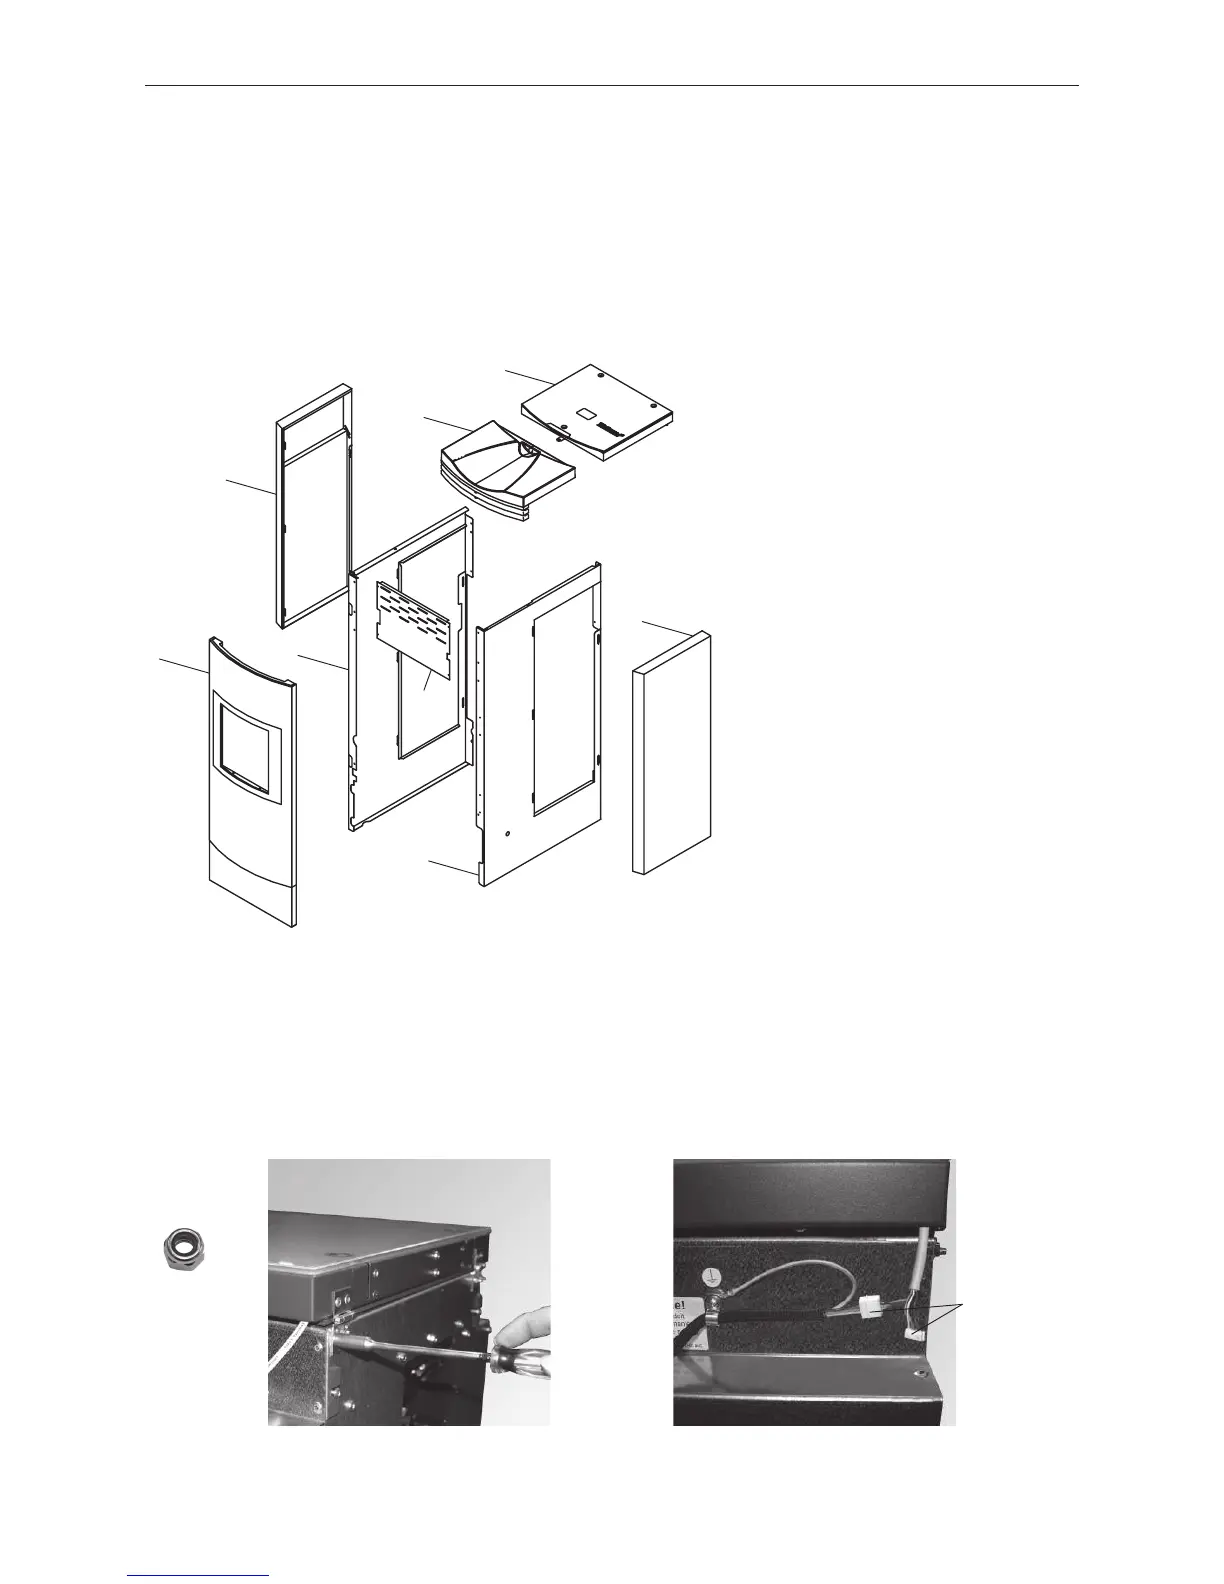
2.12 Installing the cladding
The cladding comprises the following parts:
Fig. 26 Cladding parts
1 .......... Rear left side panel
2 .......... Left side panel
3 .......... Front cover plate
4 .......... Front cover
5 .......... Rear cover
6 .......... Right side panel
7 .......... Rear right side panel
8 .......... Cladding door
Fig. 27 Fit rear cover at 4 points Fig. 28 Connect InfoWINplus plug, fit earth
cable to reserve supply container
4 x
InfoWINplus plug