Installation and electrical connection
12 | WOLF GmbH 3066510_202108
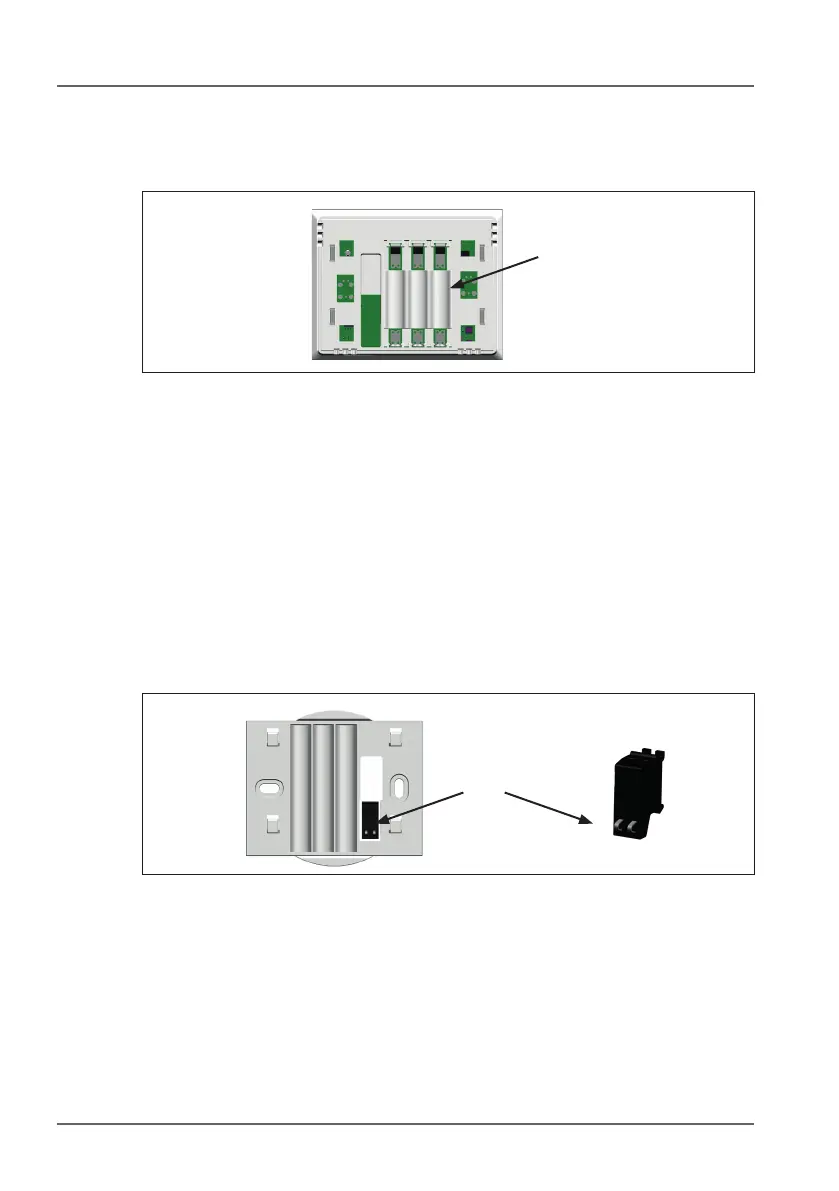
3.3.3 Battery power
To power the RM-2, place the 3 AAA batteries in the battery
compartment. Make sure that they are inserted correctly!
q
Fig. 3.3 Battery compartment
q Battery compartment
The RM-2 Wireless can then be placed on the four xing hooks of
the wall retainer (“put in place and pushed downwards”).
3.3.4 Power supply unit (9 VDC)
If necessary, the RM-2 Wireless can also be powered using a 9 V DC
power supply (not included, minimum 500 mA; suited for continuous
operation) instead of the 3x AAA batteries (not both at the same
time). The wall retainer for the RM-2 Wireless includes a plug-in
connector for this purpose:
q
Fig. 3.4 Power connection
q 9 V DC terminals (protected against polarity reversal)
► Push the terminals with a screwdriver to insert the cable
Once the electricity has been connected, the RM-2 can be placed on
the four xing hooks of the wall retainer (“put in place and pushed
downwards”).