7.1 Replacing Consumables 215
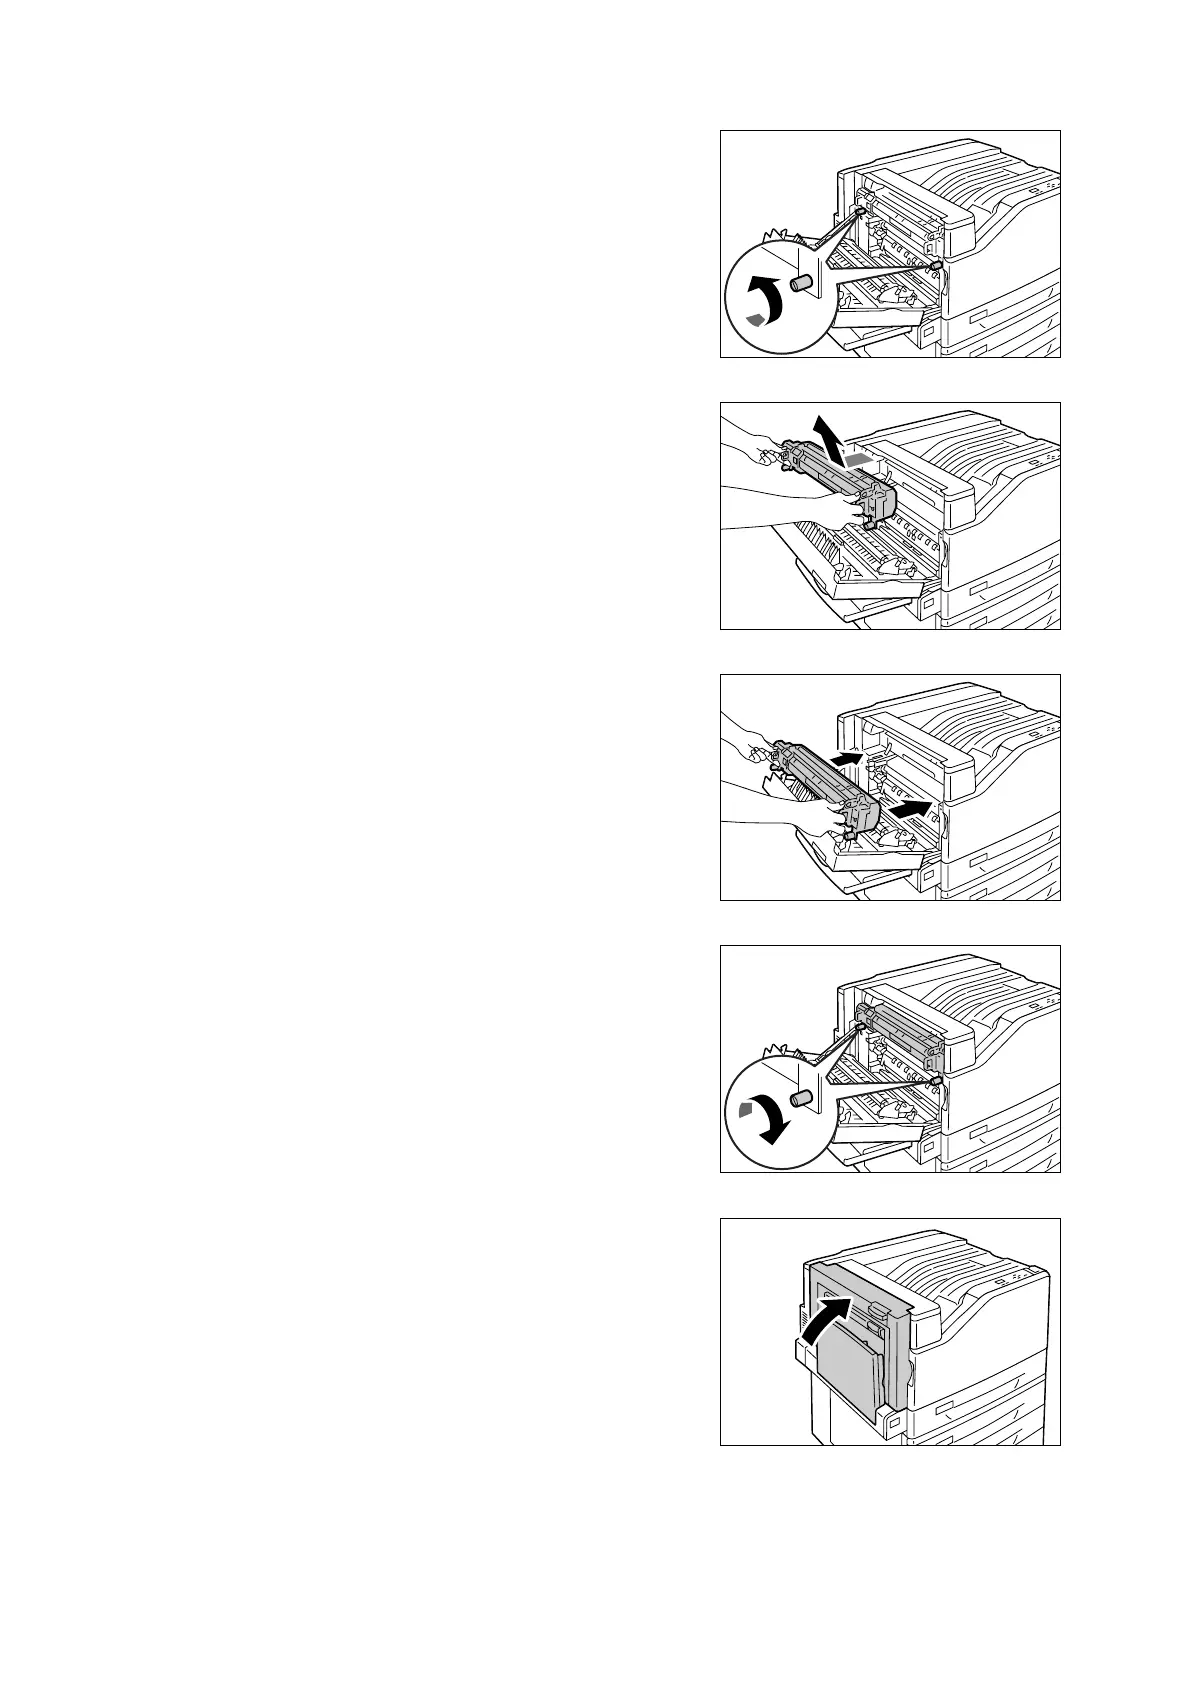
5. Loosen the two knobs on the fuser unit.
6. Holding the fuser unit with both hands, pull
it out of the printer.
Important
• The fuser unit is heavy, so use both hands to remove
it.
7. Remove the new fuser unit from its
package. Holding it with both hands, slide it
into the printer.
8. Tighten the two knobs to secure the fuser
unit in place.
9. Press the center of cover A and gently
close it. Next raise the bypass tray.
Important
• When closing the covers, be careful not to get your
fingers caught between the covers and the printer.
10. Connect the power cord to the printer.
Press the <|> side of the printer's power
switch to turn on the power.
11. Advance to “Resetting the Counter”
(P. 216).