214 7 Maintenance
Replacing the Fuser Unit
The following messages appear on the printer’s control panel when the fuser unit is near or
reaches the end of its service life. When replacing the fuser unit, also replace the transfer
belt cleaner.
Note
• For instructions on replacing the transfer belt cleaner, refer to “ Replacing the Transfer Belt Cleaner”
(P. 217).
Replacement Procedure
CAUTION
Fuser Safety
• When removing the fuser unit, always switch off first and wait for 40 minutes until it cools
off.
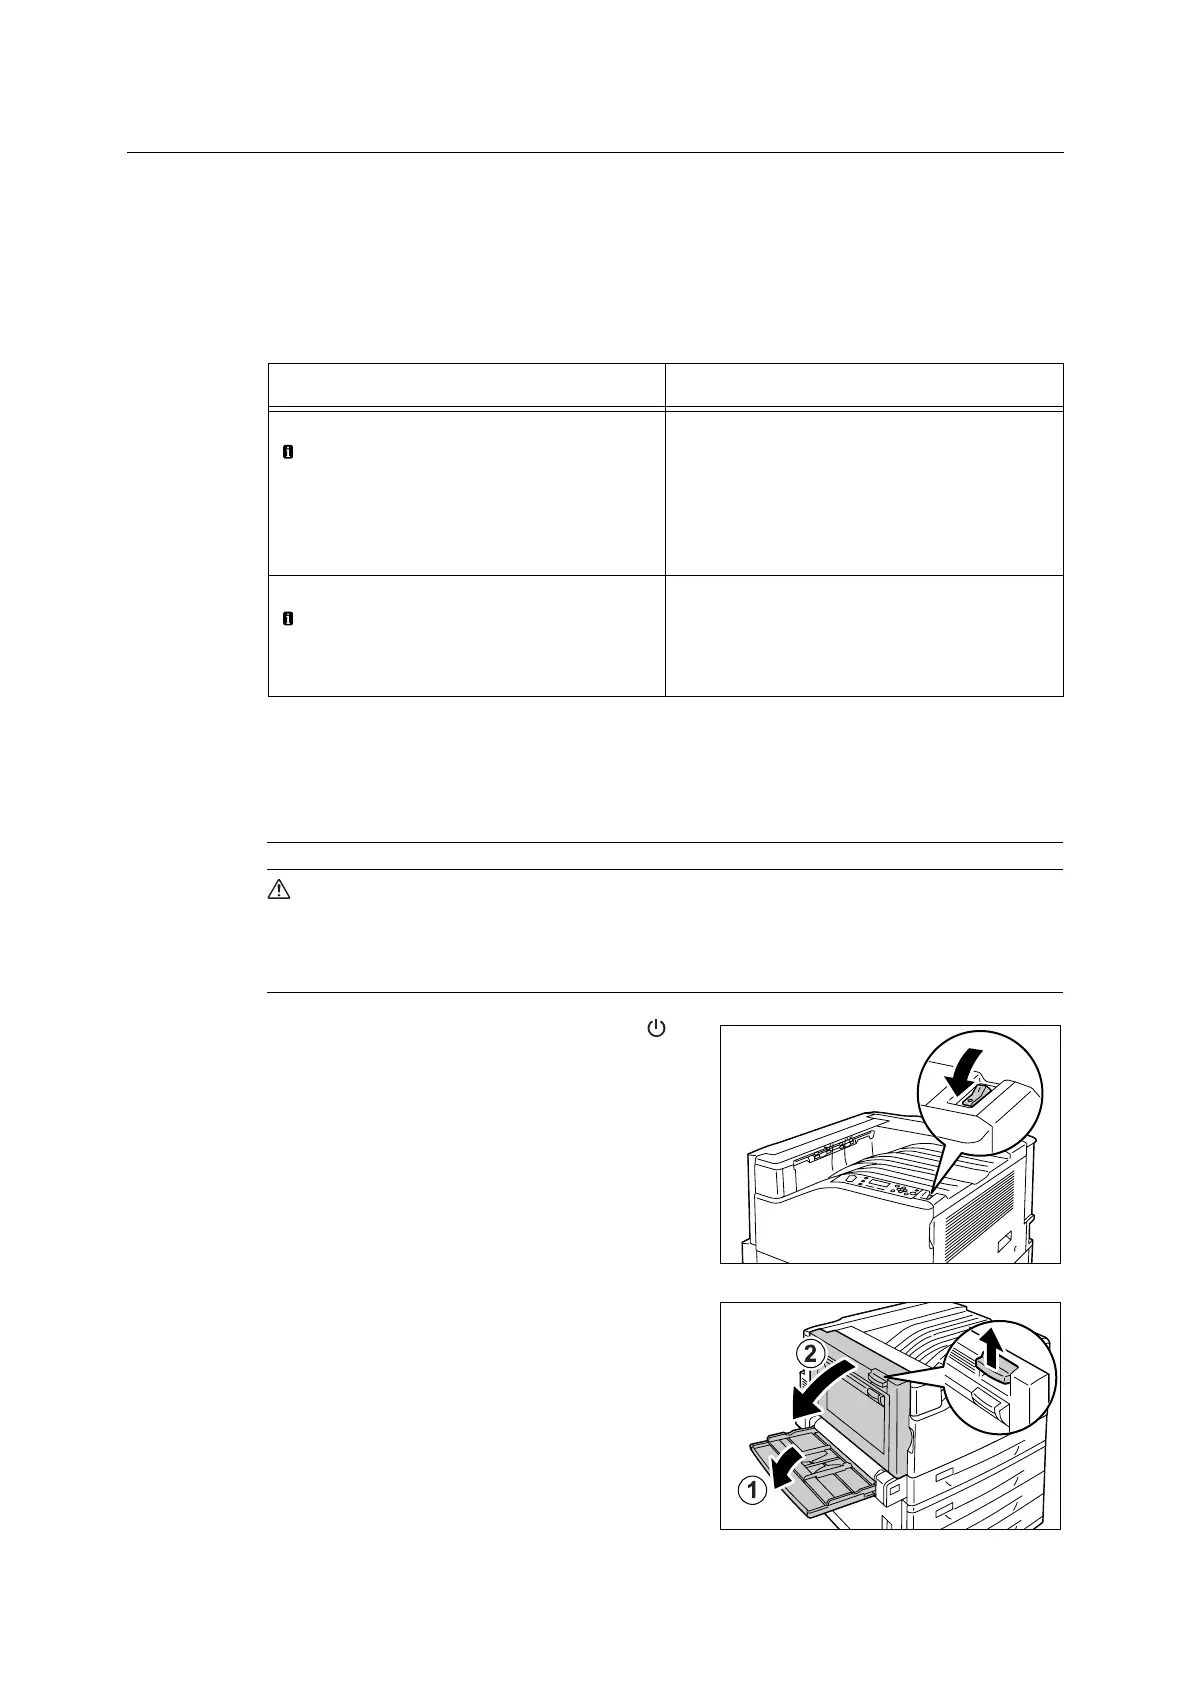
1. Switch the power off by pressing the < >
side of the power switch.
2. Unplug the power cord from the power
outlet and the printer.
3. Wait 40 minutes for the machine to cool off.
4. Lower the bypass tray.
While raising the release lever, carefully
open cover A.
Message Action
Ready to print
Replace Fuser R8
• Fuser Cartridge R8
needs to be
replaced soon.
Order a new
Fuser Cartridge.
The fuser unit needs to be replaced soon. There
is enough capacity to print approximately
10,000
*1
pages.
Ready to print
Replace Fuser R8
• Replace Fuser
Cartridge R8.
The fuser unit has reached the end of its
replacement life. Refer to “Replacement
Procedure” (P. 214) when replacing the fuser unit
and then refer to “Resetting the Counter” (P. 216)
to clear the counter.
*1
: The page yield of each consumable varies depending on print requests, documents printed, and
how often the power is switched on/off. For more information, refer to “A.3 Life of Consumables
and Regular Replacement Parts” (P. 275).