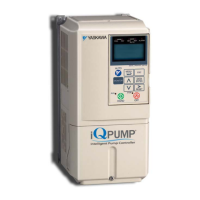
Do you have a question about the YASKAWA iQpump Micro and is the answer not in the manual?
Compare drive and motor nameplate specifications to ensure compatibility.
Check if the main power source meets the drive's input voltage and current requirements.
Confirm ambient conditions (temp, humidity) and surrounding area are suitable for the drive.
Ensure proper spacing around the drive for ventilation and cooling.
Safely remove the drive's front cover for access to terminals.
Wire the main power supply and the motor to the drive terminals.
Configure the parameter for selecting the start/stop control method.
Identify and unpack the components of the 24V power supply option.
Verify drive function and wiring before installing the 24V power supply.
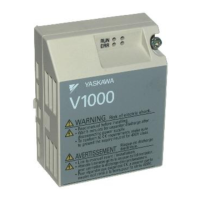
Find the drive's model number to identify its specifications.
Determine the drive's enclosure type based on its model number.
Choose appropriate tools based on drive enclosure type and model.
Follow the steps to physically install the 24V power supply unit.
Safely power down the drive and remove front and lower covers.
Check if the lower terminal cover is needed for mounting the 24V power supply.
Loosen conduit bracket screws for easier access to the ground screw.
Detach the cover of the 24V power supply unit for access.
Connect the ground wire to the drive's ground terminal.
Securely reattach the bottom terminal cover after wiring.
Connect the ground wire to the 24V power supply's FE terminal.
Connect the white J2 wire from the 24V PSU to terminal A2 on the drive.
Route ground and J2 wires into the terminal cover notch for specific models.
Securely attach the 24V power supply unit to the drive's mounting slots.
Connect transducer wires and configure DIP switch S1 for signal type.
Information on parameter H3-09 for signal level selection.
Select correct wire type and size, and follow torque specs for connections.
Properly prepare the transducer wires, including shield termination.
Use ferrule-type termination for improved wiring reliability.
Connect transducer signal wires to the 24V power supply terminals.
Keep transducer wiring separate from main power lines to prevent interference.
Securely attach the 24V power supply cover onto the drive.
Use a wire tie to secure the shielded cable for strain relief.
Connect the digital operator cable to port CN1 for IP66/NEMA 4X enclosures.
Reinstall the front cover on IP66/NEMA 4X enclosures.
Navigate parameter menu to change settings without running the motor.
Observe real-time motor frequency and current readings.
Set up the drive for a specific pump application without motor operation.
Choose the appropriate application macro setting from parameter A1-03.
Enter the motor's full load amps from its nameplate.
Configure the number of motor poles for accurate RPM display.
Scale the feedback device input based on maximum value and units.
Define the target system pressure for PID control.
Select between absolute or delta start level programming.
Set the start level as absolute or delta value relative to the setpoint.
Define the minimum operating speed to prevent no-flow conditions.
Configure auto storage for run status in AUTO mode with digital operator.
Enable or disable the HAND key on the digital operator.
Adjust integral time for PID controller responsiveness.
Configure wire break detection for the analog feedback input.
Set the time for the motor to accelerate to maximum speed.
Set the time for the motor to decelerate from maximum speed.
Configure the number of automatic restart attempts after faults.
Define the minimum operating frequency for the pump.
Set delay before entering sleep mode based on feedback level.
Configure thrust bearing function frequency for submersible motors.
Set delay for starting if a run command is active at power-up.
Configure the drive to enter sleep mode based on motor speed.
Configure 'Setpoint Not Met' fault based on feedback difference.
Set parameters for low and high feedback level fault detection.
Configure pre-charge function for systems requiring it before normal operation.
Use thrust bearing function to prevent motor wear in submersible applications.
Enable automatic restart after power failure for remote operation.
Verify the motor rotates in the correct direction during testing.
Perform a test to confirm the motor's rotation direction.
Verify the transducer feedback signal matches a mechanical gauge.
Configure and activate the drive's AUTO operating mode.
Define the target system setpoint for AUTO mode operation.
Configure and activate the drive's HAND operating mode.
Configure HAND mode reference from an external 0-10V signal.
| Category | DC Drives |
|---|---|
| Overload Capacity | 150% for 60 seconds |
| Enclosure | IP20 |
| Control Method | Sensorless Vector Control |
| Protection Features | Overcurrent, Overvoltage, Undervoltage, Overheat |
| Communication | Modbus RTU |
| Input Voltage | 200-240V AC |
| Storage Temperature | -20°C to 65°C |
| Humidity | 95% RH (non-condensing) |