Administrator’s Guide for Yealink VC110 Video Conferencing Endpoint
44
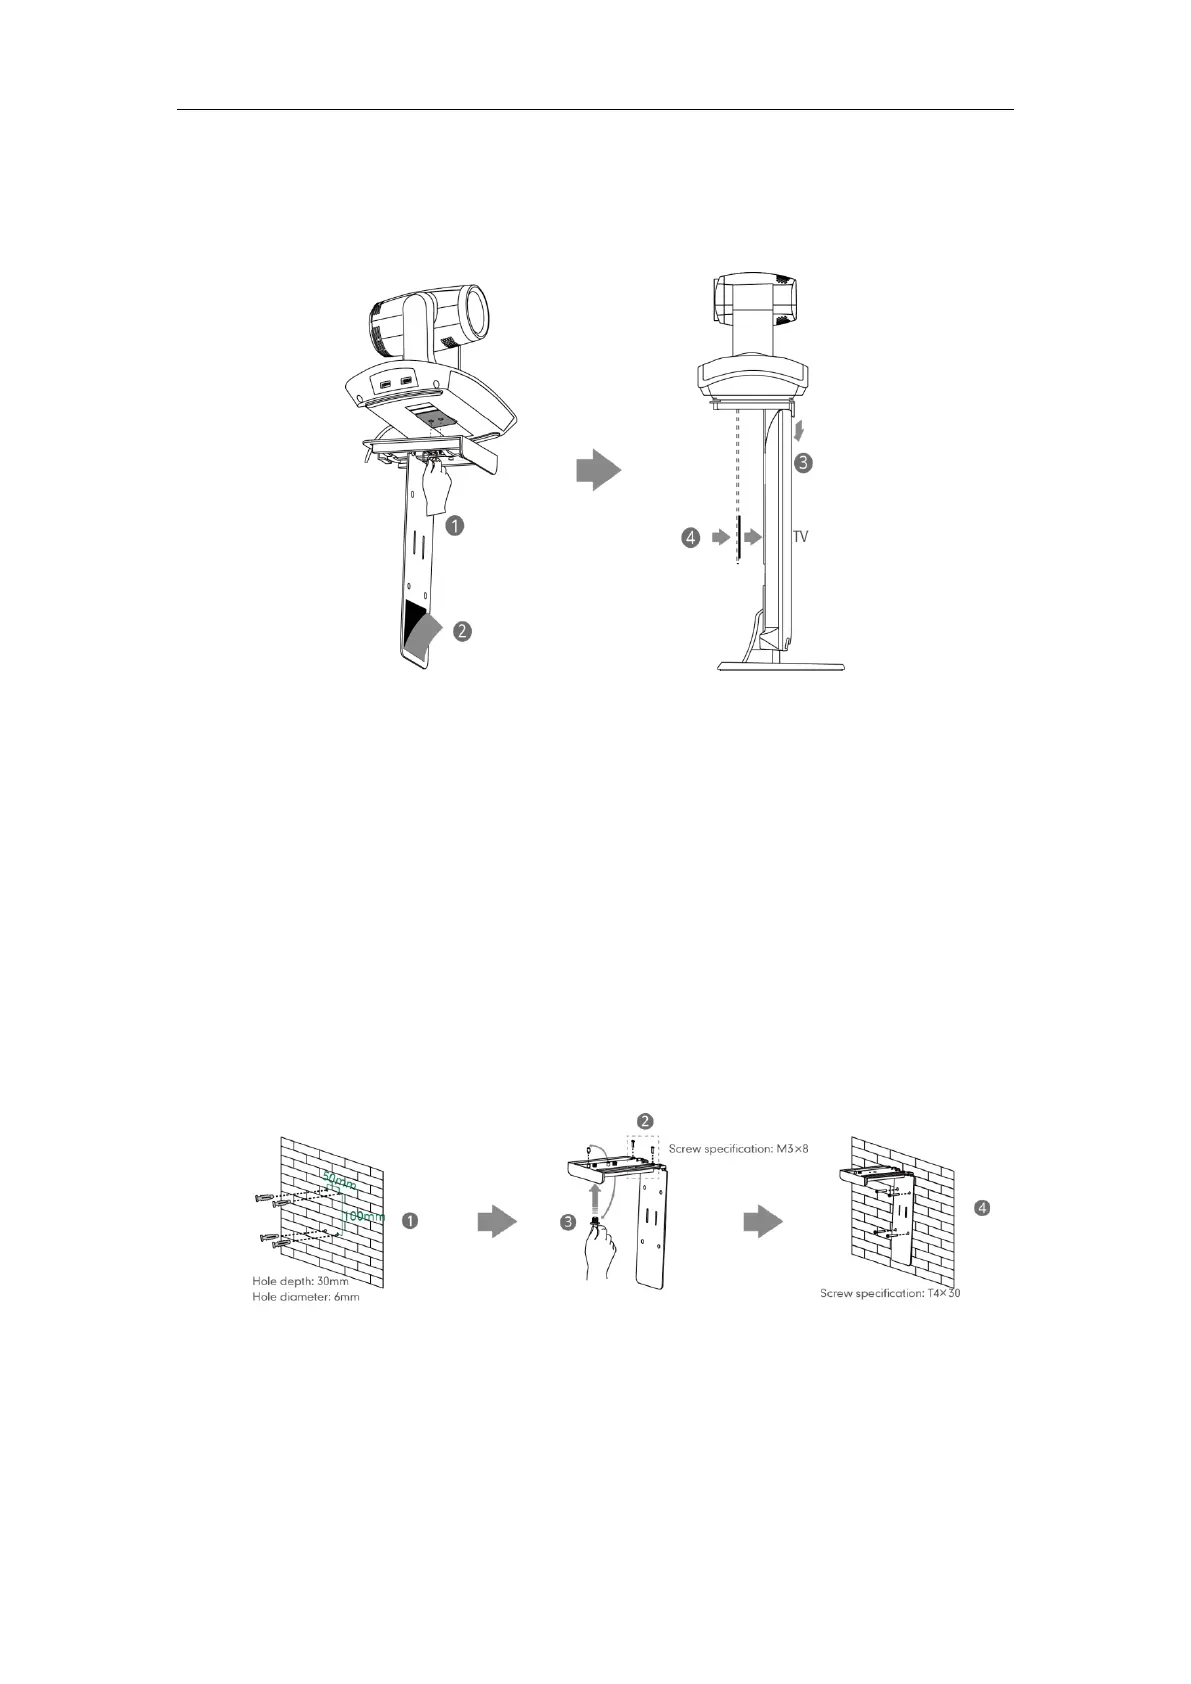
a) Mounting the VC110 all-in-one unit on a TV
When the thickness of your TV is between 35-120 mm, you can mount the VC110 all-in-one unit
on your TV.
Do the following:
1. Lock the VC110 all-in-one unit to the L-bracket.
2. Remove the protection of the Velcro.
3. Put the L-bracket on the top of the TV.
4. Make sure the back of the TV is clean, and then adjust the bracket to ensure close
adhesion to the back of the TV with Velcro.
b) Mounting the VC110 all-in-one unit on a wall
You can also mount the VC110 all-in-one unit on a wall. The recommended height for VC110
all-in-one unit positioning is 1.5m-1.8m above the ground.
Do the following:
1. Punch holes into the wall and then insert the expansion bolts.
Installation location for the expansion bolts and punching requirement are shown above.
2. Lock the L-bracket with the M3×8 screws.
3. Move the setscrews on the L-bracket to the left holes.
4. Lock the L-bracket to the wall with T4×30 screws.
 Loading...