7-11
IM AQ1210-01EN
Using the Utility Feature
7
Performing Setup
3.
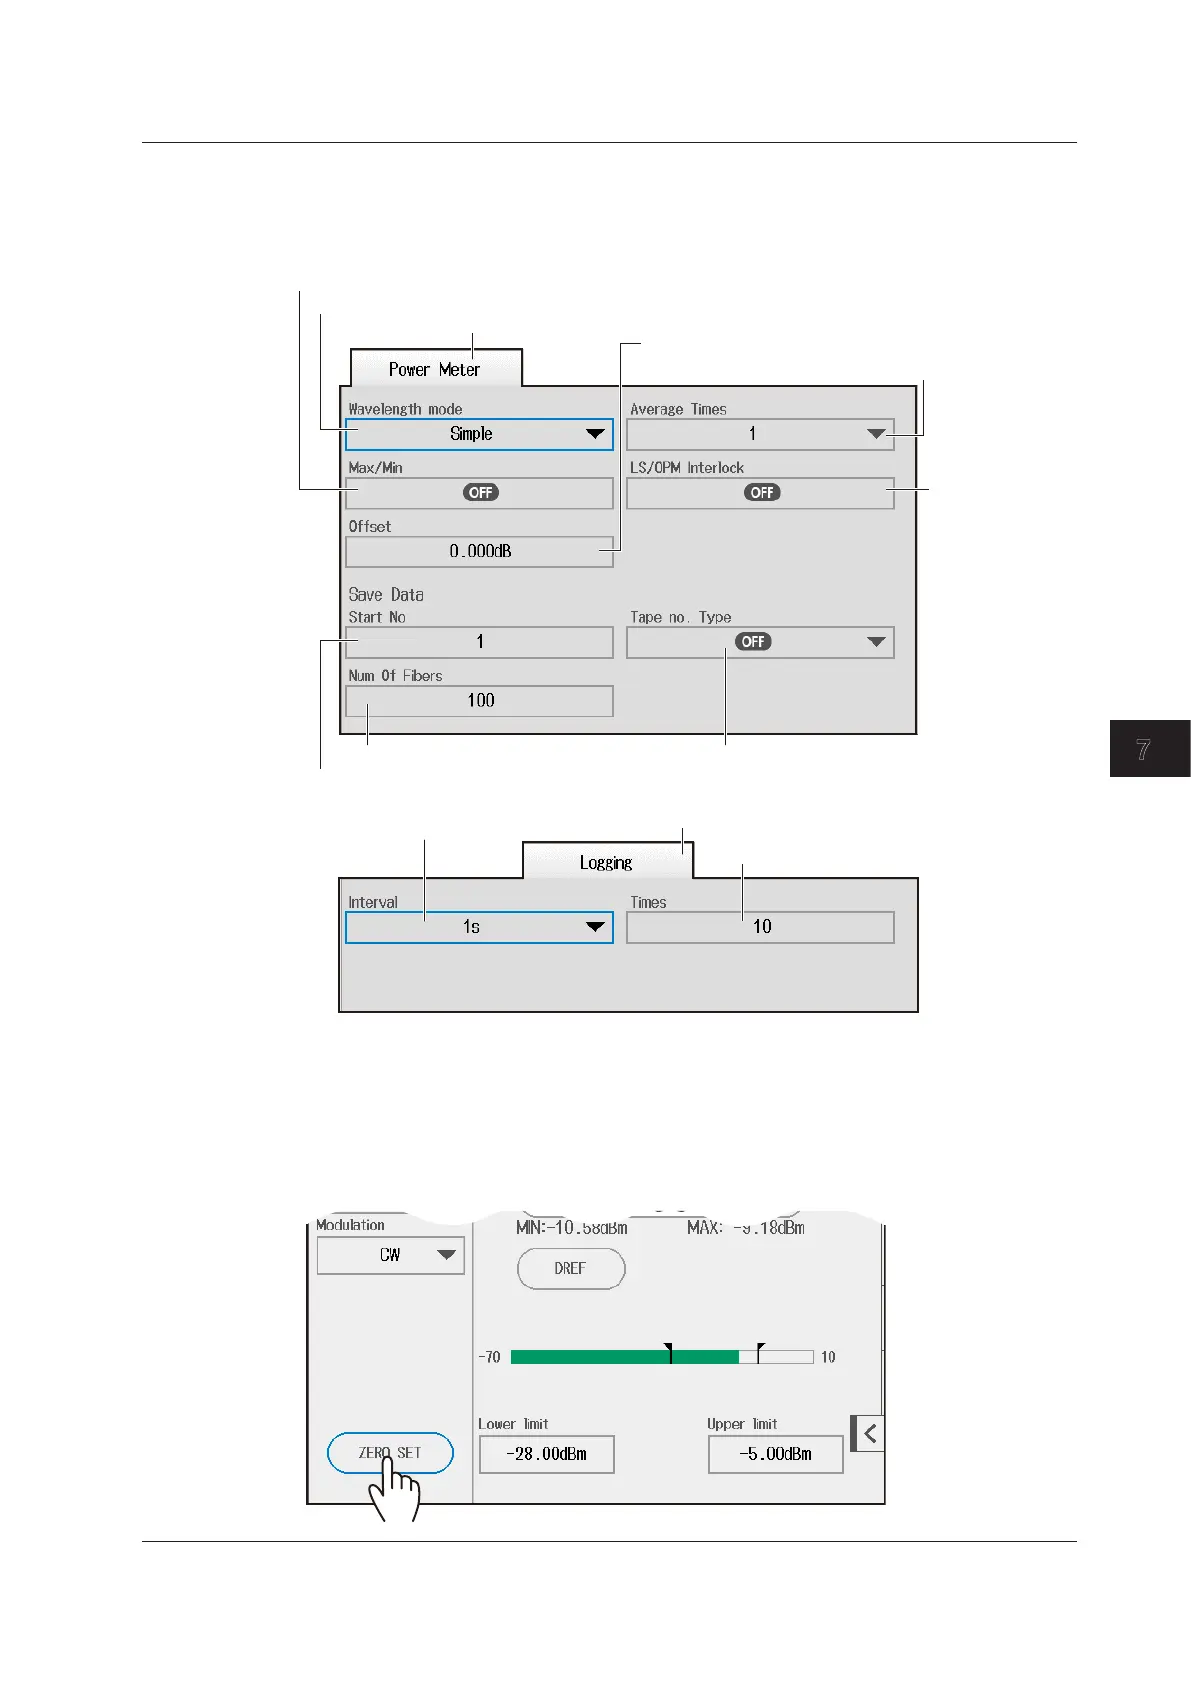
Press SETUP to display the optical power meter setup screen.
4.
Tap the Power Meter tab or Logging tab to display the following screen.
Power Meter tab
Set the wavelength mode (Simple, Detail, CWDM).
Set the display of the max/min value menu (OFF, ON).
Set the starting core number (1 to 9900).
Set the number of cores or tapes (1 to 100). Set the tape number (OFF, a-b (2), a-c (3),
a-d (4), a-e (5), a-f (6), a-g (7), a-h (8)).
Set the measurement interval
(500ms, 1s, 2s, 5s, 10s).
Set the number of times (10 to 36000).
Set the average count (1, 10, 50, 100).
Set the offset (–9.900 to 9.900 dB).
Turns the
light source and
optical power
meter settings
(OFF, ON)
Logging tab
Executing the Zero Set
5.
After step 4, close the optical power meter screen. The screen returns to the power meter
screen.
6.
Tap ZERO SET.
Remove the optical fiber cables from the instrument and close the OPM port covers, or make sure that the
power meter is not receiving any light, and then start the optical power meter zero set procedure.
7.3 Using the Optical Power Meter
 Loading...