8-33
IM AQ1210-01EN
Using the Application Feature
8
8.
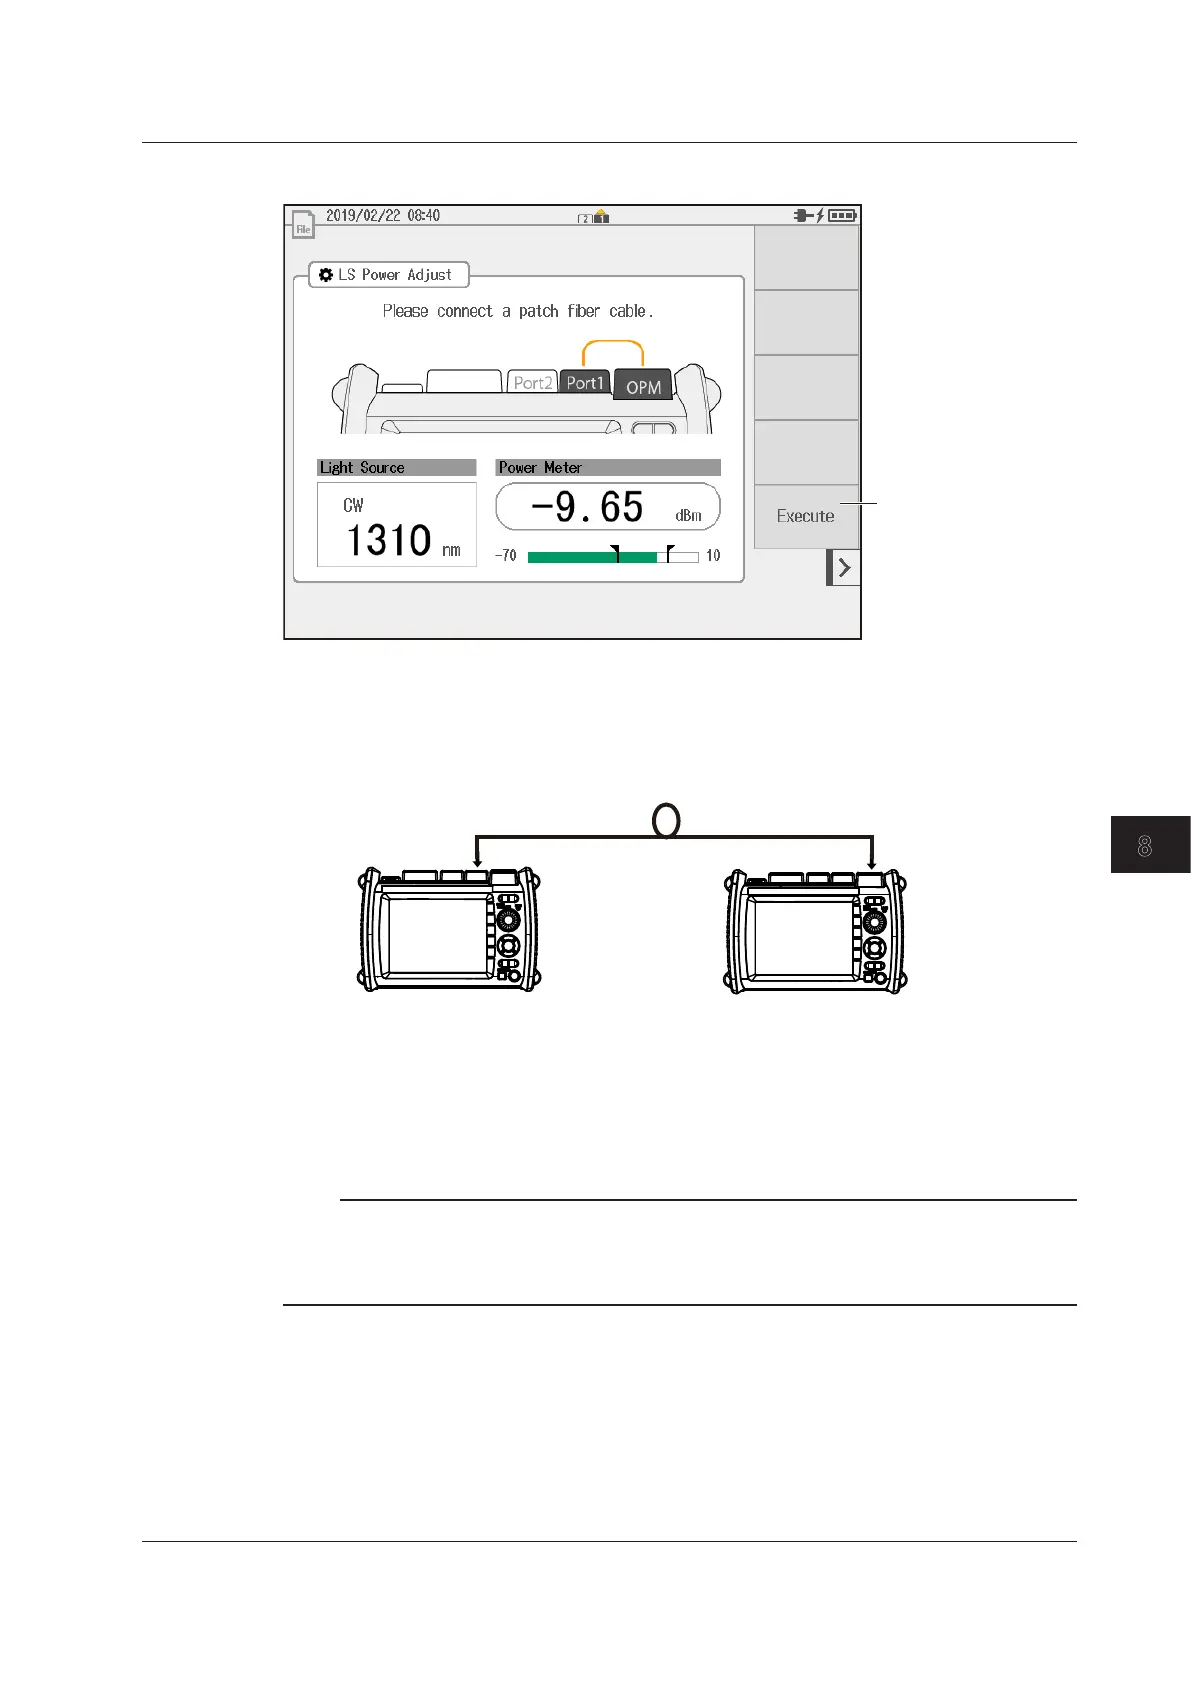
Tap LS Power Adjust to display the following screen.
Starts optical power
adjustment
The measurement light
turns on.
When adjustment ends
normally, the instrument
returns to the previous
Executing a Loss Test
9.
Connect the OTDR port (PORT1) of the instrument (light source side) to the OPM port of the
instrument (optical power meter side) with an optical fiber cable.
AQ1210A, AQ1215A,
AQ1210E, AQ1215E,
AQ1215F, AQ1216F
AQ1210E, AQ1215E,
AQ1215F, AQ1216F
Light source
Optical power meter
Optical fiber cable under loss test
OTDR port (PORT1)
OPM port
10.
On the light source side of the instrument, tap the Loss Test START soft key. The loss test
starts, and the soft key display changes to Loss Test STOP. Then, on the power meter side of
the instrument, the optical power value of the wavelength is displayed on the screen.
On the light source side of the instrument, tap the Loss Test STOP soft key to end the loss test.
Note
When you start a loss test, the optical power values of wavelength 1 and wavelength 2 (if the wavelength is
set) are measured once. Then, the soft key display changes to Loss Test STOP, which you can use to end
the loss test. In addition, you can abort the loss test by tapping the loss test start ON/OFF button on the light
source display screen.
Saving Data
11.
On the optical power meter side of the instrument, tap the Save Data soft key. A screen appears
for saving the results of optical power measurements for multi-fiber cables. For details, “Saving
the Results of Optical Power Measurements for Multi-Fiber Cables” (page 7-12) in section 7.3.
8.3 Performing an Auto Loss Test (Auto Loss Test)
 Loading...