3-13
IM 04L51B01-01EN
Using Network Functions (Ethernet interface)
3
Setting the Date and Time
Follow the procedure below to set the GX/GP’s date and time.
Procedure
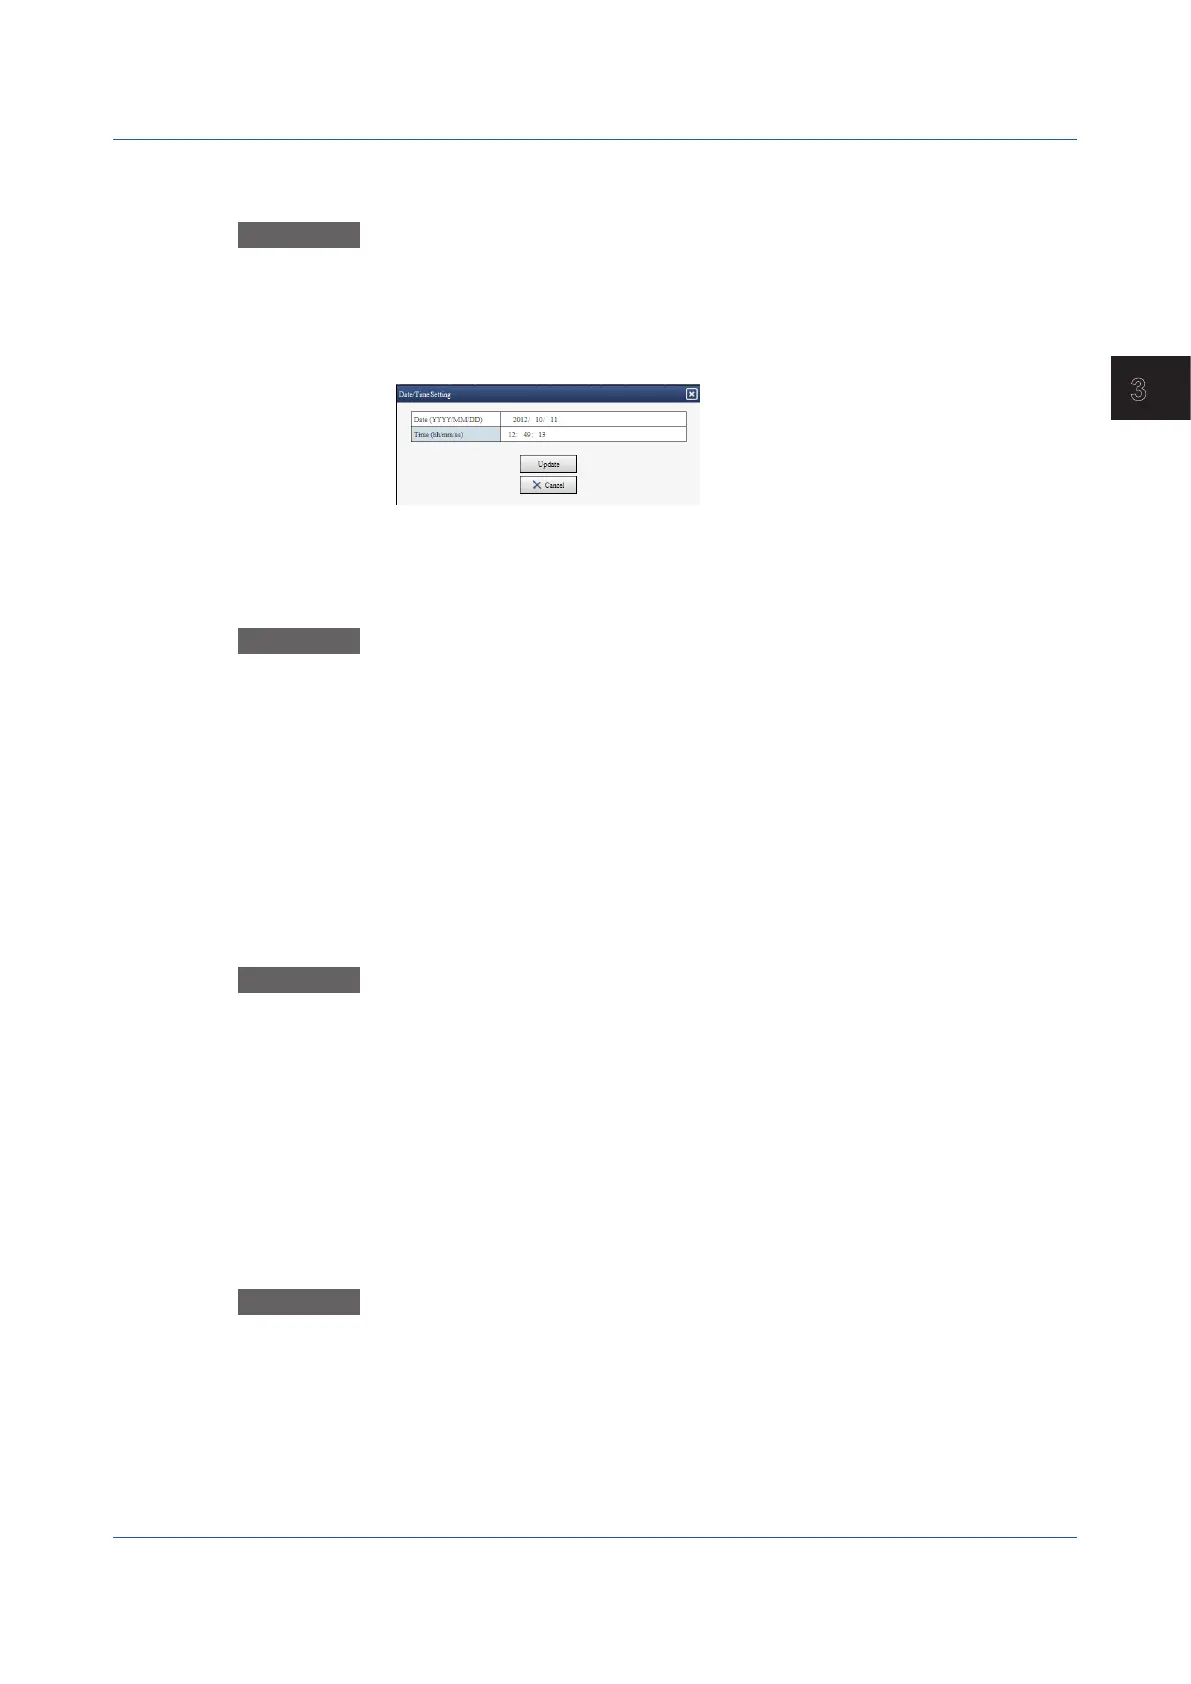
1
On the Operation tab, click Date/Time Settings.
The Date/Time settings dialog box appears.
2
Enter the date and time, and click Update.
The GX/GP’s date and time are changed.
You may not be able to change the time depending on the GX/GP settings or
condition. Follow the instructions in the message to handle it.
Starting, Stopping, and Testing Mail Transmission
Procedure
1
On the Operation tab, click E-Mailfunction.
The Mail function dialog box appears.
2
Click a button.
Start E-mail transmission: Enables the mail transmission function.
Stop E-mail transmission: Disables the mail transmission function.
E-Mail test for recipient 1 or E-Mail test for recipient 2: Sends a test mail to the
recipient.
TriggeringtheStartingofEventDataRecording
Follow the procedure below to apply a start trigger for event data recording.
Procedure
1
On the Operation tab, click Eventtrigger.
The Event trigger dialog box appears.
2
Click Executeeventtrigger.
Event data recording that is in the trigger-wait state starts.
When the measurement mode is set to Dual interval, click ExecuteEventtrigger
meas group 1, ExecuteEventtriggermeasgroup2, or ExecuteAll.
ExecutingManual Sampling
Follow the procedure below to execute manual sampling.
Procedure
1
On the Operation tab, click Manual sample.
A Manual sample dialog box appears.
2
On the Operation tab, click Executeamanualsample.
Manual sampling is executed.
3.1 Using the Web Application to Change the GX/GP Settings, Monitor Data, and Control the GX/GP (Web server function)
 Loading...