Maintenance
121
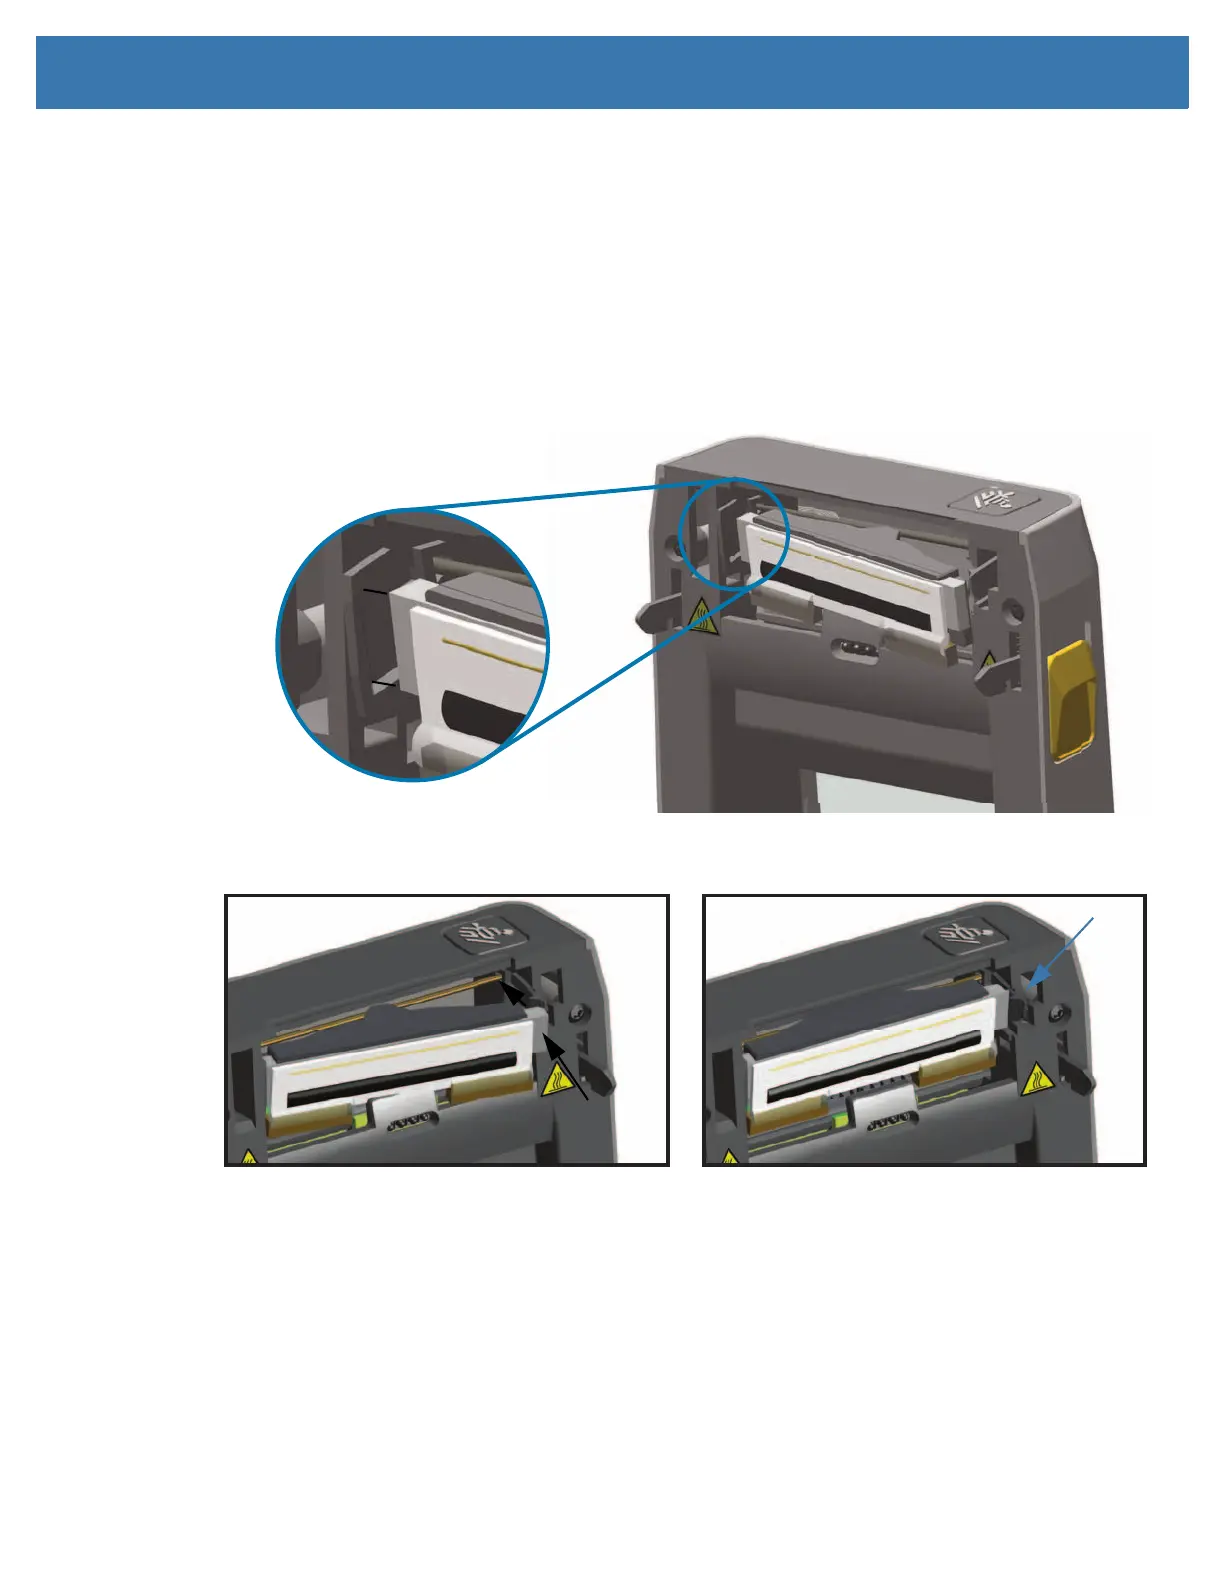
Replacing the Printhead
1. Push the right side printhead cable connector into the printhead. The connector is keyed to only insert
one way.
2. Connect the single black ground wire spade lug connector onto the spade lug attached to the backside
of the printhead.
3. Push the left side printhead cable connector onto the printhead.
4. Check that the ground wire and wire bundles are still connected to the printhead.
5. Insert the left side of the printhead assembly into the recessed area.
6. Push the right side of the printhead into the printer until the latch locks the right side of the printhead
into the printer.
7. Verify that the printhead moves freely into the printer when pressure is applied and remains locked
when pressure is released.
8. Clean the printhead by using a new cleaning pen to wipe body oils (finger prints) and debris off the
printhead. Clean from the center of the printhead to the outside. See Cleaning the Printhead.
9. Reload media. Turn on the printer and print a status report to ensure proper function. See Test Printing
with the Configuration Report.