Axiotech and Axiotech
vario
Carl Zeiss
B 40-020 e 06/99 3-9
• Focus on the specimen via the coaxial drive (3-7/4). If possible, always move the specimen away from
the objective to avoid a collision between the objective and the specimen.
• Move aperture diaphragm (3-7/2) in center position (approx. half opened or half closed) by pulling out
the pushrod.
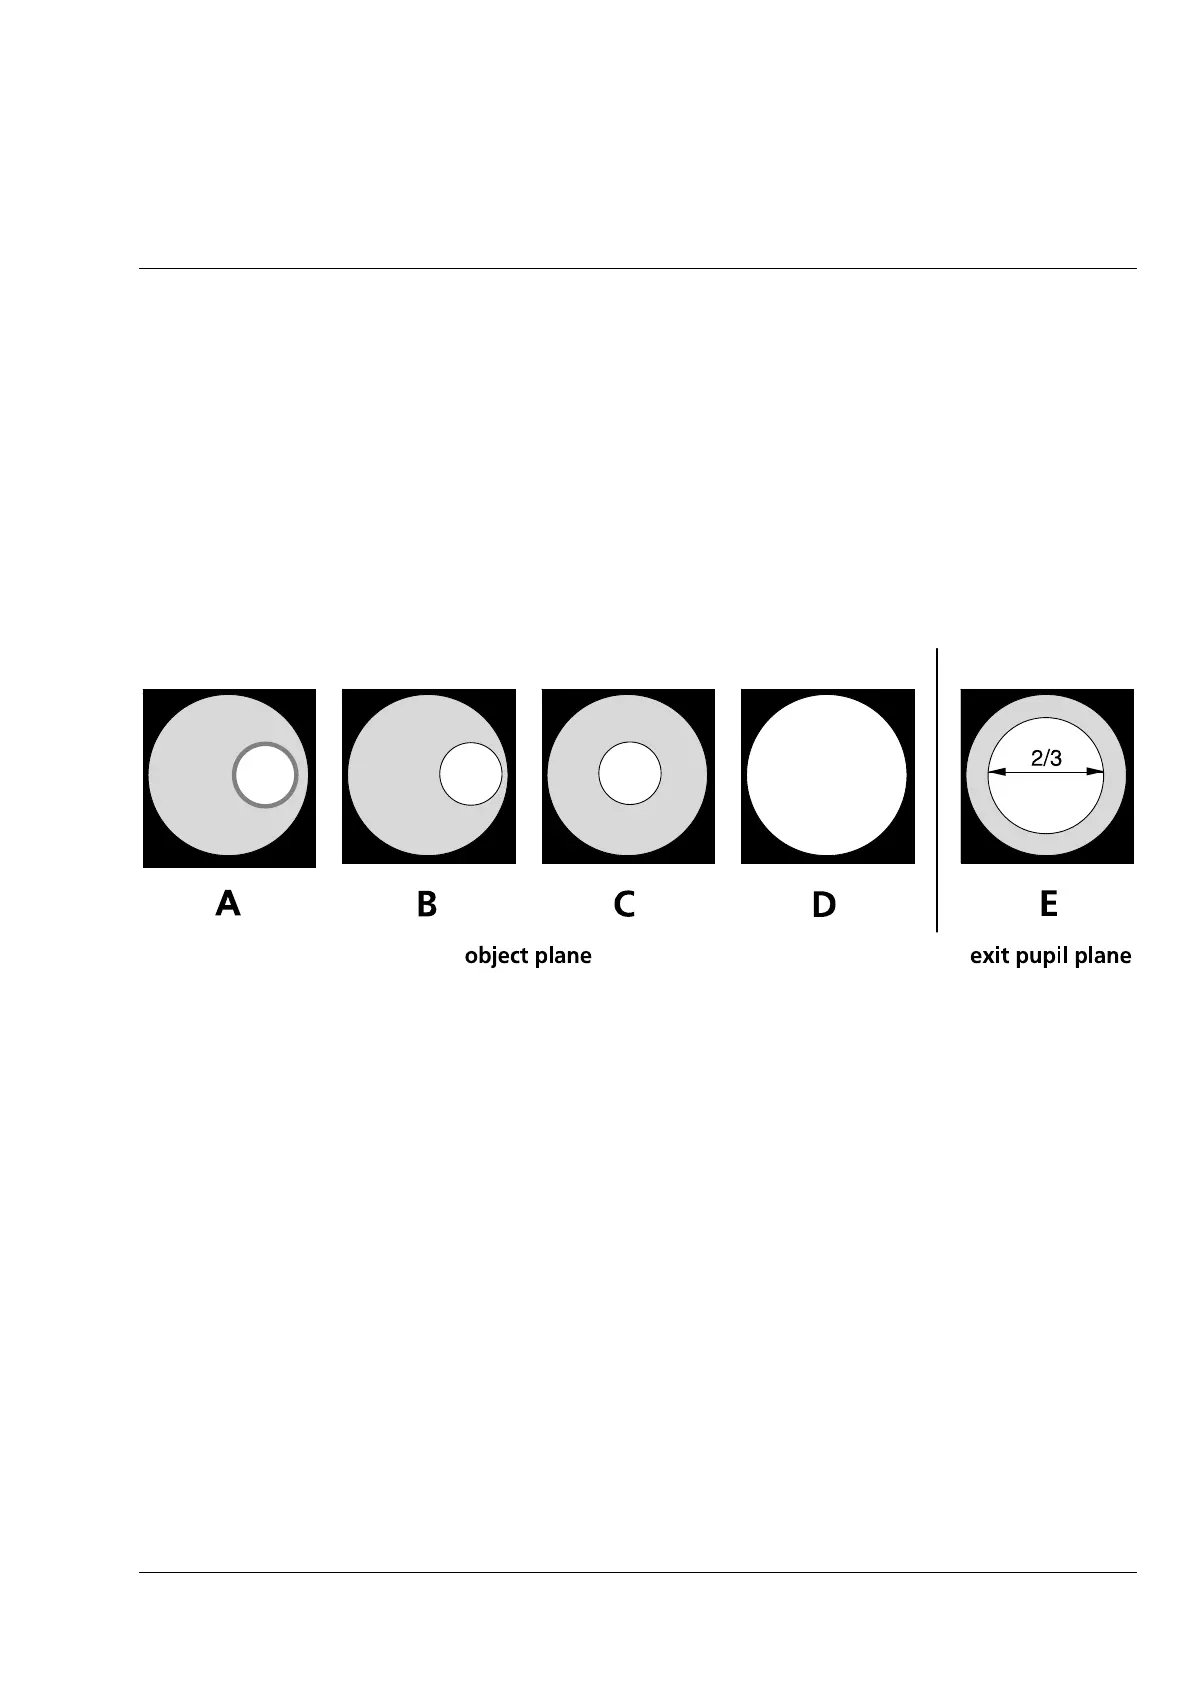
• Pull out the pushrod or adjust the setting wheel to set (reduce) the diameter of the luminous-field
diaphragm (3-7/1) until it is visible in the field of view (3-8/A).
• Use the coaxial focusing drive (3-7/4) to refocus on the edge of the luminous-field diaphragm (3-8/B)
and use screws (3-7/3) to center the luminous-field diaphragm in the edge of the field of view (3-8/C).
• Then open the luminous-field diaphragm (3-7/1) until it just disappears behind the edge of the field of
view (3-8/D).
• To set the aperture diaphragm (image contrast), remove one eyepiece from the tube and look into
the tube with your naked eye, or insert the centering telescope instead of the eyepiece.
• Center aperture diaphragm using centering screws ( 3-1/7), (3-2/7) or (3-3/7) and set pushrod (3-1/6),
(3-2/6), (3-3/9) or (3-7/2) to approx. 2/3 of the exit pupil diameter of the objective for specimens of
medium contrast ( 3-8/E). In most applications, this setting of the aperture diaphragm provides
optimum contrast at almost full resolution and is therefore the best compromise for the human eye.
• Finally, refocus on the specimen via the coaxial coarse and fine drive ( 3-7/4) and match the image
brightness to the reflected-light specimen.
☞
Since field size and objective aperture change after every objective change, the settings of the
luminous-field diaphragm and the aperture diaphragm described above must be repeated.
Do not use the aperture diaphragm for adjustment of the image brightness, but use
illuminance control (3-4/3) or the attenuation filter instead, as described under 2.9.1!
Fig. 3-8 Setting of diaphragm images according to KÖHLER
 Loading...