Index
025-9567E 135
INSTALLATION OF KEY SWITCH LABELS
Zetron provides a set of standard key switch labels with each unit. You can easily create and
print customized labels using any PC graphics or label-creation software. For best results,
create a label template that produces 13mm (0.51”) square labels. Zetron can provide a
template for you upon request.
Custom pre-printed key tops are also available; contact your Zetron sales representative for
ordering information.
To replace the labels:
Use a small flat blade screwdriver. Insert blade into the small notch on the side of the
key cap and turn clockwise.
Install the new label and replace the key cap.
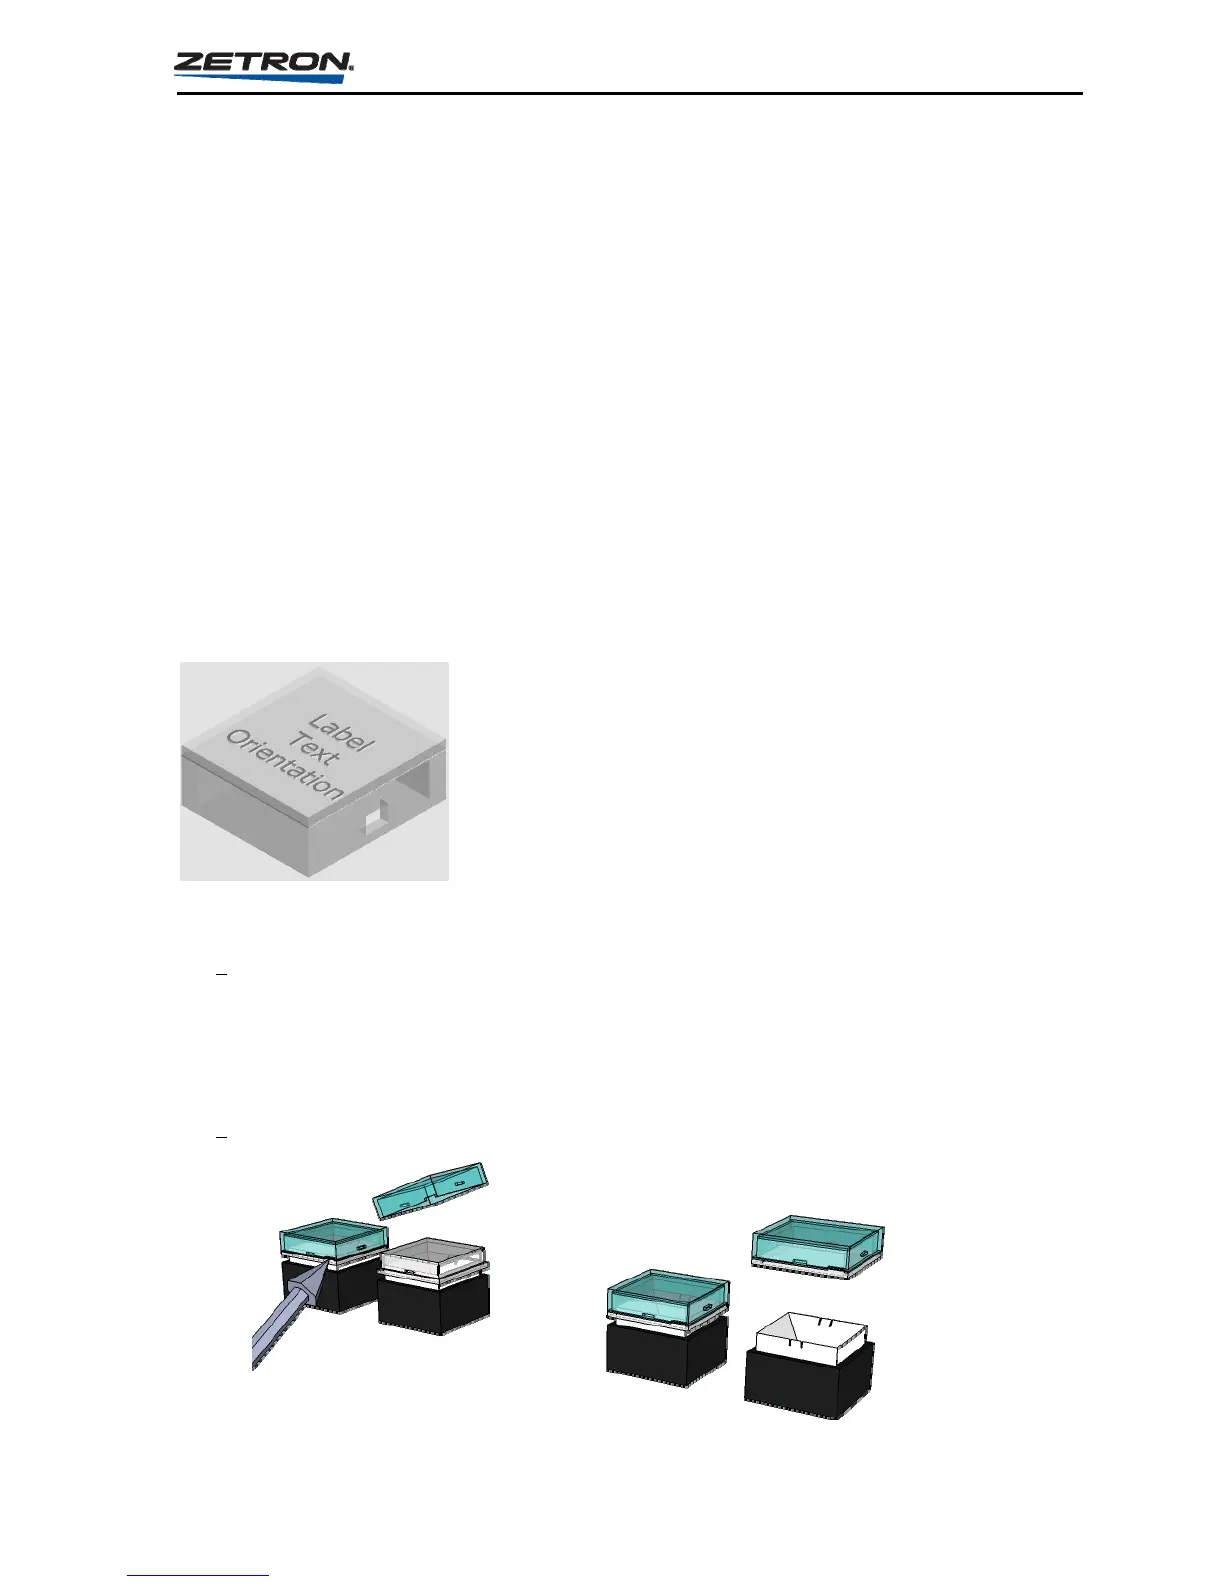
Note the orientation of the label inside the key cap before inserting. The label should be
oriented perpendicular to the two notches located on the side of the key cap.
To replace with pre-printed key top:
The key tops are accessible by removing the push-button key top from its plastic
plunger. Grasp the vertical edges of the key top with thumb and forefinger. Gently
pull the key top off using a rocking motion to release one side at a time. Pliers may be
used. Only the outer portion of the key should be grasped when removing to allow the
lower locking ribs to release.
Place the new key top onto the switch.