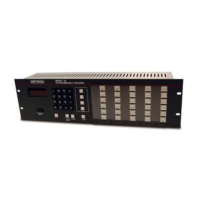
Encoder Installation
38 025-9567E
Table 7. Model 25 Jumper Functions
Function Jumpers Position Descriptions
Keypad enable/disable
(enabled for 901-9019,
disabled for 901-9022)
JP2
Encoder board
“A” = keyboard disabled
“B” = keyboard enabled
Display scroll enable/disable
(disabled)
JP1
Encoder board
“A” = display scroll enabled
“B” = display scroll disabled
Programming Enable/Disable
(enabled)
JP3 (switch)
Encoder board
“A” = disabled
“B” = enabled
Channel busy impedance
(low impedance)
JP7 & JP10
Encoder board
IN = low impedance
OUT = high impedance
Audio adjustment range
(range = -60 to -10 dBm)
R23(120k)
Encoder board
R23 IN = range covers -60 to -10 dBm
R23 OUT = range covers -60 to +7 dBm
Audio de/pre-emphasis
(de-emphasis)
C40 & C41
(.47UF), JP5
Encoder board
C40 & C41 OUT, JP5 in “A” : no emphasis
C40 & C41 OUT, JP5 in “B” : de-emphasis
C40 & C41 IN, JP5 in “A” : pre-emphasis
Internal Monitor Speaker
enable/disable (enabled)
JP6
Encoder board
“A” = speaker enabled
“B” = speaker disable (for external speaker)
Computer port connector
position (front 901-9019,
back 901-9022)
Computer port
connector
computer port on front panel
computer port on back panel
Instant call CLEAR key
function
(CLEAR key clears all LEDs)
JP3
Instant Call
Driver board
IN = CLEAR key clears all LEDs
OUT = CLEAR key clears selected LEDs
Instant call left column
function (left column
functions normally)
JP1
Instant Call
Driver board
“A” position : left key column functions
normally
“B” position : left key column selects panel
address
“C” position : left key column functions
normally
Programming Enable/Disable Switch
The altering of programmable parameters may either be enabled or disabled by the
Programming Enable/Disable switch on the encoder board (702-0312). The switch can be
accessed on the rear panel of the Model 25. The encoder will ignore any attempt to access
any programming mode from the keypad when the switch is in the disabled position. The
encoder will operate properly with the switch in either position. Setting the switch to the
disable position after programming is complete will help protect the encoder memory from
possible electrical disruption as well as inadvertent programming.
All programming modes are accessible through the serial port regardless of the position of
the switch. An “
Error 9” message will occur if the programming is attempted while the
programming switch is in the disabled position.