GET STARTED / CALIBRATION
21
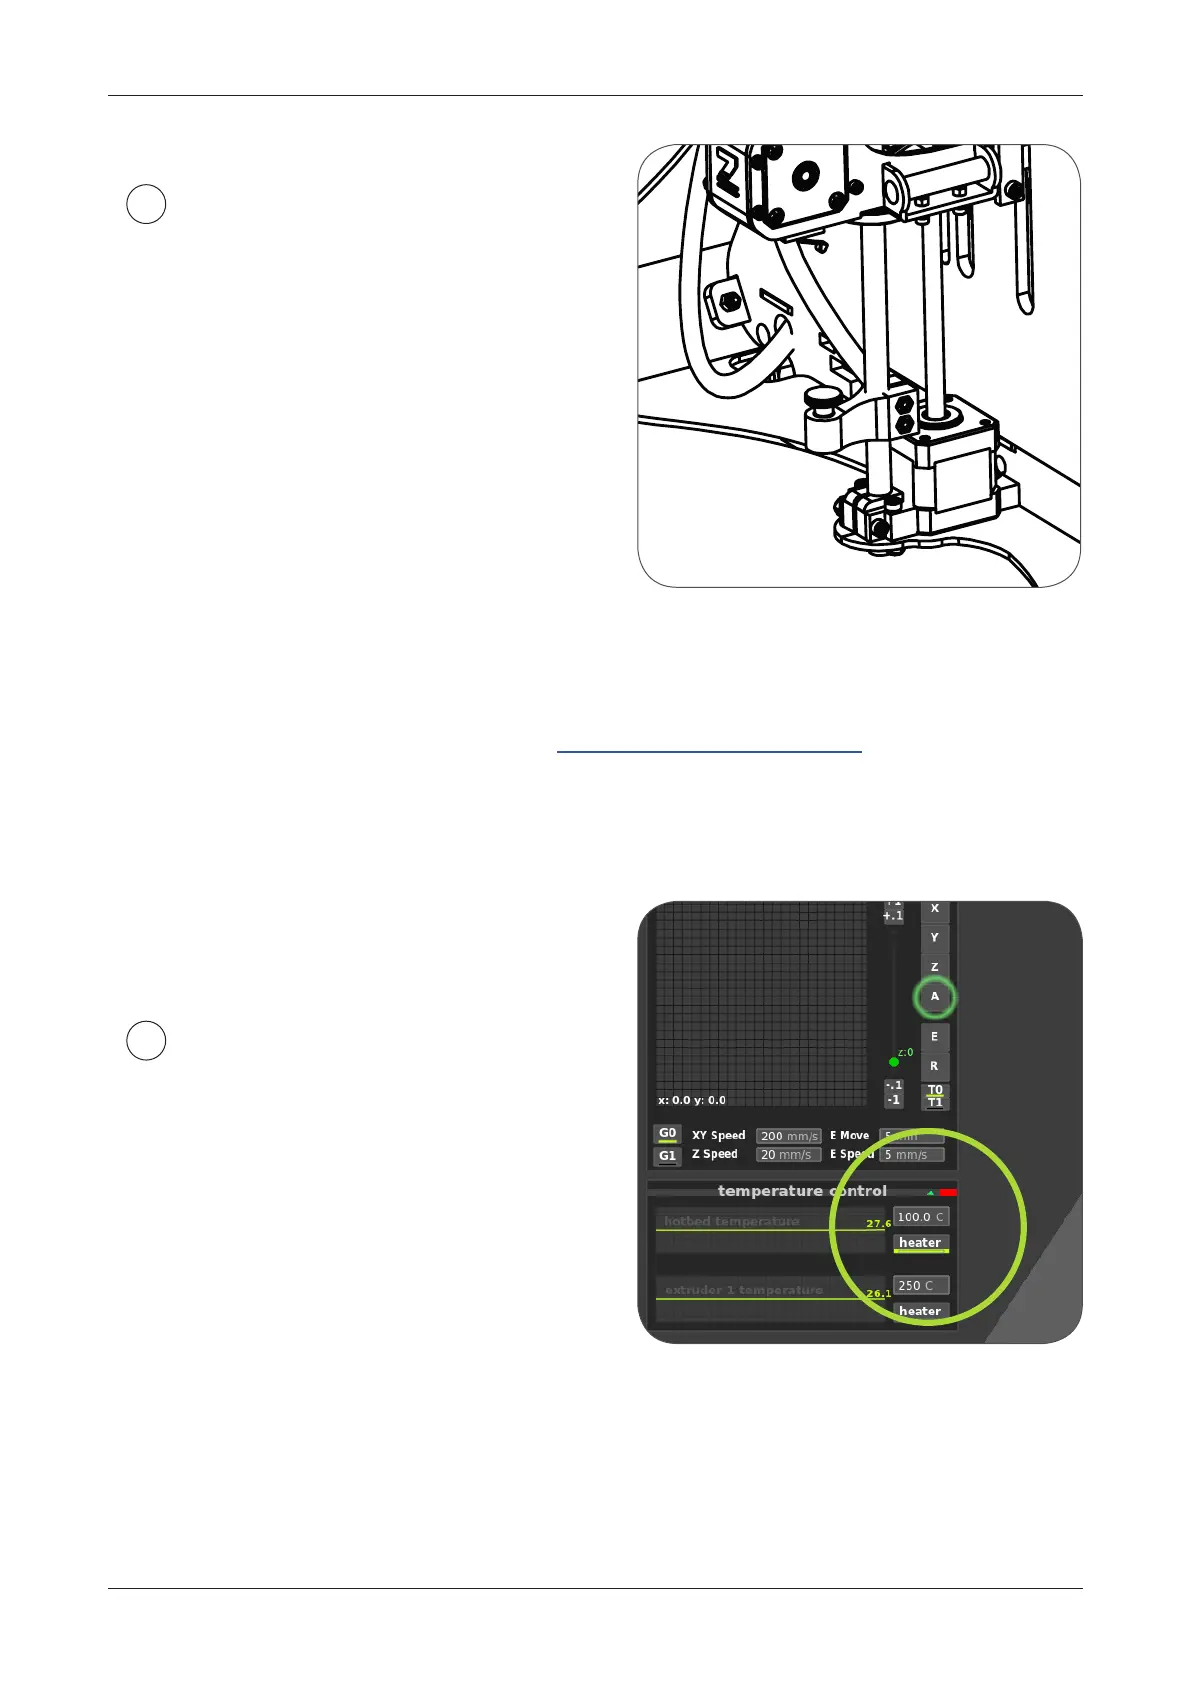
If the nozzle touches work surfa-
ce and pushes it down too much,
it means that it’s too low. In such case,
you have to move the Z endstop up.
It is positioned on le smooth rod,
under the tactile switch and X motor.
Simply turn it anti-clockwise (looking
from the top) and it will move up
a little.
3
To heat everything up
choose on the ZMorph panel:
Filament Menu >> Preheat [ABS/PLA]
Or click ‘heater’ in Voxelizer. White LEDs
on the toolhead should light up, marking
that the heating process is started.
Make sure to use correct temperatures,
according with your material specs.
4
Regulating the endstop might have to be repeated a few times, until the nozzle
barely touches the bed. It is commonly accepted, that distance between
the nozzle and the bed should be slightly less that thickness of a sheet of paper.
To see a video tutorial about that click here: https://vimeo.com/118746466
Calibration should be run with a hot machine - as elements change dimensions
with temperature.
!