MAINTENANCE AND FUNCTION / CNC MILLING
63
2
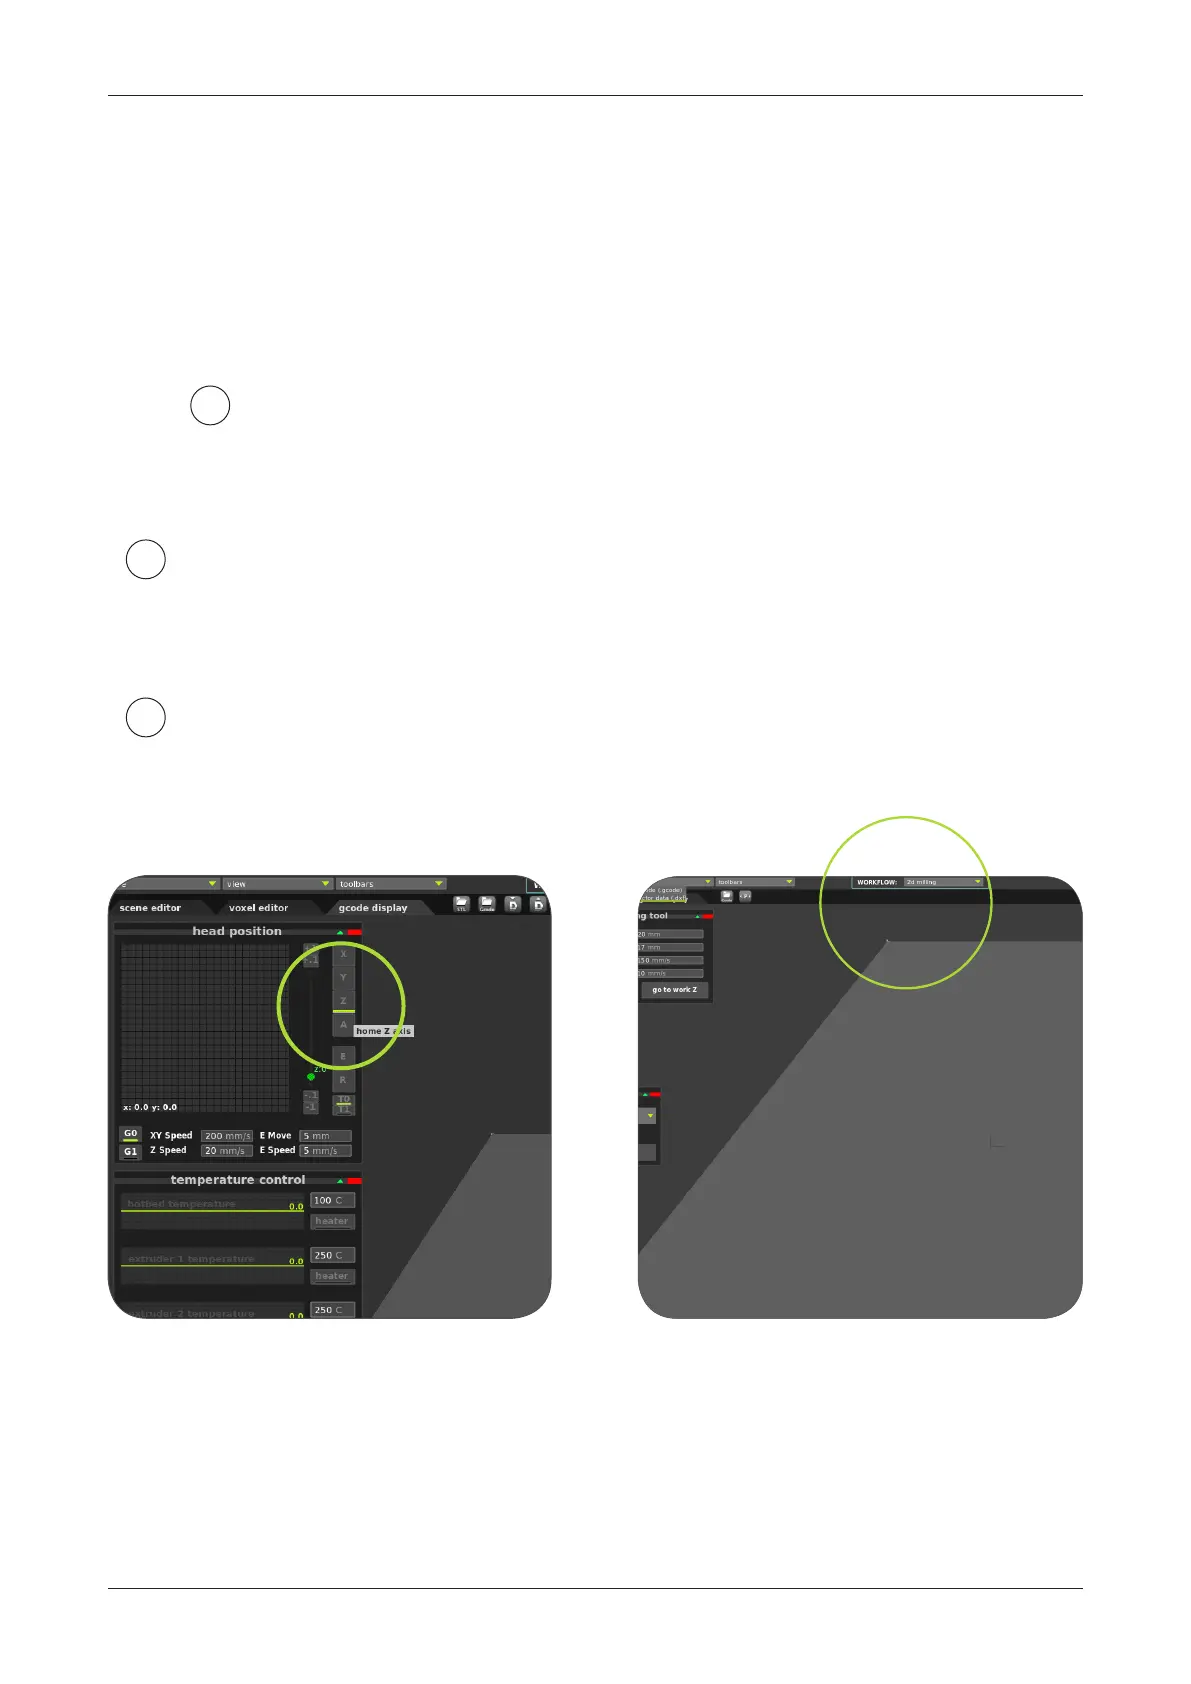
Then lower the tool carefully using buttons in "printer head set" window.
Button "-1" decrease head height by 1 milimeter, button "-.1" by 0.1 milimeter.
Buttons "+1" and "+.1" increase head hight.
PREPARING THE DREMEL TOOL
Normally printer is calibrated to use plastic extruder.
If you want to use other device you should keep in mind that its end probably will be
at dierent height creating the possibility of collision with bed.
Be careful!
To install device move head to central area of machine, and increase it’s height
to provide enough space. Mount the device to the head and place material on bed.
!
1
When head will touches the material read it's Z position and set it (or slightly
lower value. If you want to perform deeper milling) in "milling tool" window in "set
work base Z" text eld.
3