Copyright 1010music LLC 2020
Page 13 of 88
Bitbox Micro User Manual 1.0.7
Copyright 1010music LLC 2020
Page 13 of 88
Bitbox Micro User Manual 1.0.7
PADS OVERVIEW
Pads are the onscreen cells that are used to load WAV les into Presets and to trigger
them. In this section, we will give an overview of the primary screens used when
working with Pads and how to navigate between them. In the next section, we will walk
through settings and tasks for all pads, followed by settings and tasks specic to each
pad mode. Finally, we will discuss how to record single WAV les and automate the
recording of a multi-sample bank.
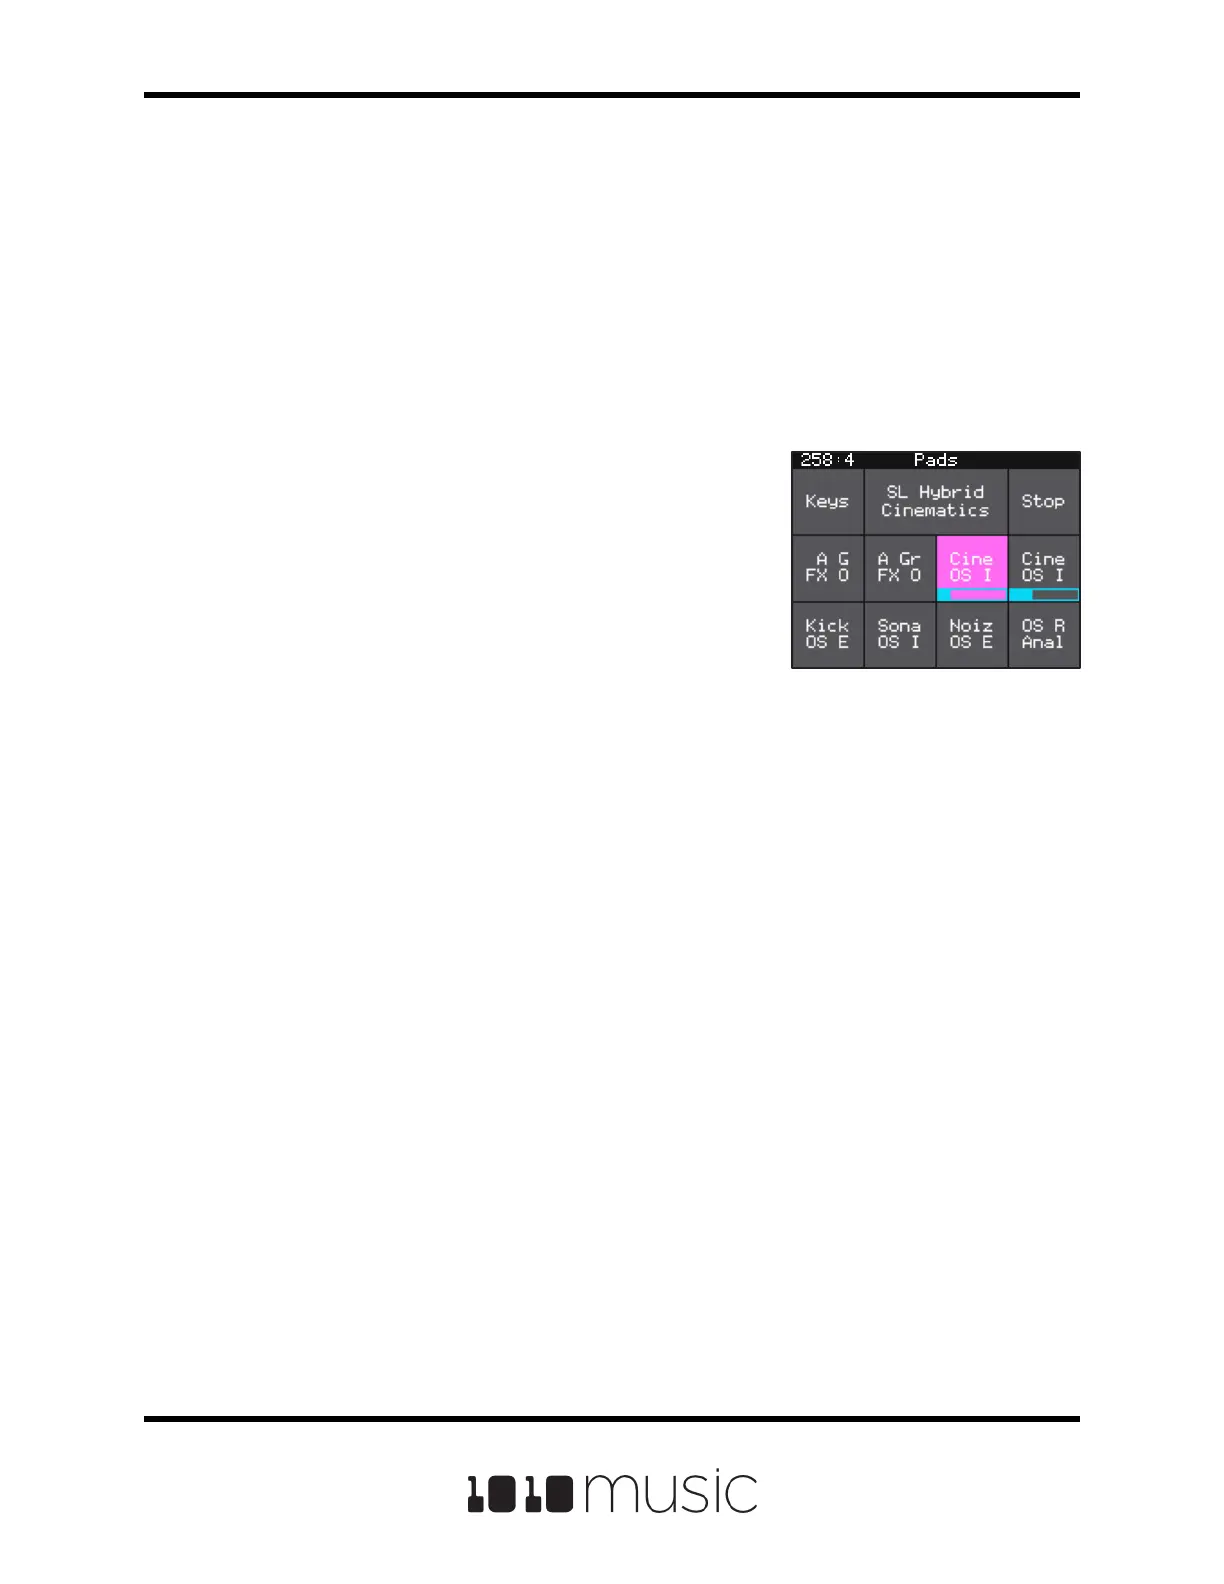
The Pads Screen
When you rst turn on bitbox micro, the Pads screen is
displayed. If you move away from this screen, you can
get back here by pushing the white HOME button at the
top of the module.
The 8 squares in the bottom two rows of the screen are
the pads. Each pad displays an abbreviated name of the
WAV le or folder mapped to the pad. Each pad can be
mapped to one WAV le or a bank of WAV les. Touch a
pad to trigger it. This will also select it, as indicated by the
pink background. You can also use the knobs to select a
pad without triggering it. Depending on how the pad is
Pads Screen
congured, a triggered sample might play all the way through each time you press it, it
might play only while you are touching the pad, or it might play until you touch it again. A
blue progress bar appears at the bottom of the pad while it is playing. You can trigger
multiple pads at once. Push the Stop button in the top right corner of the screen to halt
playback of WAV les. A white bar at the bottom of a pad indicates the pad is ready to
start at the next quantization break.
The black bar along the top of the screen displays the playback clock and the current
screen name. The number pair on the left displays the overall playback time in
measures and beats.
The Keys button in the top left displays an onscreen keyboard where you can play the
notes by pitch shifting the currently selected pad. The text between the Keys and Stop
buttons is the name of the currently selected preset. Touch this to go to the Preset
Management screen where you can save, load and create new presets.
 Loading...