Page 38 of 88
Copyright 1010music LLC 2020
Bitbox Micro User Manual 1.0.7
To Connect an Audio Input for Sampling:
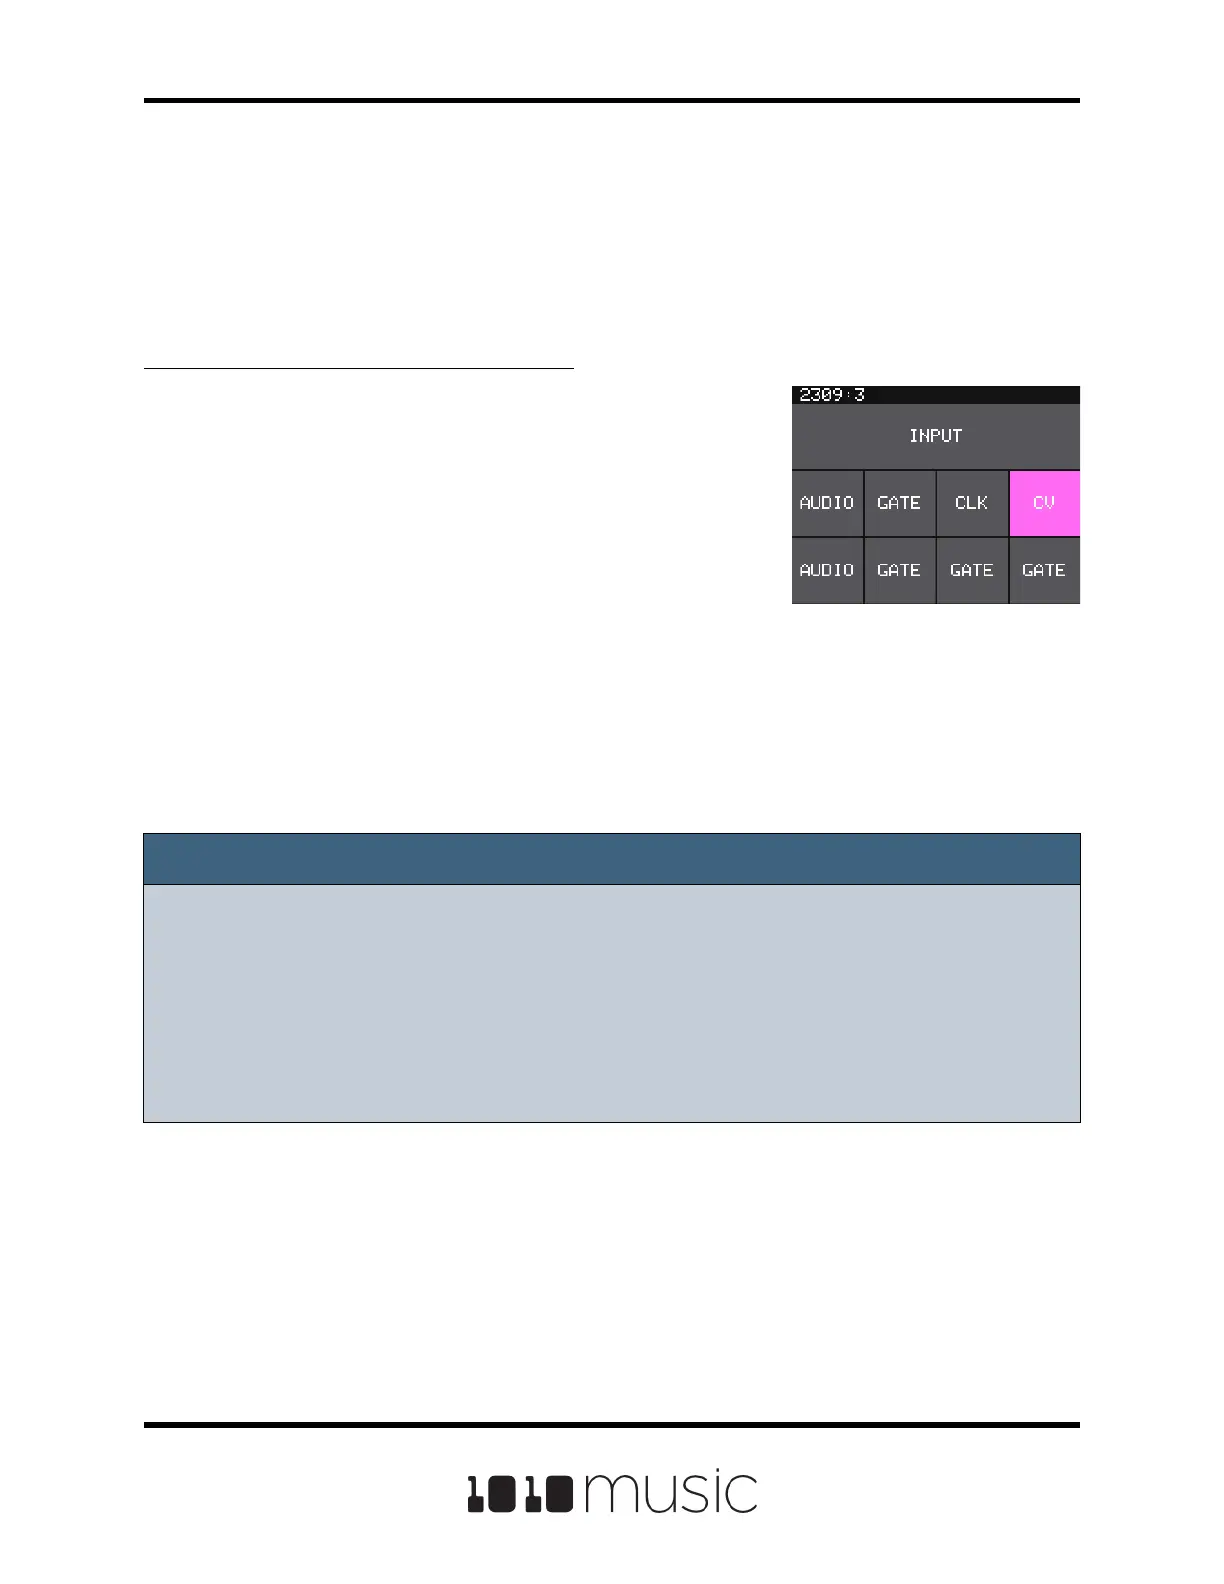
1. Push TOOLS twice to display the Input screen.
This screen displays a 2 x 4 grid that
represents the 8 input jacks on the module.
2. Touch the top left square that corresponds to
input jack 1 to select it.
3. Turn the bottom knob to change the setting for
this input to AUDIO.
4. Touch the bottom left square that corresponds
to input jack 2 to select it.
5. Turn the bottom knob to change the setting for
this input to AUDIO.
6. Connect an audio signal to input jacks 1 and 2.
Input Screen
Record a New WAV File
Bitbox micro comes with over 800 WAV les loaded on the microSD card. You can also
record new WAV les to create your own custom sound.
Before you can record, you have to set up bitbox micro to receive the audio signal.
Note:
► Bitbox micro assumes Eurorack level audio is coming in to the AUDIO IN jack at
+/-5V. If you are using a line level signal of +/- 1V you may need to adjust the
input gain on the recording screen. You could also use a mixer or preamp with
your microphone or other input to adjust the level of the incoming signal.
► If you are not recording in stereo, you only need to congure and connect to one
input jack.
 Loading...