Copyright © 2022 Nortek Security & Control LLC
29
If you selected a Sensor Type other than those listed above, skip this step.
1. Highlight Sensor Equipment Type.
2. Choose Contact, Emergency or Motion. Available options vary, depending on the selected Sensor Type.
3. Tap to move to the next option.
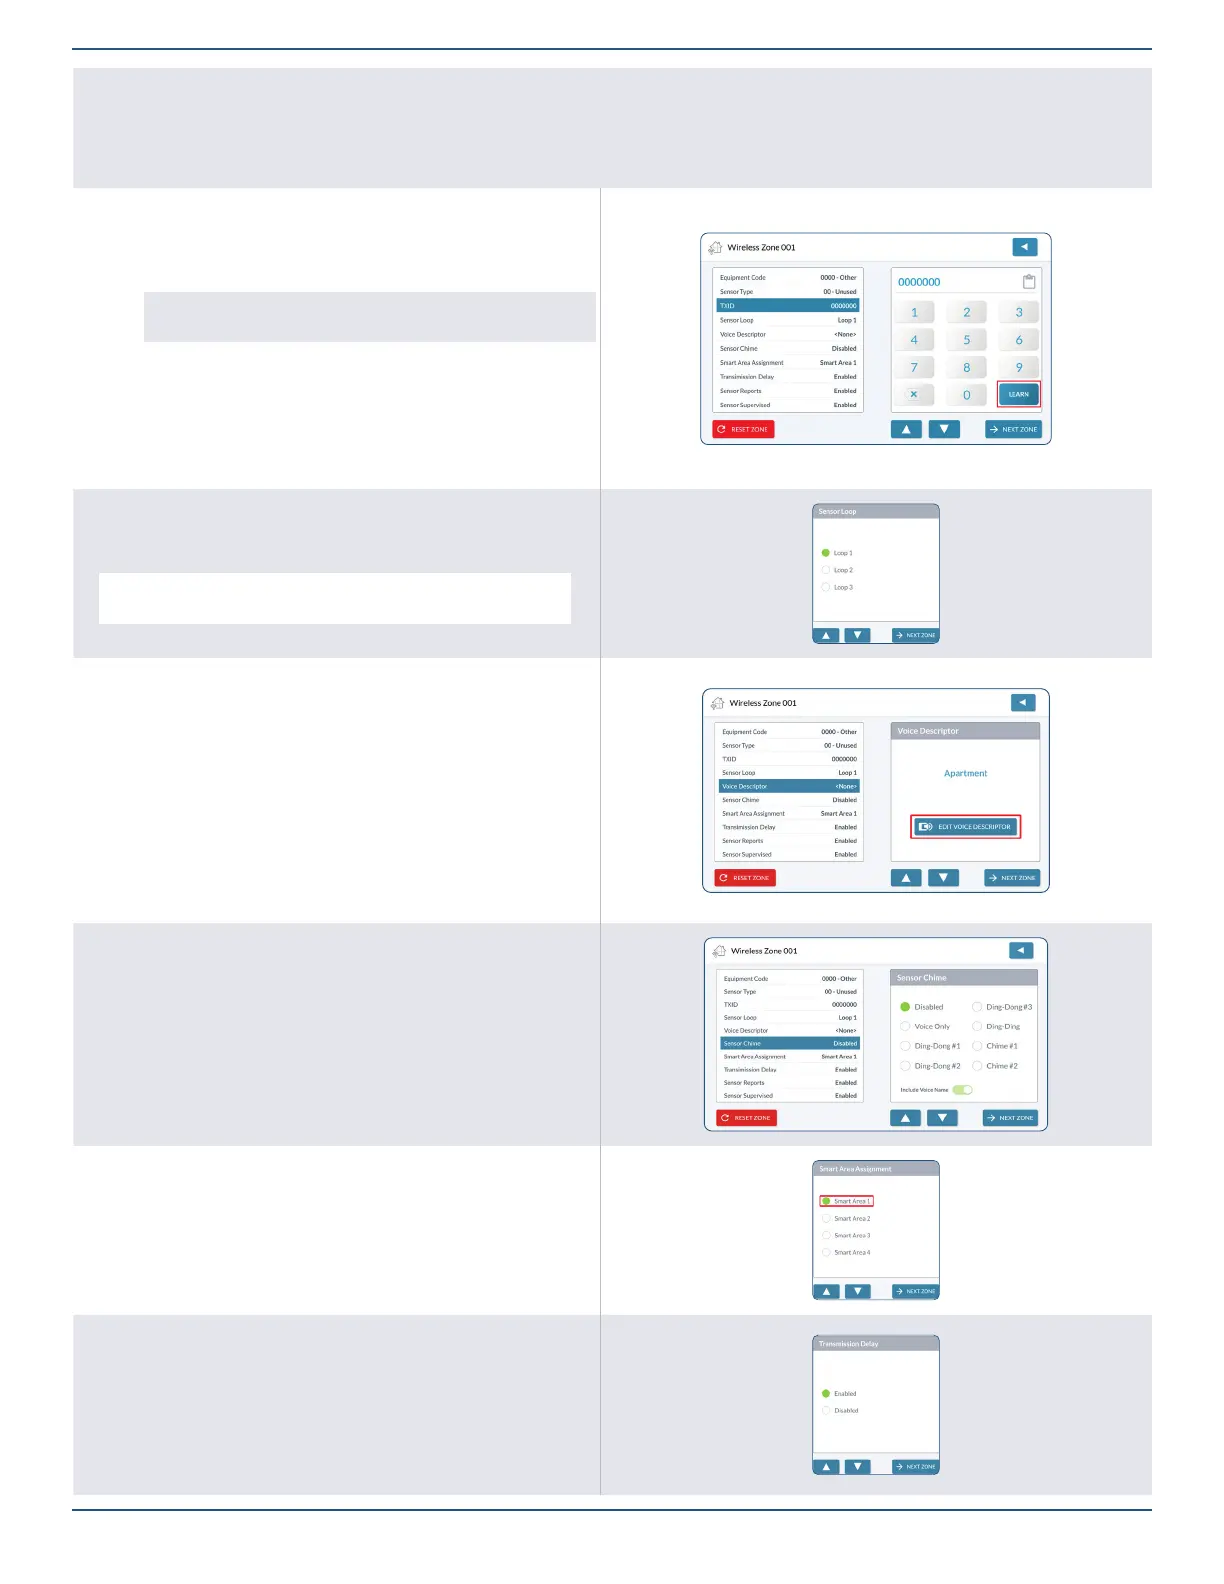
Enter TXID
1. Tap TXID.
2. Tap Learn to enter Learning Mode. This panel listens for the 7-digit TX
ID transmission from the sensor or peripheral.
TIP: Along with Learning Mode, you also have the option to
manually enter the 7-digit TX ID using the keypad.
3. Trigger the sensor or peripheral (see the product’s Installation
Instructions). When the 7-digit TX ID is received, Sensor Received
appears.
4. Verify that the 7-digit TX ID on product and touchscreen match, then tap
Accept.
5. Tap to move to the next option.
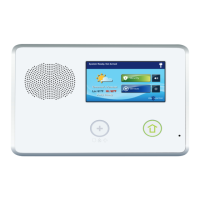
Sensor Loop
1. Highlight Sensor Loop.
2. Choose Loop 1, Loop 2, or Loop 3.
NOTE: To determine the appropriate loop number, see the
Installation Instructions included with the sensor or peripheral.
3. Tap to move to the next option.
Voice Descriptor
Create a voice descriptor for the sensor or peripheral.
1. Highlight Voice Descriptor.
2. Tap Edit Voice Descriptor to reveal the keypad.
3. Enter the rst few letters of the desired word.
4. Tap the matching word.
5. Repeat the steps above to enter the desired phrase.
6. Tap Done.
7. Review the voice descriptor.
8. Tap to move to the next option.
Sensor Chime
1. Highlight Sensor Chime.
2. Choose the desired chime from the list. The default setting is Disabled.
Smart Areas Assignment
1. Highlight Smart Areas Assignment.
2. Under Smart Areas Assignment, choose a Smart Area (Partition) for the
zone.
3. Tap to move to the next option.
Transmission Delay
1. Highlight Transmission Delay.
2. Select Enabled or Disabled.
3. Tap to move to the next option.