Pannoramic MIDI 1.18 User’s Guide 3 Operating Slides and Trays
Caution!
Incorrect slide insertion may break the glass. Always make sure that
slides are correctly inserted in the tray. The edge of the broken area of
the slide is sharp and its removal can lead to injury and contagion!
Broken slide can be removed only by a well-trained person!
Only original 3DHISTECH trays are allowed for use with Pannoramic
MIDI!
Note:
The coverslip and the label area should be on the top.
To insert and remove trays
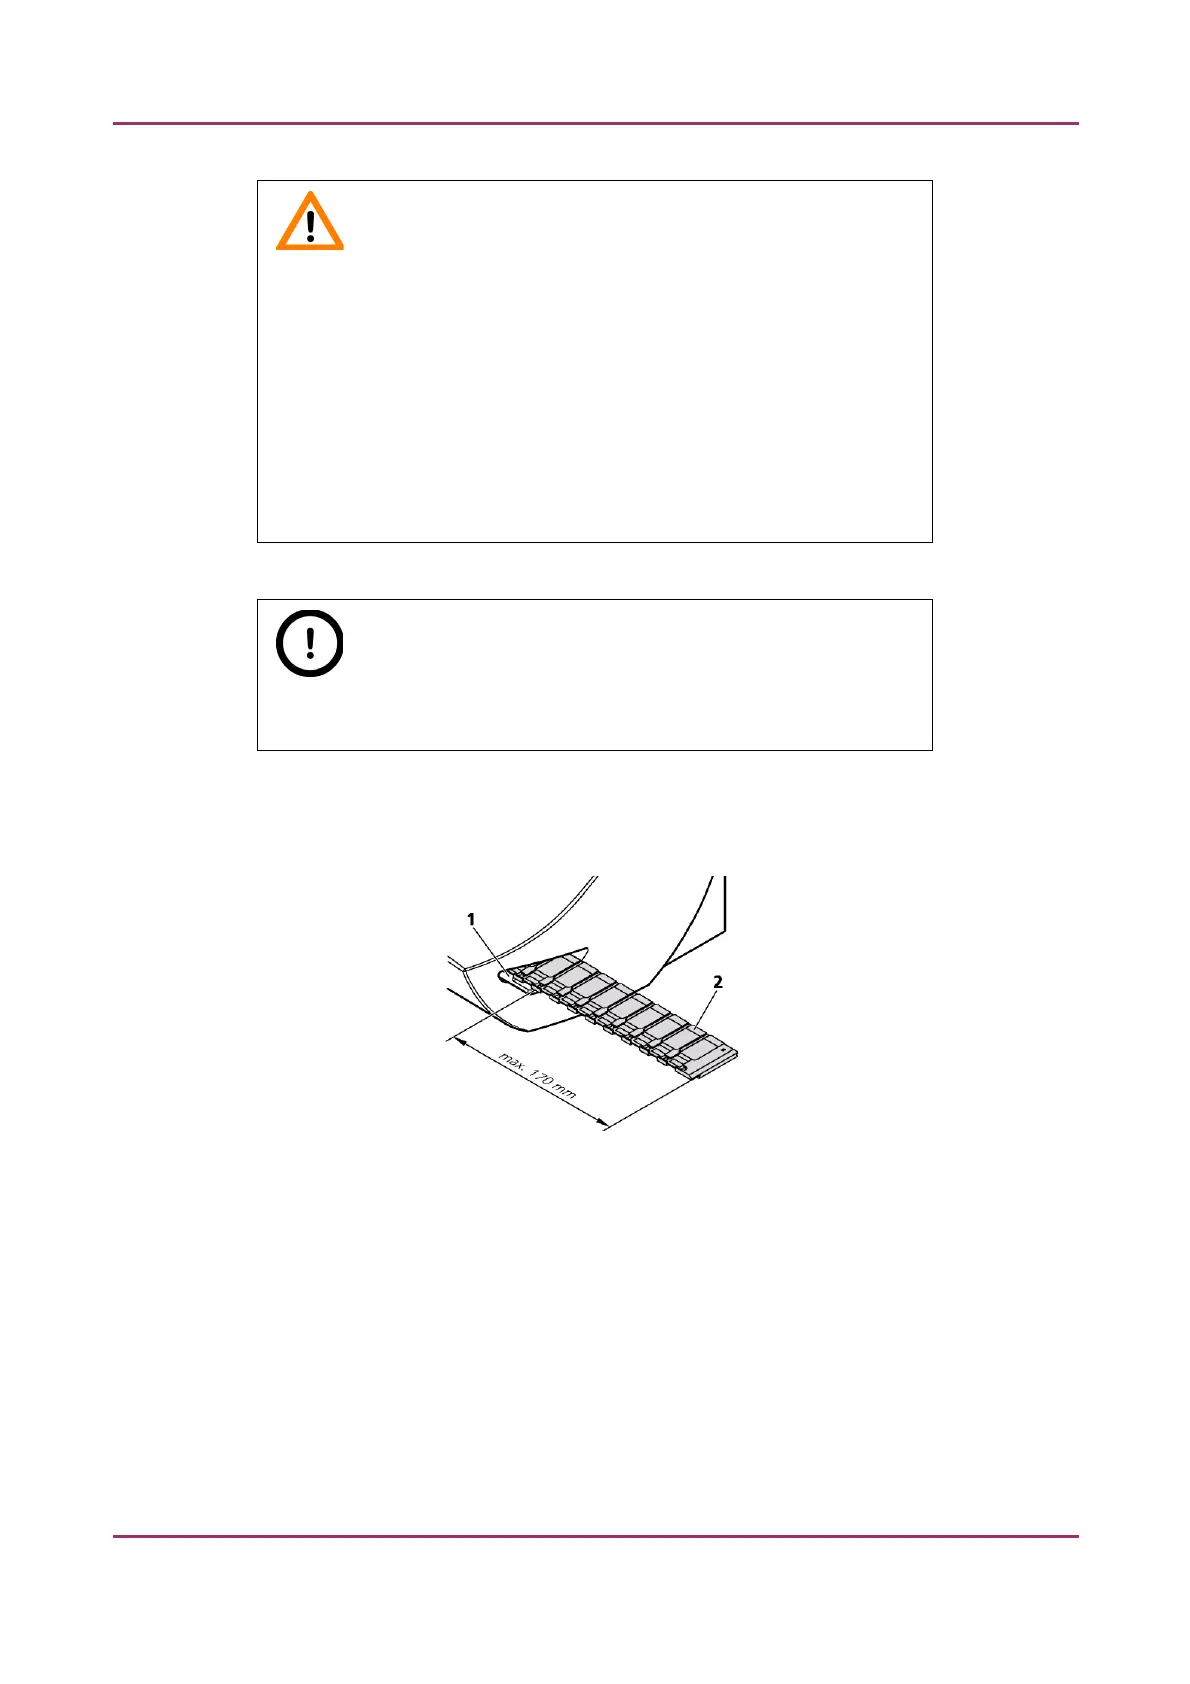
Figure 8 – Inserting the tray
1. Insert the tray (2) that contains at least one slide into the opening (1) on the right side of
the device. Push it until it cannot be pushed further.
2. After digitizing slides, the tray is moved to the output position where it can be removed.
April 3, 2014 - Rev 1 3DHISTECH Ltd. 28(127)