Mechanical installation
Contents of this chapter
The chapter tells you how to examine the installation site, unpack, check the delivery and
install the drive mechanically.
Installation alternatives
You can install the drive:
• With screws on to a wall
• With screws on to an assembly plate
• On to a DIN installation rail [Top Hat, W x H = 35 x 7.5 mm (1.4 x 0.3 in)].
Installation requirements:
• The drive has an IP20 (UL open type) protection classification for cabinet installation.
UL type 1 kit is available as an option.
• Make sure that there is a minimum of 75 mm (2.95 in) of free space at the top and
bottom of the drive (at the cooling air inlet and outlet).
• You can install several drives side by side. Note that side-mounted options require
20 mm (0.8 in) of space on the right side of the drive.
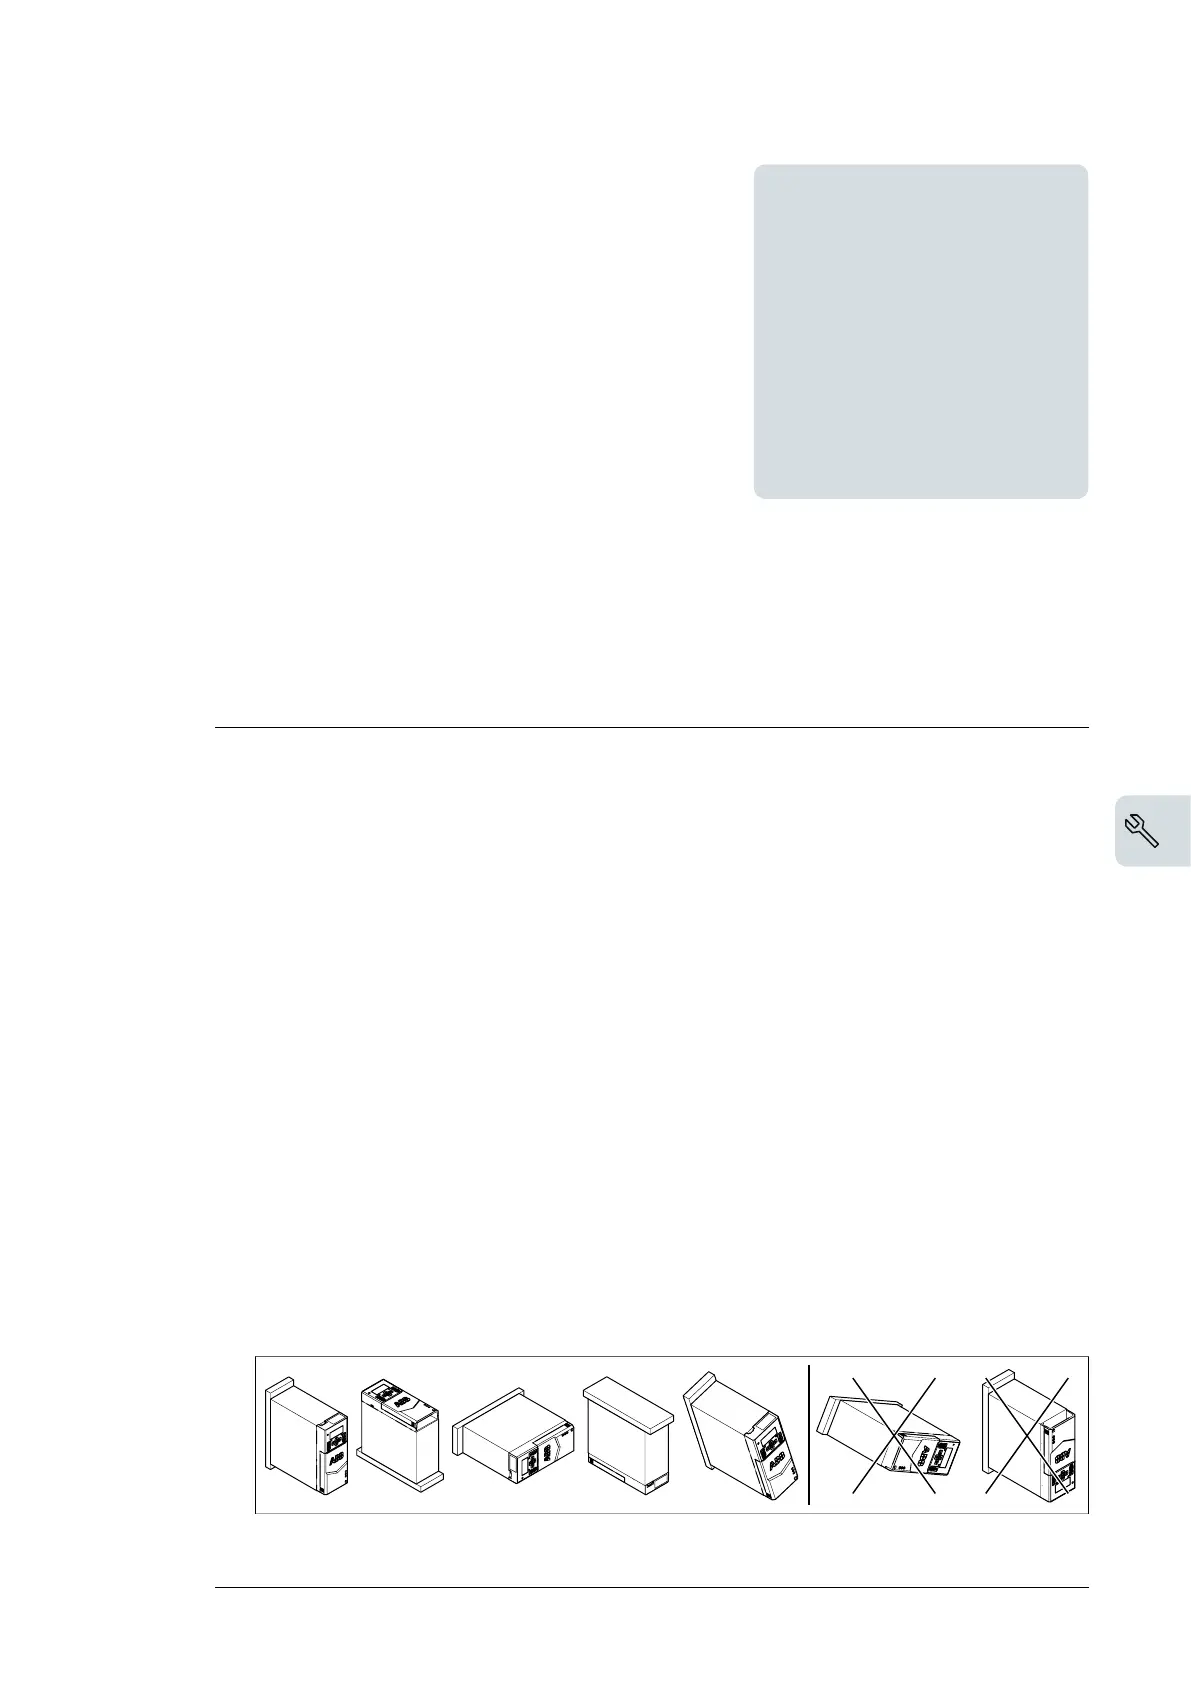
• You can install frames R1, R2, R3 and R4 tilted by up to 90 degrees from vertical to
fully horizontal orientation.
4
Mechanical installation 35

 Loading...