!"##"$"%"&%
Page ;)of (()
Fix the template with adhesive tape
3. Check the holes in order to obtain
4. Mark the fixing holes of
ark the holes for the electric
()
;<81=85>?2+
6. Drill the fixing holes
7. Remove the template DE
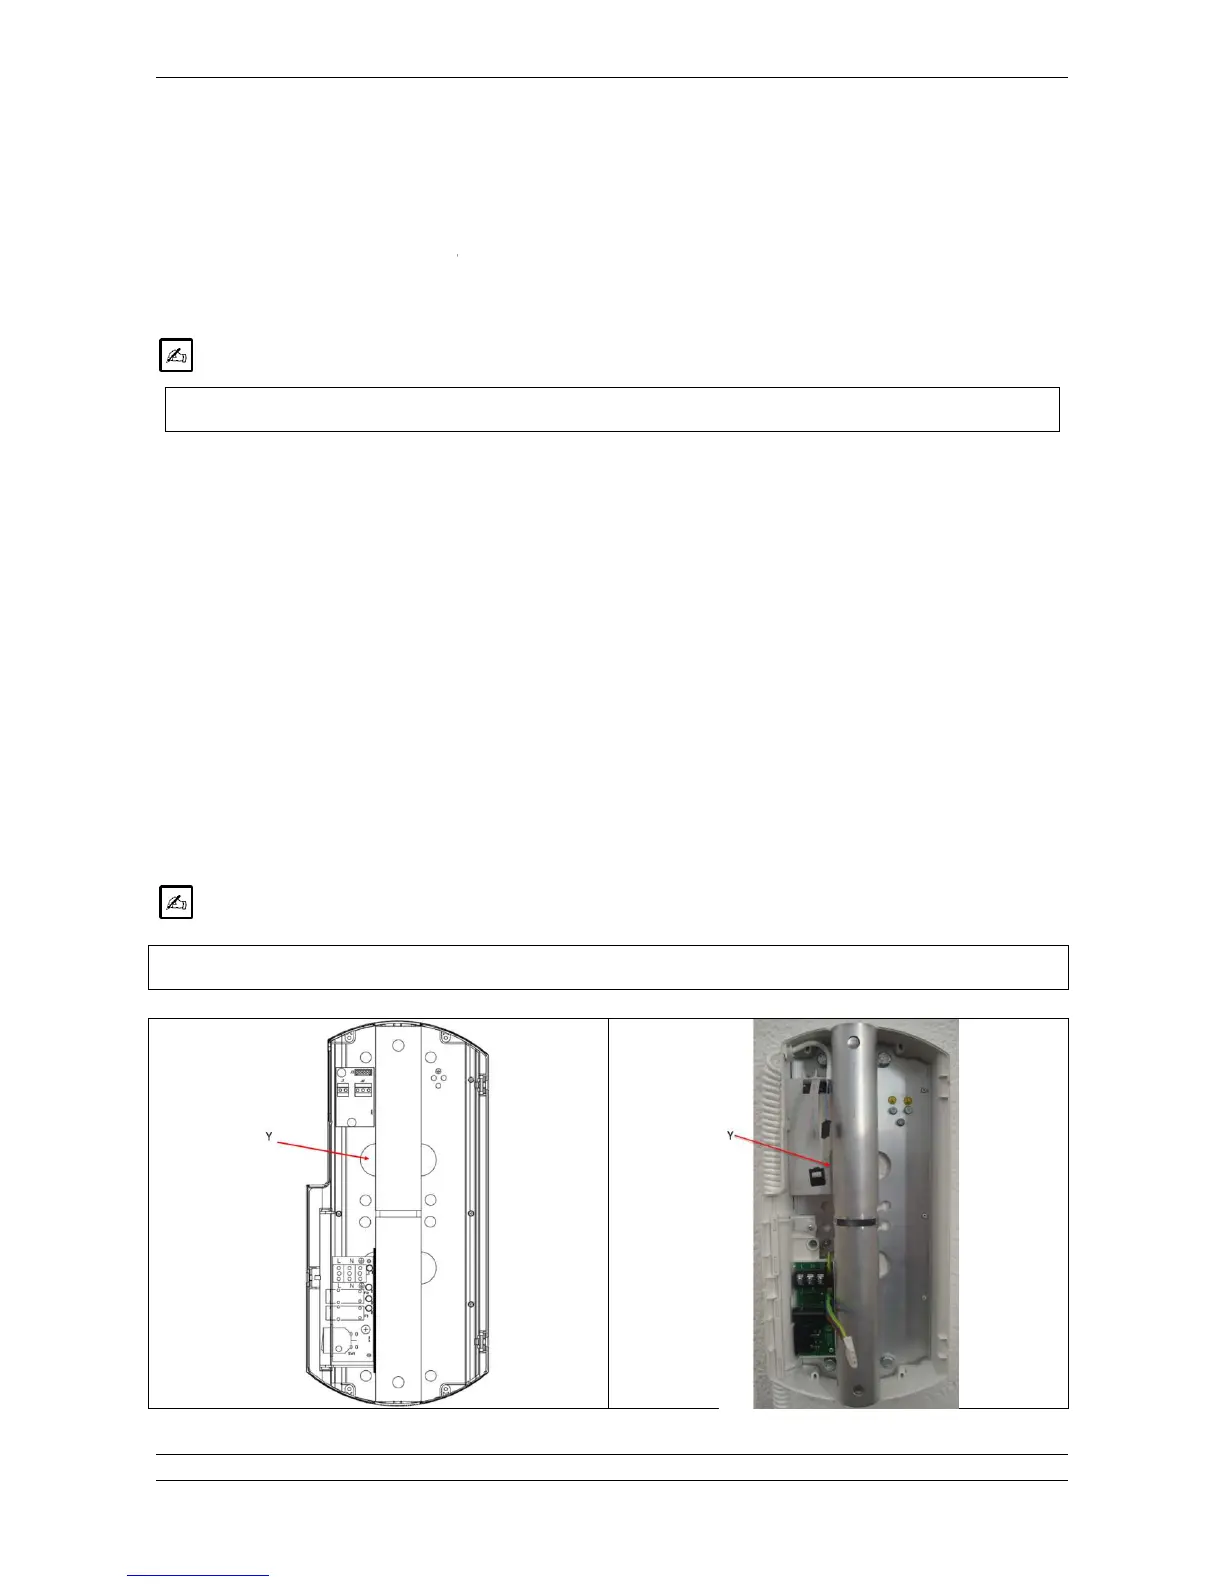
8. Insert the timer back cover DE
10. Hold the assembly D(E
11. Make sure that supply mains
passing through the right hole. DE
12. Check that the
. 3% 1"## ! $ -%0.%&#
and alignment with the floor, using a pl
mains, optional exposure key or ext
*
sert the suitable anchor screws
, according to the wall char
DE using centering pins.
ll in correspondence of the holes.
with the relevant washers, then tigh
, remote exposure key (X
MIND unity ECB) and external
D(E is steadily fixed to the wall.
" !"8#% !3* 8%1%% 3% 1"## "/ 3% 1"## -#"%
+(*
light (XMIND unity light) are
"% $ -0%2% " -$!!8#%